Dewalt DC608B Instruction Manual - Page 7
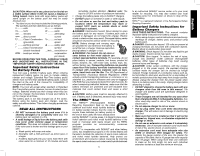
Preparing the tool, Installing and Removing the, Battery Pack, COMPONENTS, OPERATION, Mode Selection - cordless nailer
 |
View all Dewalt DC608B manuals
Add to My Manuals
Save this manual to your list of manuals |
Page 7 highlights
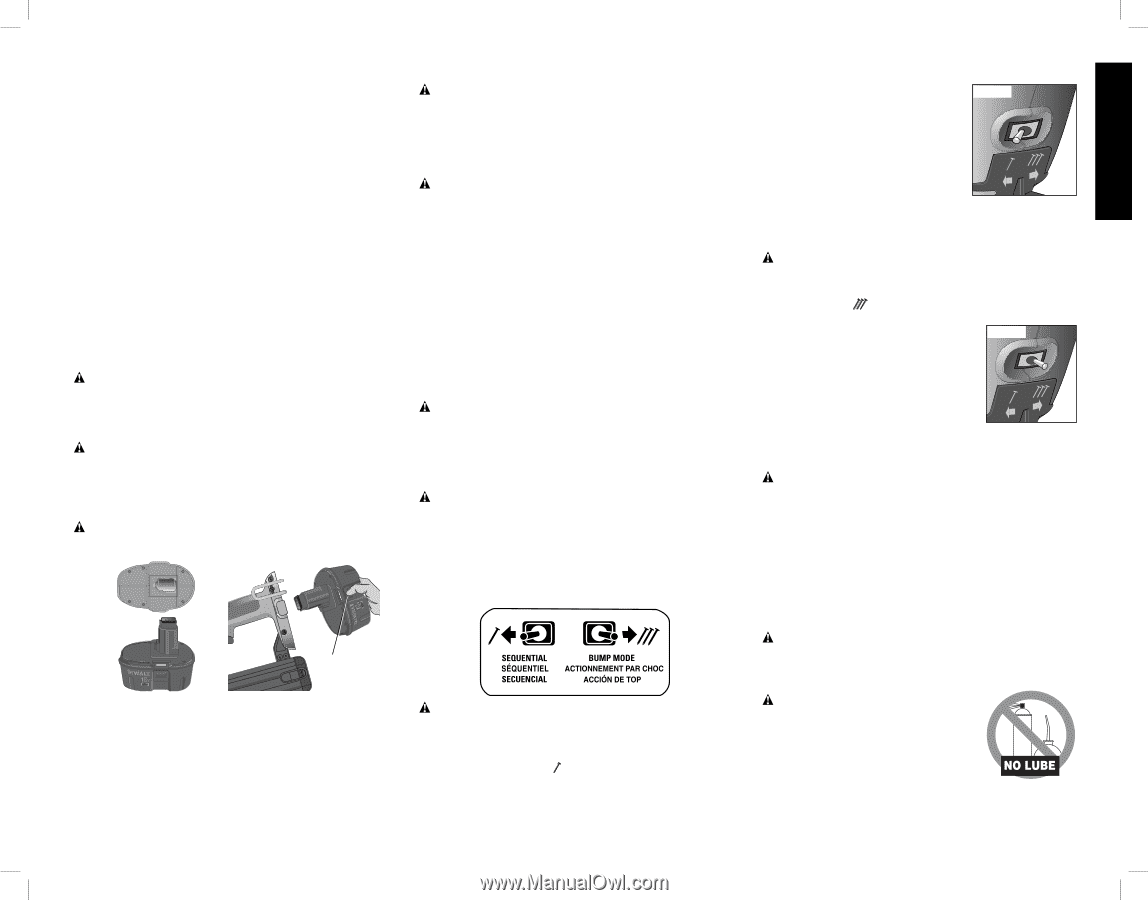
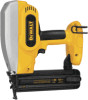
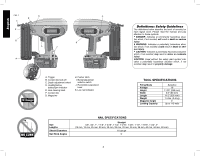
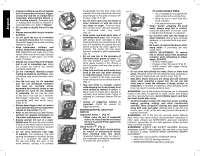
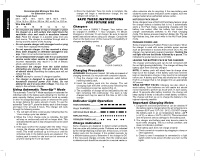
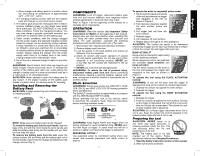
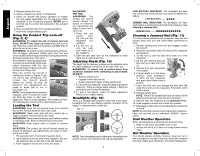
c. Move charger and battery pack to a location where the surrounding air temperature is approximately 65°F - 75°F (18° - 24°C). d. If charging problems persist, take the tool, battery pack and charger to your local service center. 4. The battery pack should be recharged when it fails to produce sufficient power on jobs which were easily done previously. DO NOT CONTINUE to use under these conditions. Follow the charging procedure. You may also charge a partially used pack whenever you desire with no adverse affect on the battery pack. 5. Under certain conditions, with the charger plugged into the power supply, the exposed charging contacts inside the charger can be shorted by foreign material. Foreign materials of a conductive nature such as, but not limited to, steel wool, aluminum foil, or any buildup of metallic particles should be kept away from charger cavities. Always unplug the charger from the power supply when there is no battery pack in the cavity. Unplug charger before attempting to clean. 6. Do not freeze or immerse charger in water or any other liquid. WARNING: Shock hazard. Don't allow any liquid to get inside charger. Electric shock may result. To facilitate the cooling of the battery pack after use, avoid placing the charger or battery pack in a warm environment such as in a metal shed, or an uninsulated trailer. CAUTION: Never attempt to open the battery pack for any reason. If the plastic housing of the battery pack breaks or cracks, return to a service center for recycling. Installing and Removing the Battery Pack CAUTION: Engage contact trip lock-off before removing or installing battery. FIG. 3 FIG. 4 M NOTE: Make sure your battery pack is fully charged. To install the battery pack into the tool handle, align the base of the tool with the notch inside the tool's handle and slide the battery pack firmly into the handle until you hear the lock snap into place. To remove the battery pack from the tool, press the release buttons (M) and firmly pull the battery pack out of the tool handle. Insert it into the charger as described in the charger manual (Fig. 4). COMPONENTS WARNING: Lock off trigger, disconnect battery pack from tool and remove fasteners from magazine before making adjustments or personal injury may result. Refer to Figure 1 at the beginning of this manual for a complete list of components. OPERATION WARNING: Read the section titled Important Safety Instructions for Nailers at the beginning of this manual. Always wear eye and ear protection when operating this tool. Keep the nailer pointed away from yourself and others. For safe operation, complete the following procedures and checks before each use of the nailer. 1. Wear proper eye, hearing and respiratory protection. 2. Remove battery pack from tool. 3. Lock the pusher in the back position and remove all fasteners from the magazine. 4. Check for smooth and proper operation of contact trip and pusher assemblies. Do not use tool if either assembly is not functioning properly. NEVER use a tool that has the contact trip restrained in the up position. 5. NEVER use a tool that has damaged parts. WARNING: To reduce the risk of personal injury, disconnect battery pack from tool before performing maintenance, clearing a jammed fastener, leaving work area, moving tool to another location or handing the tool to another person. Mode Selection WARNING: Always wear proper eye [ANSI Z87.1 (CAN/ CSA Z94.3)] and ANSI S12.6 (S3.19) hearing protection when operating tool. The DEWALT cordless nailers are assembled in accordance with the ANSI Standard SNT-101-2002. Before operating this tool, look at the selector switch to determine the actuation mode. Read all instructions before selecting actuation mode. WARNING: Keep fingers AWAY from trigger when not driving fasteners to avoid accidental firing. NEVER carry tool with finger on trigger. In bump mode tool will fire a fastener if safety is bumped while trigger is depressed. SEQUENTIAL ACTION Use sequential action for intermittent nailing where very careful and accurate placement and depth control is desired. 7 To operate the nailer in sequential action mode: 1. Flip the switch located on the body of the tool just between the trigger FIG. 6 and magazine to the left, as shown in Figure 6. 2. Fully depress nosepiece against the work surface (motor will start). 3. Pull trigger (nail will drive into work surface). 4. Release trigger. 5. Lift nosepiece off work surface. 6. Repeat steps 2 through 4 for next application. CAUTION: The contact trip needs to be depressed followed by a trigger pull for each nail followed by a release of both the contact trip and trigger after each nail. BUMP ACTION Bump action is intended for rapid nailing on flat, stationary surfaces. FIG. 7 When using bump action, two methods are available: place actuation and bump actuation. Flip the switch located on the body of the tool just between the trigger and magazine to the right as shown in Figure 7. To operate the tool using the PLACE ACTUATION method: WARNING: A nail will fire each time the trigger is depressed as long as the contact trip remains depressed. 1. Depress the contact trip against the work surface. 2. Depress the trigger. To operate the tool using the BUMP ACTUATION method: 1. Depress the trigger. 2. Push the contact trip against the work surface. As long as the trigger is depressed, the tool will fire a nail every time the contact trip is depressed. This allows the user to drive multiple nails in sequence. CAUTION: Do not keep trigger depressed when tool is not in use. Keep the contact trip lock-off engaged in the locked position when the tool is not in use. Preparing the tool CAUTION: NEVER spray or in any other way apply lubricants or cleaning solvents inside the tool. This can seriously affect the life and performance of the tool. NOTE: The battery pack is not fully charged out of the carton. Follow instructions outlined (see Charging Procedures). 1. Read the Safety Instruction section of this manual. 2. Wear eye and ear protection. English
-
 1
1 -
 2
2 -
 3
3 -
 4
4 -
 5
5 -
 6
6 -
 7
7 -
 8
8 -
 9
9 -
 10
10 -
 11
11 -
 12
12 -
13
-
14
-
15
-
16
-
17
-
18
-
19
-
20
-
21
-
22
-
23
-
24
-
25
-
26
-
27
-
28
-
29
-
30
-
31
-
32
-
33
-
34
-
35
-
36
 |
 |