Dewalt DW505 Instruction Manual - Page 18
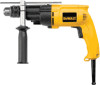
MAINTENANCE, Lubrication, Cleaning, Purchasing Accessories - hammer drill parts
 |
View all Dewalt DW505 manuals
Add to My Manuals
Save this manual to your list of manuals |
Page 18 highlights
DRILLING IN METAL USE ONLY in the low-speed gear range. Start drilling with slow speed and increase to full power while applying firm pressure on the tool. A smooth even flow of metal chips indicates the proper drilling rate. Use a cutting lubricant when drilling metals. The exceptions are cast iron and brass which should be drilled dry. NOTE: Large [5/16" (8 mm) to 1/2" (13 mm)] holes in steel can be made easier if a pilot hole [5/32" (4 mm) to 3/16" (5 mm)] is drilled first. DRILLING IN WOOD USE ONLY in the low-speed gear range. Start drilling with slow speed and increase to full power while applying firm pressure on the tool. Holes in wood can be made with the same twist drills used for metal. These bits may overheat unless pulled out frequently to clear chips from the flutes. Work that is apt to splinter should be backed up with a block of wood. DRILLING IN MASONRY When drilling in masonry, use carbide tipped bits rated for percussion drilling and be certain that the bit is sharp. For holes up to 3/8" (10 mm) diameter use the high-speed gear range. For holes larger than 3/8" (10 mm), use the the low-speed gear range. Ensure that the hammer mode is selected. Use a constant and firm force on the tool to drill most effectively. A smooth, even flow of dust indicates the proper drilling rate. Depth Rod To adjust the depth rod, loosen the handle and move rod so that the distance between the end of the rod and the end of the bit equals the desired drilling depth. When drilling with depth rod, stop when end of rod reaches surface of material. MAINTENANCE WARNING: To reduce the risk of injury, turn unit off and disconnect tool from power source before installing and removing accessories, before making any adjustments or removing/installing attachments or accessories. An accidental start-up can cause injury. Your DEWALT power tool has been designed to operate over a long period of time with a minimum of maintenance. Continuous satisfactory operation depends upon proper tool care and regular cleaning. Lubrication Your power tool requires no additional lubrication. Cleaning WARNING: Blow dirt and dust out of the main housing with dry air as often as dirt is seen collecting in and around the air vents. Wear approved eye protection and approved dust mask when performing this procedure. WARNING: Never use solvents or other harsh chemicals for cleaning the non-metallic parts of the tool. These chemicals may weaken the materials used in these parts. Use a cloth dampened only with water and mild soap. Never let any liquid get inside the tool; never immerse any part of the tool into a liquid. Purchasing Accessories WARNING: Since accessories, other than those offered by DEWALT, have not been tested with this product, use of such accessories with this tool could be hazardous. To reduce the risk of injury, only DEWALT, recommended accessories should be used with this product. Recommended accessories for use with your tool are available at extra cost from your local dealer or authorized service center. English 18
-
 1
1 -
2
-
3
-
4
-
5
-
6
-
7
-
8
-
9
-
10
-
11
-
12
-
 13
13 -
 14
14 -
 15
15 -
 16
16 -
 17
17 -
 18
18 -
 19
19 -
 20
20 -
 21
21 -
 22
22
 |
 |
