Dymo LabelManager® 450 User Guide 1 - Page 7
Formatting Your Label
 |
View all Dymo LabelManager® 450 manuals
Add to My Manuals
Save this manual to your list of manuals |
Page 7 highlights
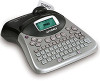
Figure 8 Refer to the ExecuLabel LM450 Quick Start Guide for installation instructions and the DYMO LabelMANAGER Software User Guide for information about designing and printing labels. Formatting Your Label You can choose from a number of formatting options to enhance the appearance of your labels. The labelmaker remembers the last feature selection made so that each time you enter one of the feature menus described in this section, you are positioned at the last item selected from that menu. Changing the Font Seven fonts are available for your labels: Arial Narrow Arial Normal Arial Wide BIG Times New Roman When you specify a font, that font applies to all characters on the label. If you want to use more than one font, you must insert format breaks. See Using Mixed Formats on page 9 for more information. To set the font 1. Press the key. 2. Use the arrow keys to move to the desired font and then press . Adding Font Styles You can choose from many different font styles to apply to your text: Normal Bold Italic Outline Shadow 3D Strike-through Vertical Mirror Italic + Bold Italic + Outline Italic + Shadow Italic + 3D When you select a style, that style applies to all characters on a label. If you want to use more than one style, you must insert format breaks. See Using Mixed Formats on page 9 for more information. However,when you use mirror or vertical style, that style applies to the whole label. Styles can be used with alphanumeric characters and symbols. See Using Symbols and Special Characters on page 9 for more information on printing symbols. 7
-
 1
1 -
 2
2 -
 3
3 -
 4
4 -
 5
5 -
 6
6 -
 7
7 -
 8
8 -
 9
9 -
 10
10 -
 11
11 -
 12
12 -
13
-
14
-
15
-
16
-
17
-
18
 |
 |
