Electrolux GLMV169HS Installation Instructions - Page 7
Optional Tip
 |
View all Electrolux GLMV169HS manuals
Add to My Manuals
Save this manual to your list of manuals |
Page 7 highlights
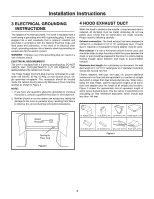
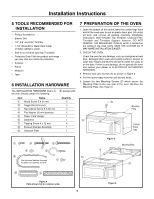
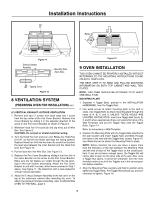
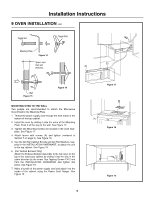
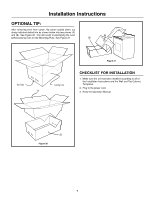
Installation Instructions OPTIONAL TIP: After removing oven from carton, flip carton upside down, cut along indicated dotted line as shown below into two pieces (A) and (B). See Figure 20. This will assist in positioning the oven before placing oven on the Mounting Plate. See Figure 21. (B) Top Side (A) Cutting Line Figure 21 CHECKLIST FOR INSTALLATION 1. Make sure the unit has been installed according to all of the Installation Instructions and the Wall and Top Cabinet Templates. 2. Plug in the power cord. 3. Keep the Operation Manual. (B) Figure 20 7
-
 1
1 -
 2
2 -
 3
3 -
 4
4 -
 5
5 -
 6
6 -
 7
7 -
 8
8
 |
 |

7
CHECKLIST FOR INSTALLATION
1.
Make sure the unit has been installed according to all of
the Installation Instructions and the Wall and Top Cabinet
Templates.
2.
Plug in the power cord.
3. Keep the Operation Manual.
OPTIONAL TIP:
After removing oven from carton, flip carton upside down, cut
along indicated dotted line as shown below into two pieces (A)
and (B). See Figure 20. This will assist in positioning the oven
before placing oven on the Mounting Plate. See Figure 21.
Figure 21
(B)
(B)
(A)
Cutting Line
Top Side
Installation Instructions
Figure 20