Epson 2180 User Setup Information - Page 7
Removing the Printed Document From the Push Tractor, Tear Off/Bin, Load/Eject
 |
UPC - 010343815766
View all Epson 2180 manuals
Add to My Manuals
Save this manual to your list of manuals |
Page 7 highlights
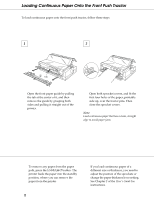
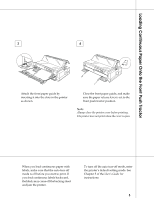
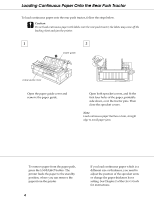
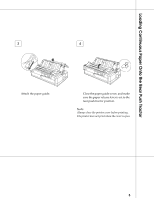
Removing the Printed Document From the Push Tractor To remove the printed document from the front or rear push tractor, follow the steps below. To remove continuous paper from the pull tractor, see Chapter 2 of the User's Guide. 1 Make sure the Tear Off/Bin lights are flashing. (You may need to press the Tear Off/Bin button.) When the Tear Off/Bin lights are flashing, your paper is in the tear-off position. 2 from the front push tractor from the rear push tractor Open the paper guide cover, and tear off the printed document using the printer's tear-off edge. When you resume printing, the printer automatically feeds the paper backward to the top-of-form position, and starts printing. To feed the continuous paper backward from the tear-off position to the standby position, press the Load/Eject button. 6
-
 1
1 -
 2
2 -
 3
3 -
 4
4 -
 5
5 -
 6
6 -
 7
7 -
 8
8 -
 9
9 -
 10
10 -
 11
11 -
 12
12 -
13
-
14
-
15
-
16
-
17
 |
 |
