Epson 50 Quick Guide - Page 23
ink button to begin charging the ink. This takes about two, minutes. When it's finished,
 |
UPC - 010343168718
View all Epson 50 manuals
Add to My Manuals
Save this manual to your list of manuals |
Page 23 highlights
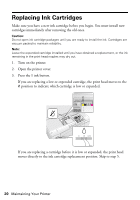
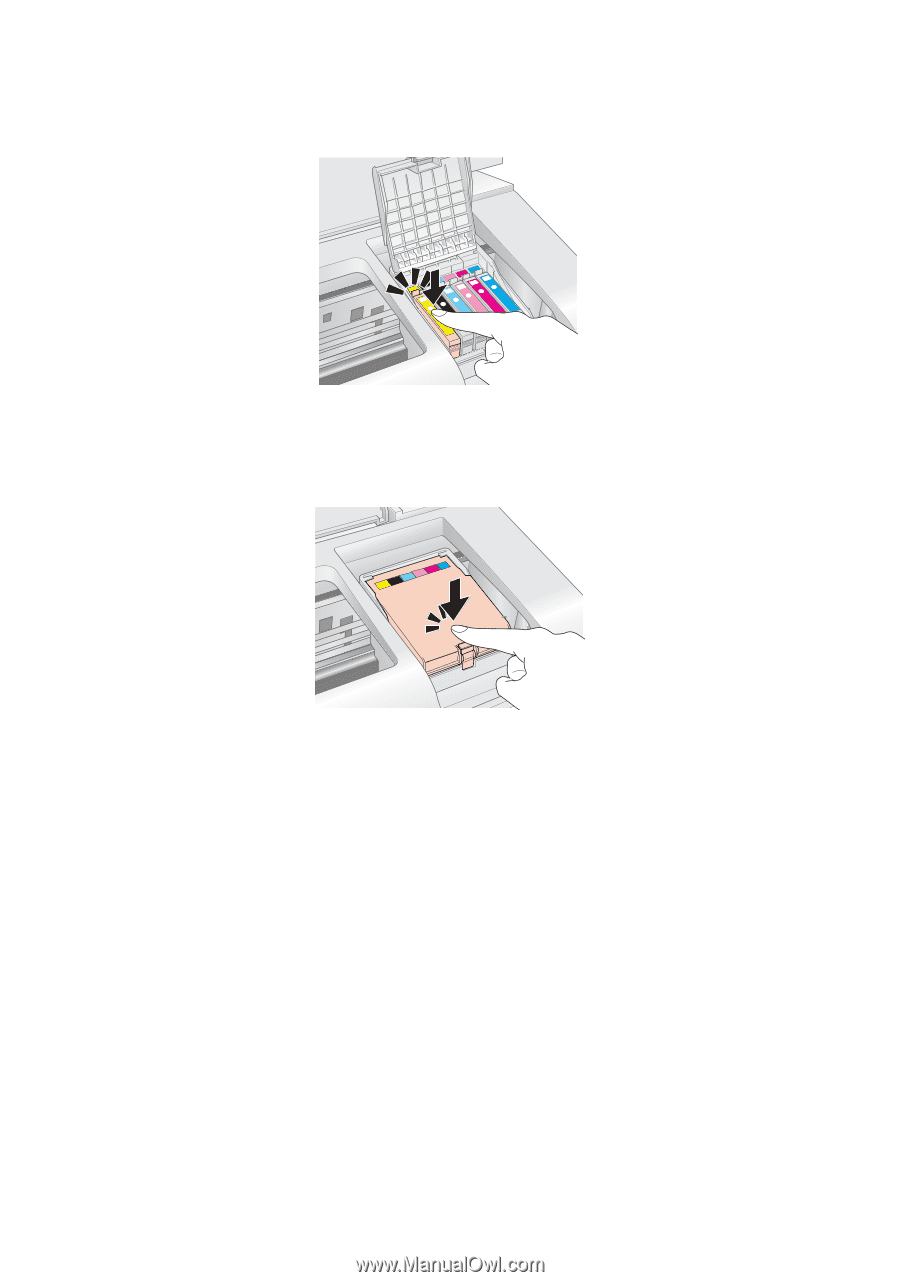
9. Insert the new ink cartridge into the holder and push it down until it clicks into place. 10. Once you replace all the cartridges that need replacing, close the cartridge cover, then close the printer cover. 11. Press the H ink button to begin charging the ink. This takes about two minutes. When it's finished, the P power light stops flashing and remains on, and the H ink light goes out. Caution: Never turn off the printer while ink is charging or you'll waste ink. If the H ink light flashes, press the H ink button again and press down all the cartridges securely. Note: If you remove a low or expended ink cartridge, you cannot reinstall and use the cartridge. Replacing Ink Cartridges 23
-
 1
1 -
2
-
3
-
4
-
5
-
6
-
7
-
8
-
9
-
10
-
11
-
12
-
13
-
14
-
15
-
16
-
17
-
 18
18 -
 19
19 -
 20
20 -
 21
21 -
 22
22 -
 23
23 -
 24
24 -
 25
25 -
 26
26 -
 27
27 -
 28
28 -
29
-
30
-
31
-
32
-
33
-
34
-
35
-
36
 |
 |
Replacing Ink Cartridges
23
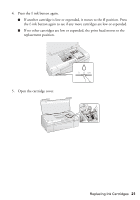
9.
Insert the new ink cartridge into the holder and push it down until it clicks
into place.
10.
Once you replace all the cartridges that need replacing, close the cartridge
cover, then close the printer cover.
11.
Press the
H
ink button to begin charging the ink. This takes about two
minutes. When it’s finished, the
P
power light stops flashing and remains on,
and the
H
ink light goes out.
Caution:
Never turn off the printer while ink is charging or you’ll waste ink. If the
H
ink light
flashes, press the
H
ink button again and press down all the cartridges securely.
Note:
If you remove a low or expended ink cartridge, you cannot reinstall and use the
cartridge.