Epson ActionLaser 1100 Product Information Guide - Page 3
Selecting The Printer Driver, Changing The Printer Settings
 |
View all Epson ActionLaser 1100 manuals
Add to My Manuals
Save this manual to your list of manuals |
Page 3 highlights
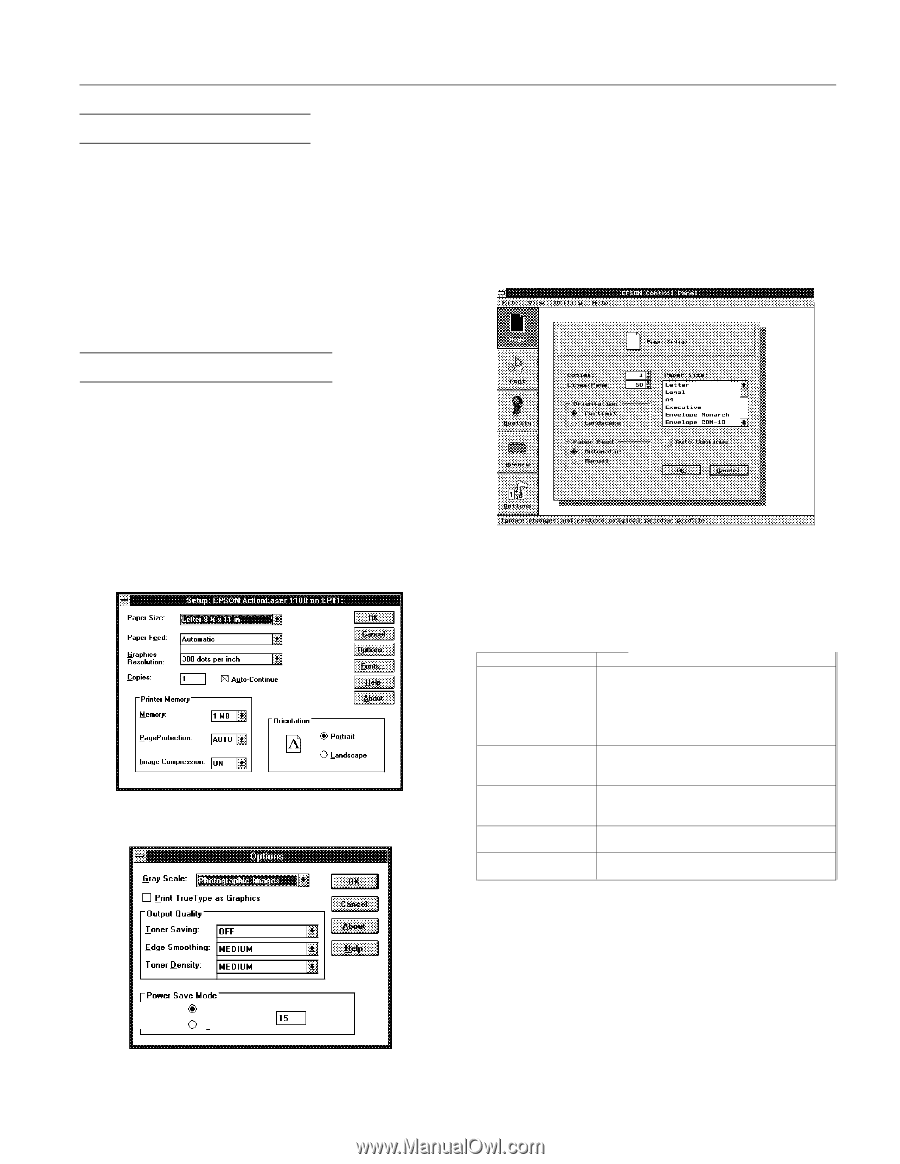
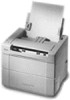
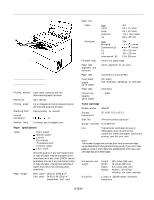
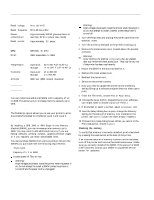
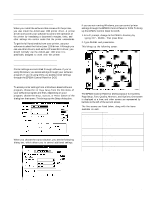
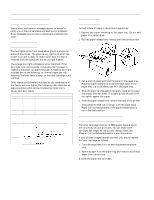
Selecting the Printer Driver When you install the software that comes with the printer, you also install the ActionLaser 1100 printer driver. A printer driver works with your software to control the operation of the printer by translating a document's margins, fonts, and other settings into control codes that the printer understands. To get the full functionality from your printer, use your software to select the ActionLaser 1100 driver. Although you can use other drivers, such as the HP LaserJet III driver, you should normally use the ActionLaser 1100 since it is specifically designed to work with this printer. Changing the Printer Settings Printer settings are controlled through software. If you're using Windows, you access settings through your software program. If you're using DOS, you access printer settings through the EPSON Control Panel for DOS. Accessing printer driver settings in Windows To access printer settings from a Windows-based software program, choose Print or Page Setup from the File menu of your software program and then, depending on your program, choose the Setup, Options, or Printer button of the dialog box that opens. This brings up the Setup dialog box. When you choose the Options button, you see the following dialog box, which allows you to control additional settings. EPSON ActionLaser 1100 Accessing printer driver settings in DOS If you are not running Windows, you can control printer settings through the EPSON Control Panel for DOS. To bring up the EPSON Control Panel for DOS: 1. At a C: prompt, change to the PANEL directory by typing CD \ PANEL. Then press Enter. 2. Type PANEL and press Enter. This brings up the following screen: The EPSON Control Panel for DOS consists of five screens: Page Setup, Font, Quality, Memory, and Options. One screen is displayed at a time, and other screens are represented by buttons to the left of the current screen. The five screens are listed below, along with the items available on each. Menu Page setup Font Quality Memory Options Items Copies Lines per Page Orientation Paper Feed Paper Size Auto Continue Typeface Point Symbol Set Toner Saving Edge Smoothing Toner Density Page Protection Image Compression Power Save Mode Power Save Interval 0 On Mode: 0 Off Interval: 115 min. Laser Printers 8/15/94 AL1100-3
-
 1
1 -
 2
2 -
 3
3 -
 4
4 -
 5
5 -
 6
6 -
 7
7
 |
 |