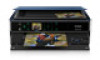
Epson Artisan 730 Quick Guide - Page 7
Copying a Document or Photo - color
 |
View all Epson Artisan 730 manuals
Add to My Manuals
Save this manual to your list of manuals |
Page 7 highlights
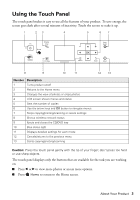
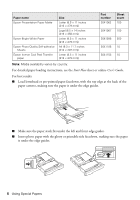
Copying a Document or Photo Follow the instructions in this section to position your originals correctly on the scanner glass and make color or black-and-white copies. 1. Make sure paper is loaded. 2. Open the document cover and place your original facedown on the scanner glass, with the top against the back left corner. 3. Close the cover gently so you don't move the original. 4. Press Home if necessary, press l or r to select Copy, then press OK. You see this screen. 5. Press + or - to select the number of copies you want. 6. Press u or d to select Color or B&W (black and white) copies. 7. Press l or r to adjust the Density (make the copies lighter or darker) if necessary. 8. To change copy settings, press x Menu, select Paper and Copy Settings, then press OK. ■ To print on both sides of the page, turn on 2-Sided Printing. ■ Press u or d to select your Layout and Paper Size settings. ■ To adjust the copy size, select Reduce/Enlarge, press OK, then select Actual Size (to print at actual size), Custom Size (to select a percentage), Auto Fit Page (to automatically size the image to fit your paper), or one of the specific sizes listed. Copying a Document or Photo 7
-
 1
1 -
 2
2 -
 3
3 -
 4
4 -
 5
5 -
 6
6 -
 7
7 -
 8
8 -
 9
9 -
 10
10 -
 11
11 -
 12
12 -
13
-
14
-
15
-
16
-
17
-
18
-
19
-
20
-
21
-
22
-
23
-
24
-
25
-
26
-
27
-
28
-
29
-
30
-
31
-
32
-
33
-
34
-
35
-
36
 |
 |
