Epson BrightLink 536Wi User Manual - Page 40
Connecting to External Speakers, Computer, Monitor Out, Parent topic, Communication On, Standby Mode
 |
View all Epson BrightLink 536Wi manuals
Add to My Manuals
Save this manual to your list of manuals |
Page 40 highlights
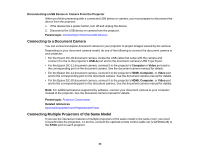
Note: Monitors that use a refresh rate less than 60 Hz may not be able to display images correctly. 1. Make sure your computer is connected to the projector's Computer port. If there are two computer ports, make sure you use the Computer1 port. 2. Connect the external monitor's cable to your projector's Monitor Out port. Note: Only analog RGB signals from the Computer 1 port can be output to an external monitor. Note: Content you draw using the interactive features is not displayed on an external monitor unless you draw it using Easy Interactive Tools. Parent topic: Projector Connections Connecting to External Speakers To enhance the sound from your presentation, you can connect the projector to external self-powered speakers. You can control the volume using the projector's remote control. You can also connect the projector to an amplifier with speakers. If you want to output audio from the external speakers when the projector is turned off, you need to select Communication On for the Standby Mode setting and Always On for the A/V Output setting in the projector's menu system. Note: The projector's built-in speaker system is disabled when you connect external speakers. 1. Make sure your computer or video source is connected to the projector with both audio and video cables as necessary. 2. Locate the appropriate cable to connect your external speakers, such as a stereo mini-jack-to-pin- jack cable, or another type of cable or adapter. 3. Connect one end of the cable to your external speakers as necessary. 40
-
 1
1 -
2
-
3
-
4
-
5
-
6
-
7
-
8
-
9
-
10
-
11
-
12
-
13
-
14
-
15
-
16
-
17
-
18
-
19
-
20
-
21
-
22
-
23
-
24
-
25
-
26
-
27
-
28
-
29
-
30
-
31
-
32
-
33
-
34
-
 35
35 -
 36
36 -
 37
37 -
 38
38 -
 39
39 -
 40
40 -
 41
41 -
 42
42 -
 43
43 -
 44
44 -
 45
45 -
46
-
47
-
48
-
49
-
50
-
51
-
52
-
53
-
54
-
55
-
56
-
57
-
58
-
59
-
60
-
61
-
62
-
63
-
64
-
65
-
66
-
67
-
68
-
69
-
70
-
71
-
72
-
73
-
74
-
75
-
76
-
77
-
78
-
79
-
80
-
81
-
82
-
83
-
84
-
85
-
86
-
87
-
88
-
89
-
90
-
91
-
92
-
93
-
94
-
95
-
96
-
97
-
98
-
99
-
100
-
101
-
102
-
103
-
104
-
105
-
106
-
107
-
108
-
109
-
110
-
111
-
112
-
113
-
114
-
115
-
116
-
117
-
118
-
119
-
120
-
121
-
122
-
123
-
124
-
125
-
126
-
127
-
128
-
129
-
130
-
131
-
132
-
133
-
134
-
135
-
136
-
137
-
138
-
139
-
140
-
141
-
142
-
143
-
144
-
145
-
146
-
147
-
148
-
149
-
150
-
151
-
152
-
153
-
154
-
155
-
156
-
157
-
158
-
159
-
160
-
161
-
162
-
163
-
164
-
165
-
166
-
167
-
168
-
169
-
170
-
171
-
172
-
173
-
174
-
175
-
176
-
177
-
178
-
179
-
180
-
181
-
182
-
183
-
184
-
185
-
186
-
187
-
188
-
189
-
190
-
191
-
192
-
193
-
194
-
195
-
196
-
197
-
198
-
199
-
200
-
201
-
202
-
203
-
204
-
205
-
206
-
207
-
208
-
209
-
210
-
211
-
212
-
213
-
214
-
215
-
216
-
217
-
218
-
219
-
220
-
221
-
222
-
223
-
224
-
225
-
226
-
227
-
228
-
229
-
230
-
231
-
232
-
233
-
234
-
235
-
236
-
237
-
238
-
239
-
240
-
241
-
242
-
243
-
244
-
245
-
246
-
247
-
248
-
249
-
250
-
251
-
252
-
253
-
254
-
255
-
256
-
257
 |
 |
