Epson C11C294131BZ Product Information Guide - Page 10
Printing with the pull tractor
 |
View all Epson C11C294131BZ manuals
Add to My Manuals
Save this manual to your list of manuals |
Page 10 highlights
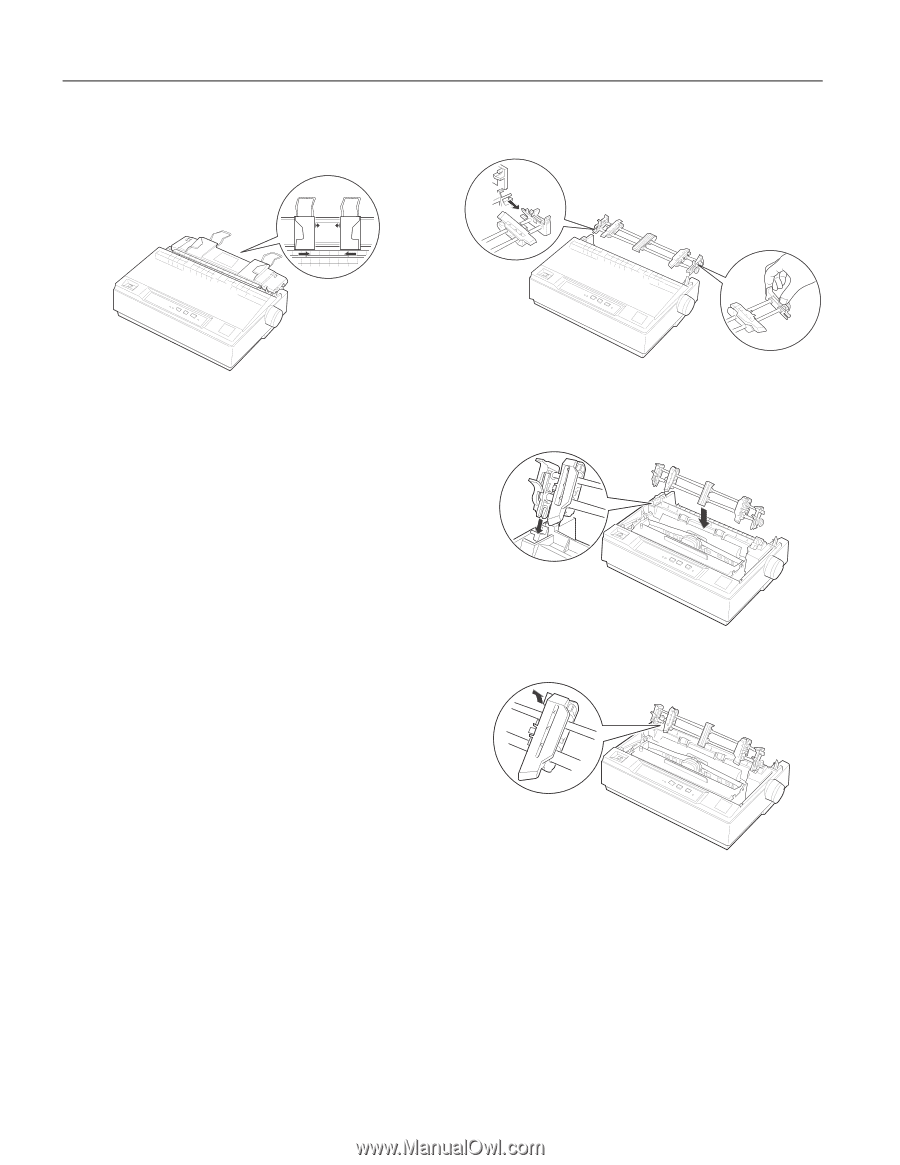
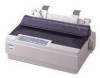
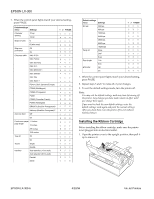
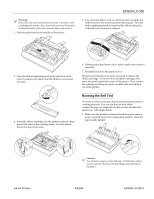
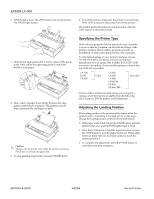
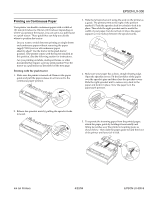
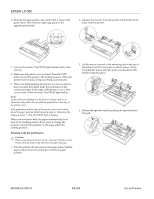
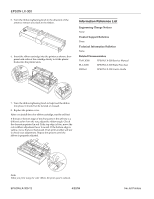
(3621ý/;ðêíí 6. Slide the left edge guide to the center until it stops at the guide mark. Then slide the right edge guide to the opposite guide mark. 2. Squeeze the tractor's lock tabs gently and pull the tractor away from the printer. 7. Turn on the printer. The PAUSE light flashes briefly, then stays on. 8. Make sure the printer cover is closed. Press the LF/FF button to feed the paper to the loading position. When the printer receives data, it begins printing automatically. 9. When you finish printing (the printer receives no data for three seconds) the printer feeds the perforation of the continuous paper to the edge of the printer cover so that you can tear off the last sheet. The PAUSE light flashes. Note: Set the Auto tear off feature in the Printer Setting mode to on. Otherwise, the printer does not feed the perforation to the edge of the printer cover. If the perforation and the edge of the printer cover do not match, adjust the paper position by following the steps in "Adjusting the loading position," while the PAUSE light is flashing. When you send more data, the paper automatically feeds back to the loading position. If you want to change the position where printing begins on the page, adjust the loading position. Printing with the pull tractor F Caution: When using the pull tractor, set the Auto tear off feature in the Printer Setting mode to off; otherwise the paper may jam. 1. Turn the printer off; then remove the paper guide. Pull the paper-release lever forward to the continuous paper position. 3. Lift the tractor forward to the mounting slot at the top of the printer and tilt it into place as shown below. When you push the tractor onto the posts, you should feel the notches snap into place. 4. Release the sprocket units by pulling the sprocket locks forward. (3621 ,QNý-HWý3ULQWHUV
-
 1
1 -
2
-
3
-
4
-
 5
5 -
 6
6 -
 7
7 -
 8
8 -
 9
9 -
 10
10 -
 11
11 -
 12
12
 |
 |