Epson L-1000 User Manual
Epson L-1000 - ActionPrinter Impact Printer Manual
 |
View all Epson L-1000 manuals
Add to My Manuals
Save this manual to your list of manuals |
Epson L-1000 manual content summary:
- Epson L-1000 | User Manual - Page 1
- Epson L-1000 | User Manual - Page 2
Where to Get Help Customer support and service for Epson products are provided by a network of authorized Epson dealers and service centers throughout the United States. Epson America provides product information and toll-free support to its dealers and service centers. Epson is confident that this - Epson L-1000 | User Manual - Page 3
- Epson L-1000 | User Manual - Page 4
DIP Switches 3-5 Selecting Typestyles 3-11 Selecting an International Character Set 3-14 Choosing a Character Table 3-16 Chapter 4 Troubleshooting and Maintenance 4-1 Problems and Solutions 4-2 Cleaning the Printer 4-6 Replacing the Ribbon 4-8 Transporting the Printer 4-11 Contents iii - Epson L-1000 | User Manual - Page 5
Chapter 5 Technical Specifications 5-1 Printer Specifications 5-2 Interface Specifications 5-7 Initialization 5-11 Default Settings 5-12 Chapter 6 Command Summary 6-1 Appendix A-1 The Interface Boards A-2 The Multi-Font Module A-14 Glossary Index iv Contents - Epson L-1000 | User Manual - Page 6
The ActionPrinter™ L-1000 is an advanced 24-pin impact dot matrix printer combining a compact design and high performance with a wide range of features. Features In addition to the high-quality printing and ease of operation you have come to expect from Epson® printers, your printer offers - Epson L-1000 | User Manual - Page 7
About This Guide This user's guide provides fully illustrated, step-by-step instructions for setting up and operating your printer. Finding your way around Chapter 1 contains information on unpacking, setting up, testing, and connecting the printer. Be sure to read and follow the instructions in - Epson L-1000 | User Manual - Page 8
Removing the pull tractor 1-3 Choosing a Place for the Printer 1-5 Assembling the Printer 1-7 Installing the paper feed knob 1-7 Installing the ribbon cartridge 1-8 Attaching the paper guide 1-11 Testing the Printer 1-13 Plugging in the printer 1-13 Loading a sheet of paper 1-14 Running the - Epson L-1000 | User Manual - Page 9
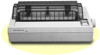
the Printer As you unpack the printer, check that you have all the parts shown below and that none have been damaged during transportation. Note: You'll find the paper feed knob in a piece of the foam packing. Also, in some locations, the power cable may be attached to the printer. 1-2 Setting - Epson L-1000 | User Manual - Page 10
After removing the parts, store the packaging materials in case you ever need to transport your printer. CAUTION: There are several different versions of the printer designed for different electrical standards. The power supply type is shown on the label on the back of the printer. If it does - Epson L-1000 | User Manual - Page 11
Unpacking the Printer 2. Hold both ends of the tractor unit and slowly tilt the unit back until the front notches of the unit are free. 3. Lift the tractor unit up and off.; 1-4 Setting Up the Printer - Epson L-1000 | User Manual - Page 12
Choosing a Place for the Printer When you select a location for your printer, keep the following in mind: l Place the printer on a flat, stable surface. l Place the printer close enough to the computer for its cable to reach. l Leave adequate room around the printer to allow for easy operation and - Epson L-1000 | User Manual - Page 13
sure it meets the following requirements: l The stand must support at least 30 lb or 14 kg (twice the weight of the printer). l The stand must not tilt the printer more than 15 degrees from horizontal. With a cut sheet feeder, the stand must keep the printer level. l If the paper supply is below the - Epson L-1000 | User Manual - Page 14
do the following: l Install the paper feed knob. l Install the ribbon cartridge. l Attach the paper guide. Installing the paper feed knob The first step in setting up the printer is to install the paper feed knob. You use this knob to manually feed paper in the printer when the printer is turned off - Epson L-1000 | User Manual - Page 15
2. Push firmly on the knob until it fits against the printer case. Installing the ribbon cartridge Follow these steps to install the ribbon cartridge. 1. Slide the print head to the middle of the printer. CAUTION: Never move the print head while the printer is turned on because this can damage the - Epson L-1000 | User Manual - Page 16
the direction of the arrow. This removes any excess slack in the ribbon and makes it easier to install. 4. Hold the ribbon cartridge by its handle and push it firmly down into position, making sure the plastic hooks fit into the printer. Press lightly on both sides of the cartridge to be sure the - Epson L-1000 | User Manual - Page 17
pencil, to guide the ribbon between the print head and ribbon guide while you turn the ribbon-tightening knob to help feed the-ribbon into place. 6. Slide the print head from side to side to be sure it moves smoothly. Also check that the ribbon is not twisted or creased. 1-10 Setting Up the Printer - Epson L-1000 | User Manual - Page 18
Assembling the Printer Attaching the paper guide The paper guide functions to feed the paper smoothly and efficiently. Follow these steps to install the paper guide: 1. Place the paper guide on the printer. 2. Raise the paper guide until it locks into place. Setting Up the Printer 1-11 - Epson L-1000 | User Manual - Page 19
Assembling the Printer 3. Attach the printer cover by fitting the legs of the cover into the notches at the front of the printer. 4. Close the printer cover. 1-12 Setting Up the Printer - Epson L-1000 | User Manual - Page 20
operating properly. Before running the self test, you need to connect your printer to an electrical outlet and load a sheet of paper. Plugging in the printer Follow these steps to plug in the printer: 1. Be sure the printer is turned off. 2. Plug the power cable into a properly grounded electrical - Epson L-1000 | User Manual - Page 21
Testing the Printer Loading a sheet of paper Next, you need to load a sheet of paper that is letter or A4 size. 1. Turn on the printer. The green POWER and red PAPER OUT lights 2. Be sure that the paper release lever is pushed back to the single sheet position. 1-14 Setting Up the Printer - Epson L-1000 | User Manual - Page 22
Testing the Printer 3. Move the left edge guide so it locks in place next to the guide mark. 4. Adjust the right edge guide to match the width of your paper. Next, slide a sheet down between the edge guides until it meets resistance. Setting Up the Printer 1-15 - Epson L-1000 | User Manual - Page 23
Testing the Printer WARNING: Never run the self test using paper that is narrower than 8¼ inches (210 mm or A4 size) because then the print or Letter Quality mode. Follow the steps below: 1. Be sure you have loaded a sheet of paper, as described above. 2. Turn off the printer. 1-16 Setting Up the - Epson L-1000 | User Manual - Page 24
down the LINE FEED button (draft mode) or the FORM FEED button (Letter Quality mode), turn on the printer. After printing starts, release the button. A list of your printer's settings is printed first, followed by a series of characters. Here is part of a typical draft self test: Setting Up the - Epson L-1000 | User Manual - Page 25
the test results are satisfactory and you wish to stop the test, press the ON LINE button. 5. To end the self test, be sure the printer is not printing. If paper is still loaded, press the FORM FEED button to eject it. Then turn off the - Epson L-1000 | User Manual - Page 26
your printer to the computer. If the self test did not print correctly, see "Where to Get Help" on the inside front cover of this guide. The printer has connect your printer immediately. If you are unsure whether your computer has a parallel interface, see your computer's operating manual. The - Epson L-1000 | User Manual - Page 27
Connecting the Printer to Your Computer 3. Squeeze the wire clips together until they lock in place on either side of the connector. Note: If your cable has a ground wire, connect it to the of the cable, attach it to the ground connector at the back of the computer.) 1-20 Setting Up the Printer - Epson L-1000 | User Manual - Page 28
-500 LQ-2550 LQ-800/1000 LQ-1500 If none of these printers is listed, select the first one available on the following list. EX MX FX Epson printer LX Standard printer Rx Draft printer To use all the features of your printer, however, it is best to use a program with one of the LQ printers - Epson L-1000 | User Manual - Page 29
Printer Selection Menus 1-22 Setting Up the Printer - Epson L-1000 | User Manual - Page 30
Installing the pull tractor 2-8 Positioning your continuous paper supply 2-11 Loading continuous paper 2-11 Attaching the paper guide 2-16 Setting the top of form position 2-17 When you have finished printing 2-19 Printing on Special Paper 2-20 The paper thickness lever 2-20 Using multi-part - Epson L-1000 | User Manual - Page 31
tractor unit is installed, you need to remove it before you can print on single sheets. See "Removing the pull tractor" in Chapter 1. Attaching the paper guide Follow these steps to attach the paper guide: 1. Place the paper guide on the printer. Then raise it up until it locks into place. 2-2 Paper - Epson L-1000 | User Manual - Page 32
Using Single Sheets 2. Slide the left edge guide until it locks in place at the guide mark. Next, adjust the right edge guide to match the width of your paper. 3. Attach the printer cover. Paper Handling 2-3 - Epson L-1000 | User Manual - Page 33
Using Single Sheets Loading paper Follow these steps to load paper in the printer: 1. Push the paper release lever back to the single-sheet position. 2. Turn on the printer. The POWER and PAPER OUT lights should be on. 2-4 Paper Handling - Epson L-1000 | User Manual - Page 34
Using Single Sheets 3. Slide the paper down between the edge guides until it meets resistance. 4. Press the AUTO LOAD button once to load the paper automatically. Note: If the platen turns without loading the paper, completely - Epson L-1000 | User Manual - Page 35
Using Single Sheets 5. Press the ON LINE button to set the printer on line. To eject the paper, set the printer off line (by pressing the ON LINE button) and then press the FORM FEED button. CAUTION: Never advance the paper using the paper feed knob while the printer is turned on. 2-6 Paper Handling - Epson L-1000 | User Manual - Page 36
than one page long using single sheets of paper, there are two ways your software can allow you to load a new sheet at the end of a printed page: l If your software sends characters in a continuous stream, the printer stops printing when it reaches the bottom of the paper. When this happens, the - Epson L-1000 | User Manual - Page 37
). If the pull tractor is already installed, skip to "Positioning your continuous paper supply" later in this chapter. Installing the pull tractor Follow these steps to install the pull tractor: 1. Turn off the printer and remove the printer cover and paper guide. 2. Attach the paper rest. 2-8 Paper - Epson L-1000 | User Manual - Page 38
Using Continuous Paper 3. Pull the paper release lever forward to the continuous paper position. 4. Open the slot cover for the tractor unit. Paper Handling 2-9 - Epson L-1000 | User Manual - Page 39
Using Continuous Paper 5. Fit the rear notches of the tractor unit over the rear mounting pins of the printer. 6. Press the tractor unit forward until its front notches lock onto the front mounting pins of the printer. 2-10 Paper Handling - Epson L-1000 | User Manual - Page 40
tractor so that the paper feeds smoothly and straight into the printer. Loading continuous paper Follow these steps to load continuous paper. 1. Turn off the printer. 2. Slide the print head to the middle of the printer. WARNING: If the printer has been used recently, the print head may be hot. Let - Epson L-1000 | User Manual - Page 41
Using Continuous Paper 3. Pull the sprocket lock levers forward to unlock the sprocket frames. 4. Slide the left sprocket frame to approximately 1/2 inch (12 mm) from the far left position, Then push the sprocket lever back to lock it in place. 2-12 Paper Handling - Epson L-1000 | User Manual - Page 42
Using Continuous Paper 5. Slide the right sprocket frame to match the width of your paper, but do not lock it. 6. Position the paper support midway between the two sprocket frames. Paper Handling 2-13 - Epson L-1000 | User Manual - Page 43
Using Continuous Paper 7. Open both sprocket covers. 8. Be sure your paper has a clean, straight edge and then insert the paper into the printer until it emerges between the platen and the ribbon guide. Pull it up to the sprocket frames. 2-14 Paper Handling - Epson L-1000 | User Manual - Page 44
Using Continuous Paper 9. Fit the holes of the paper over the tractor pins of the sprocket frames, and then close the sprocket covers. 10. Adjust the position of the right sprocket frame to remove any slack across the paper and then lock it into place. Paper Handling 2-15 - Epson L-1000 | User Manual - Page 45
slack in the paper between the print head and the tractor unit, use the paper feed knob to take up the slack. Attaching the paper guide With continuous paper, the paper guide functions as a paper separator. 1. Place the paper guide over the printer and paper. 2-16 Paper Handling - Epson L-1000 | User Manual - Page 46
2. Slide the edge guides to the center of the paper's width. Setting the top of form position It is important to set the top of form position properly because this position determines the first printable line of each page: The top of form position remains valid until the printer is turned off - Epson L-1000 | User Manual - Page 47
: If you use the paper feed knob to feed the paper after turning on the printer, the printer loses track of the set position. If you wish to retain the set top of form position, be sure to use the LINE FEED or - Epson L-1000 | User Manual - Page 48
When you have finished printing To tear off the paper after you have finished printing, follow the steps below: 1. After printing is completed, set the printer off line. 2. Press the FORM FEED button to feed the paper forward, and then tear it off at the perforation. Paper Handling 2-19 - Epson L-1000 | User Manual - Page 49
Printing on Special Paper In addition to printing on single sheets and continuous paper, your printer can also print on a wide variety of paper types, such as multi-part forms. Before printing on special types of paper, you need to change the paper thickness setting. WARNING: Always return the lever - Epson L-1000 | User Manual - Page 50
paper thickness lever to match the thickness of your paper, according to the table below. Paper Type Ordinary (single sheets or continuous) Thin paper Multi-part paper 2 sheets (original + 1 copy) 3 sheets (original + 2 copies) Lever Position 2 2 or 1 3 4 Paper Handling 2-21 - Epson L-1000 | User Manual - Page 51
Printing on Special Paper 5. Attach the tractor cover or printer cover. Using multi-part forms With the pull tractor unit installed, your printer can print on continuous multi-part forms. You can use multi-part forms up to three sheets thick including the original. Be sure you set the paper - Epson L-1000 | User Manual - Page 52
3 Using the Printer Operating the Control Panel 3-2 Lights 3-2 Buttons 3-3 Other control panel features 3-4 DIP Switches 3-5 Setting the DIP switches 3-5 DIP switch functions 3-7 Selecting Typestyles 3-11 Built-in character fonts 3-11 Selecting a font with SelecType 3-12 Selecting a font - Epson L-1000 | User Manual - Page 53
lights so you can check the current status of the printer's settings. Lights POWER: READY: PAPER OUT: On when the power switch is on and power is supplied. On when the printer is ready to accept data. This light flickers during printing. On when the printer is out of paper. 3-2 Using the - Epson L-1000 | User Manual - Page 54
LINE: FORM FEED: LINE FEED/ AUTO LOAD: This button controls the printer's on line/off line status. When the printer is on line, the ON LINE light is on and the printer can receive and print data from the computer. When the printer is off line, press this button to eject a single sheet of paper - Epson L-1000 | User Manual - Page 55
in Chapter 1 for more information. Data dump: By holding down both the LINE FEED and FORM FEED buttons while you turn on the printer, you turn on the data dump mode. This feature allows advanced users to find the cause of communication problems between the printer and the software. 3-4 Using the - Epson L-1000 | User Manual - Page 56
settings of the two sets of DIP switches inside the font compartment, you can control various printer features, such as the character set and page length. These new settings become valid whenever the printer is turned on, reset, or initialized. Setting the DIP switches Follow these steps to set the - Epson L-1000 | User Manual - Page 57
following pages give the DIP switch functions for each setting. 4. Reattach the font compartment cover. The new settings become valid when you turn on the printer. 3-6 Using the - Epson L-1000 | User Manual - Page 58
page length 2-3 Skip over perforation 2-4 Auto line feed 2-5 Input buffer capacity 2-6 Print direction for graphics 2-7 2-8 Character pitch selection ON OFF 12 inches 11 inches A4 size (65 lines) ON Letter size (61 lines) OFF ON OFF 8 kbytes 1 kbyte Bidirectional Unidirectional See - Epson L-1000 | User Manual - Page 59
DIP Switches International character set Country USA France Germany United Kingdom Denmark 1 Sweden Italy Spain 1 SW1-1 ON ON ON ON OFF ON OFF ON SW1-5 OFF OFF ON ON Pitch selection Character pitch 10 pitch 12 pitch 15 pitch Proportional SW2-7 OFF ON OFF ON SW2-8 OFF OFF ON ON 3-8 Using the - Epson L-1000 | User Manual - Page 60
capacity The input buffer stores data from your computer. If you want to free your computer for other tasks while the printer prints, change the setting to select a page length of 11 inches (27.94 cm) or 12 inches (30.48 cm). If you are using paper that is 12 inches long, you can set this switch on. - Epson L-1000 | User Manual - Page 61
DIP Switches Skip over perforation DIP switch 2-3 controls the skip over perforation function. If this switch is on when you are using continuous paper, the printer leaves a one-inch (25.4 mm) margin between the last printed line on one page and the first printable line on the next page so that - Epson L-1000 | User Manual - Page 62
pitches, widths, and other enhancements. You can select the character font using a software command, the SelecType feature on your control panel, or by setting DIP switches. Built-in character fonts Your printer has three built-in character fonts: DRAFT 0123456789:;?@ABCDEFGHIJK LMNOPQRSTUVWXYZ - Epson L-1000 | User Manual - Page 63
the printer is not receiving data (the READY light should not be flickering). 3. Press the FORM FEED button until the two SelecType lights match the desired font, as shown below. Status of the SelecType lights DRAFT selected ROMAN selected SANS SERIF selected SLOT (font module) selected 3-12 Using - Epson L-1000 | User Manual - Page 64
skips over the SLOT option (both lights on) if an optional font module is not installed. The font selected by SelecType remains valid until another font is selected by a software command or until the printer is turned off, reset, or initialized. Selecting a font with DIP switches You can set your - Epson L-1000 | User Manual - Page 65
Country ASCII code (hex) 23 24 40 5B 5C 5D 5E 60 7B 7C 7D 7E 0 USA 1 France 2 Germany 3 UK 4 Denmark I 5 Sweden 6 Italy 7 Spain I DIP SW 1-1 1-2 1-3 ON DIP switch, be sure to first turn off the printer. Change the DIP switch and then turn the printer back on. Besides the eight sets above, the six - Epson L-1000 | User Manual - Page 66
Selecting an International Character Set Country 8 Japan 9 Norway 10 Denmark II 11 Spain II 12 Latin America 13 Korea 64 Legal ASCII code (hex) 23 24 40 5B 5C 5D 5E 60 7B 7C 7D 7E Using the Printer 3-15 - Epson L-1000 | User Manual - Page 67
are shown below. Italics 0123456789:;?@ABCDEFG HIJKLMNOPQRSTUVWXYZ[\]^_'abcdefghijklmno pqrstuvwxyz{|} ~ Epson Extended Graphics CAUTION: When you change the setting of a DIP switch, be sure to first turn off the printer. Change the DIP switch and then turn the printer back on. 3-16 Using the - Epson L-1000 | User Manual - Page 68
is faint or uneven 4-3 The printer stops printing 4-4 Single sheets do not feed properly 4-4 Continuous paper does not feed properly 4-5 The printout is not what you expect 4-5 Cleaning the Printer 4-6 Replacing the Ribbon 4-8 Transporting the Printer 4-11 Troubleshooting and Maintenance 4-1 - Epson L-1000 | User Manual - Page 69
in Chapter 1. If the self test works properly, the printer is working, and the problem probably lies in the computer, the software, or the cable. If the self test does not work, contact the store where you purchased your printer or call the Epson toll-free number. 4-2 Troubleshooting and Maintenance - Epson L-1000 | User Manual - Page 70
may be worn out. This is especially likely if parts of printed characters are missing. Contact an Authorized Epson Dealer to have the head replaced. Never attempt to replace the head yourself because other parts of the printer should be checked at the same time. Troubleshooting and Maintenance 4-3 - Epson L-1000 | User Manual - Page 71
the printer's paper specifications in Chapter 5. l The paper guide may not be installed properly. See the section on installing the paper guide in Chapter 2. l The cut sheet feeder mode may be selected by the DIP switch. See the section on setting DIP switches in Chapter 3. 4-4 Troubleshooting and - Epson L-1000 | User Manual - Page 72
that the sprocket holes of the paper fit correctly over the sprockets. The paper guide may not be installed properly. See the section on continuous paper in Chapter 2. The paper supply may be stacked too far from the printer or not aligned with the tractor. Also, there may be some obstacle in the - Epson L-1000 | User Manual - Page 73
at its best, you should clean it thoroughly several times a year. Follow these steps to clean the printer. 1. Be sure the printer is turned off. 2. Remove the paper guide, tractor unit, and any installed options. 3. Use a soft brush to carefully clear away all dust and dirt. 4. If the outer case or - Epson L-1000 | User Manual - Page 74
get water on the printer mechanism or electronic components. l Do not use a hard or abrasive brush. l Do not spray the inside of the printer with lubricants; unsuitable oils can damage the mechanism. Contact your Authorized Epson Dealer if lubrication is needed. Troubleshooting and Maintenance 4-7 - Epson L-1000 | User Manual - Page 75
. 2. To remove the ribbon cartridge, lift it straight up and out of the printer. 3. Slide the print head to the middle of the printer. WARNING: If the printer has been used recently, the print head may be hot. Let it cool before attempting to replace the ribbon. 4-8 Troubleshooting and Maintenance - Epson L-1000 | User Manual - Page 76
the new ribbon, turn the ribbontightening knob in the direction of the arrow. 5. Push the new ribbon cartridge firmly into position, making sure the plastic hooks fit into the printer. Note: Press lightly on both sides of the cartridge to be sure the hooks are properly inserted. Troubleshooting and - Epson L-1000 | User Manual - Page 77
help feed-the ribbon into place. 7. Slide the print head from side to side to be sure it moves smoothly. Also check that the ribbon is not twisted or creased. 8. Insert the legs of the printer cover into the printer, then tilt the printer cover back into place. 4-10 Troubleshooting and Maintenance - Epson L-1000 | User Manual - Page 78
materials, as described below. 1. Turn off the printer. 2. Remove the paper guide and paper rest. 3. Unplug the power cable from the electrical outlet; then disconnect the interface cable from the printer. 4. Remove the ribbon cartridge and paper feed knob. Troubleshooting and Maintenance 4-11 - Epson L-1000 | User Manual - Page 79
the tractor cover, replace them now according to the instructions in Chapter 2. WARNING: Never hold the printer by the font compartment cover-even if you are only carrying the printer a short distance. This cover could come off and cause you to drop the printer. 4-12 Troubleshooting and Maintenance - Epson L-1000 | User Manual - Page 80
Chapter 5 Technical Specifications Printer Specifications 5-2 Printing 5-2 Paper 5-3 Mechanical 5-5 Electrical 5-5 Environmental 5-6 Interface Specifications 5-7 Initialization 5-11 Default Settings 5-12 Technical Specifications 5-1 - Epson L-1000 | User Manual - Page 81
Printer Specifications Printing Printing method: Printing speed: Pitch 10 10 12 12 Quality draft Letter Quality draft Letter Quality 24-pin impact dot matrix Characters/second/line 150 50 180 60 Printing direction: Line spacing: Printable columns: Character pitch 10 pitch 10 pitch double-wide - Epson L-1000 | User Manual - Page 82
Printer Specifications Buffer: Character fonts: Font Epson Draft Epson Roman Epson Sans Serif Courier ( 12, 15, proportional 10, 12, 15, proportional 10, 12, 15 10, 12, 15 10, 12, 15 10 10 10 10 Character tables: 96 standard ASCII characters 14 international character sets and a legal set Epson - Epson L-1000 | User Manual - Page 83
Printer Specifications Printable area: 3 mm (0.12") or more 9 mm (0.35") or more 101 to 242 mm (4.0 to 9.5") to 0.1 m m ) Continuous 0.0025 to 0.01 inches (0.065 to 0.25 mm) With continuous multi-part paper only; one original plus up to two copies. Maximum thickness: 0.01 inches (0.25 mm) 5-4 - Epson L-1000 | User Manual - Page 84
48 dots/character): 2 million MCBF: For all components excluding print head: 3 million lines MTBF: 4000 power on hours Print head life: 200 million strokes per wire Dimensions and weight; Height: 139 mm (5.5 inches) Width: 390 mm (15.3 inches) Depth: 320 mm (12.6 inches) Weight: 7 Kg (15 lb - Epson L-1000 | User Manual - Page 85
Printer Specifications Environmental Temperature: Humidity: Shock: Vibration: Operation: 41°F to 95°F (5°C to 35°C) Storage: -22°F to 140°F ( -30°C to 60°C) Operation: 10% to 80% without condensation - Epson L-1000 | User Manual - Page 86
are shown in the following table. signal Return Pin Pin 1 19 Signal STROBE 2 20 DATA 1 3 21 DATA 2 4 22 DATA 3 5 23 DATA 4 6 24 DATA 5 7 25 DATA 6 8 26 DATA 7 9 27 DATA 8 10 28 ACKNLG 11 29 BUSY 12 30 PE Direction Description IN IN IN IN IN IN IN IN IN OUT OUT - Epson L-1000 | User Manual - Page 87
Interface Specifications 5-8 Technical Specifications - Epson L-1000 | User Manual - Page 88
" refers to the direction of signal flow as viewed from the printer. 2. "Return" denotes the twisted-pair return, to be connected less than 0.2 microseconds. 4. Data transfer must be carried out by observing the ACKNLG or BUSY signal. (Data transfer to this printer can be carried out only after - Epson L-1000 | User Manual - Page 89
enabled or disabled, the on line/off line status, and the receipt of the data on/off control characters, DC1 or DC3. * While printing is disabled, character data is being received and acknowledged so that the printer can look for another DC1 character, which would allow it to resume printing. 5-10 - Epson L-1000 | User Manual - Page 90
the parallel interface (pin 31 goes LOW). 3. Software sends the ESC @ (Initialize the printer) command. These three kinds of initialization have slightly different ESC @ does not initialize the printer mechanism, clear the input data buffer, or clear the user-defined character set. Technical - Epson L-1000 | User Manual - Page 91
justification Cancelled Hardware: cleared Software: Deselected only ESC K = ESC * 0, ESC L = ESC * 1, ESC Y = ESC * 2, ESC Z = ESC * 3 In addition, when the printer is initialized by turning on the power or by an INIT signal, the data buffer is cleared of all text. 5-12 Technical Specifications - Epson L-1000 | User Manual - Page 92
. ESC D nn is a command with a variable number of parameters. ASCII Dec. Hex. Description Printer Operation ESC@ DC1 6 4 4 0 Initialize Printer 17 11 Select Printer DC3 DEL 19 13 Deselect Printer 127 7F Delete Character ESC < ESC U 1/0 ESCEMn 60 3C Select Unidirectional Mode (one line - Epson L-1000 | User Manual - Page 93
Command Summary ASCII Dec. Hex. Description Printer Operation (continued) ESC# BEL 35 23 Cancel MSB Control 7 07 Beeper Data Control CR CAN 13 0D Carriage Return 24 18 Cancel Line Vertical Motion FF ESC C n ESC C0 n ESC N n ESC 0 LF ESC 0 12 0C 67 43 67 43 78 4E 79 4F 10 0A 48 30 - Epson L-1000 | User Manual - Page 94
inch units Total units = n1 + (n2 x 256) Set Relative Print Position Moves current print position in units of 1/120 inch for draft and 1/180 for LQ Total units = n1 + (n2 x 256) Tab Horizontally Set Horizontal Tabs Up to 32 tabs (1-255) entered in ascending order Terminated by 0 Command Summary 6-3 - Epson L-1000 | User Manual - Page 95
Orator the Multi-Font 3: Prestige 8: Orator-S Module is 4: Script installed) Master Select To find the value of n add together the numbers typestyles you want to combine from the list below: 10 pitch: 0 decimal, 00hex; 12 pitch: 1,01; proportional: 2,02; condensed: 4,04; emphasized: 8,08; double- - Epson L-1000 | User Manual - Page 96
Command Summary ASCII Dec. Hex. Description Print Size and Character Width (continued) ESC SO ESC W 1/0 DC4 ESC w 1/0 14 0E Select Double-wide Mode (one line) 87 57 Turn Double-wide Mode On/Off 20 14 Cancel Double-wide Mode (one line) 119 77 Turn Double-high Mode On/Off Print Enhancement ESC - Epson L-1000 | User Manual - Page 97
Intercharacter Space n= number of units of space added to the space between characters (1-127) Units are 1/120 inch (draft) and 1/180 inch (LQ and proportional) Character Tables ESC t n 116 74 Select Character Tables Selects character table for codes 128-255 0: Italic 1: Extended Graphics 2: Re - Epson L-1000 | User Manual - Page 98
Set 0: USA 1: France 2: Germany 3:UK 4: Denmark 5: Sweden 6: Italy 7: Spain 8: Japan 9: Norway 10: Denmark II 11: Spain II 12: Latin America 13 of character; d1 = Body width of character; d2 = right space of character data: 3 bytes required for each column; super/subscripts require only 2 bytes per - Epson L-1000 | User Manual - Page 99
-density 24 32 Double-density 24 33 CRT III 24 38 Triple-density 24 39 Hex-density* 24 40 Horiz. dots/inch 60 120 120 240 40 90 60 120 90 180 360 * Adjacent dots cannot be printed in this mode. ESC ? s m 63 3F Reassign Graphics Mode s = K,L,Y, or Z m = mode (0-6) 6-8 Command Summary - Epson L-1000 | User Manual - Page 100
Appendix The Interface Boards A-2 Compatible interface A-2 Installing the interface board A-2 #8143 new serial interface board A-12 The Multi-Font Module A-14 Installing the Multi-Font Module A-16 Selecting the Multi-Font Module A-17 Appendix A-1 - Epson L-1000 | User Manual - Page 101
installing an optional interface board, follow these steps: 1. Turn off both the printer and your computer. 2. Disconnect the parallel cable from the printer and the computer. 3. Remove the printer cover. 4. Remove the paper guide. 5. Remove the ribbon cartridge. 6. Remove any installed printer - Epson L-1000 | User Manual - Page 102
is turned off and the power cord is unplugged. Also, try not to touch contacts on the circuit board of the printer because many of the components can be destroyed by the static electricity present in your body. 1. Unplug the power cable from the electrical outlet. 2. Remove - Epson L-1000 | User Manual - Page 103
The Interface Boards CAUTION: Use caution when removing or attaching the upper case to avoid damaging the printer. 3. To remove the upper case, first put the printer on a table or desk so that its front extends slightly over the edge, allowing access to the openings on the front of the underside of - Epson L-1000 | User Manual - Page 104
The Interface Boards 4. Insert a flat-blade screwdriver into either opening on the underside of the printer. Push the screwdriver up and press the handle of the driver toward the back of the printer to release the clips on the case. 5. Partially raise the upper case, taking care not to strain the - Epson L-1000 | User Manual - Page 105
on the main board, as shown below. Then lift off the cover and set it aside. 7. Remove the shield plate on the back of the printer by pressing in on the plastic clips located at the back of the plate. 8. Using a cross-head screwdriver, remove the screw labelled CG (shown on - Epson L-1000 | User Manual - Page 106
The Interface Boards Note: Two screws are labelled CG. Be sure to remove the one indicated in the illustration below. Installing the board There are two basic types of interface board designs-the frame ground (FG) wire is attached for one type and not attached for - Epson L-1000 | User Manual - Page 107
The Interface Boards 2. Carefully place the interface board next to the printer as shown below. Use the CG screw to connect the round end of the FG (frame ground) wire to the main board. 3. Holding the interface - Epson L-1000 | User Manual - Page 108
5. For all interface boards except the #8143 new serial interface board, set the DIP switches on the interface board according to the manual accompanying your interface board. (If you have the #8143 board, see page A-12.) 6. Reattach the upper case as described in the following section. Appendix A-9 - Epson L-1000 | User Manual - Page 109
The Interface Boards Attaching the upper case 1. Fit the hinges of the upper case into the openings in the lower case. Now partially lower the upper case. WARNING: Take care not to pinch the FG wire between the upper and lower cases. 2. Carefully insert the control panel cable into the connector - Epson L-1000 | User Manual - Page 110
When you use the optional interface, be sure to disconnect the printer cable from the printer's built-in parallel interface. You should never leave two interface cables connected at the same time. 5. Replace the ribbon cartridge, printer cover, and any other necessary parts or options. Appendix A-11 - Epson L-1000 | User Manual - Page 111
manual to match the computer with the interface. For the #8143 optional interface board, use the DIP switch settings shown below. These DIP switches are on the interface board, not on the printer. #8143 DIP switch settings DIP SW Function 1-1 Selects baud rate 1-2 Selects data A-12 Appendix - Epson L-1000 | User Manual - Page 112
#8143 baud rate selection The Interface Boards Note: During current loop operation, normal data transfer cannot be guaranteed at a baud rate higher than 1200 bps. Error handling When a parity error is detected, your printer prints an asterisk (*). All other errors are ignored. Appendix A-13 - Epson L-1000 | User Manual - Page 113
slot, the following fonts are available: Courier, Prestige, Script, OCR-A, OCR-B, Orator, and Orator-S. The Multi-Font Module is installed in the slot in the printer. See the manual that comes with the module for full information on using the Multi-Font Module. Note: Font modules #7400, #7401, #7402 - Epson L-1000 | User Manual - Page 114
The Multi-Font Module OCR-A The OCR-A and OCR-B fonts can be read by an optical character reader (also known as a document reader or image scanner) for input into another computer. Appendix A-15 - Epson L-1000 | User Manual - Page 115
the Multi-Font Module Follow these steps to install the Multi-Font Module: 1. Turn off the printer. 2. Remove the font compartment cover. 3. Insert the Multi-Font Module securely into the connector so that the small arrow on the font module points to - Epson L-1000 | User Manual - Page 116
by using the SelecType panel or by setting two DIP switches located inside the font compartment. To select the font using SelecType: 1. Turn on the printer and set it on line. 2. Press the FORM FEED button until both SelecType lights are on. This selects the Multi-Font Module. When you select - Epson L-1000 | User Manual - Page 117
The Multi-Font Module A-18 Appendix - Epson L-1000 | User Manual - Page 118
letters and symbols. baud rate A measure of the speed of data transmission. Usually equivalent to bits per second. bidirectional printing Printing digit (0 or 1), which is the smallest unit of information used by a printer or computer. See also number systems. byte A unit of information consisting - Epson L-1000 | User Manual - Page 119
is turned on, reset, or initialized. DIP switches Small switches in a printer that control various printer functions and set the default status of the printer when it is turned on or initialized. DIP stands for Dual In-line Package. dot matrix A method of printing in which each letter or symbol is - Epson L-1000 | User Manual - Page 120
qualities available on your printer. Draft uses a minimum number of dots per character for high- Epson Standard Code for Printers. This system of commands gives you software control of your printer from your computer. It is standard for all Epson printers and supported by most application software - Epson L-1000 | User Manual - Page 121
the computer and the printer. A parallel interface transmits data one character or code at a time, and a serial interface transmits data one bit at a Quality (LQ) One of two print qualities available on your printer. Letter Quality reduces the print speed and increases the number of dots per - Epson L-1000 | User Manual - Page 122
memory used as a buffer and for storing user-defined characters. All data stored in RAM is lost when the printer is turned off. self test A method of checking the operation of the printer. When the self test is run, the printer prints out its current DIP switch settings and the characters that are - Epson L-1000 | User Manual - Page 123
GL-6 Glossary - Epson L-1000 | User Manual - Page 124
feeder mode, 3-7 D Data dump, 3-4 Default settings, 5-12 DIP switches functions, 3-7-8, 3-14 setting, 3-5-6 Double-wide mode, 5-2 Draft font, 3-3, 3-8, 3-11-13, 5-3 Draft/line feed button, 1-17, 2-18, 3-3 Draft mode, 3-4, 3-7, 5-2 E Edge guides, 1-15, 2-3, 2-5, 2-17 Epson Extended Graphics, 3-16 - Epson L-1000 | User Manual - Page 125
direction, 3-7, 3-9, 5-2 Printer assembling, 1-7-12 cleaning, 4-6-7 cover, 1-2, 1-12, 2-3, 2-8 default settings, 5-12 specifications, 5-1-12 testing, 1-13-18 transporting, 4-11 unpacking, 1-2-4 voltage, 1-3 Print head, 1-8, 2-11, 4-3, 4-8 Print speed, 5-2 Problems, see Troubleshooting Proportional - Epson L-1000 | User Manual - Page 126
effects, 5-12 Specifications, 5-1-12 T Technical specifications, 5-1-12 Testing printer, 1-13-18 Top of form, 2-17-18, 5-12 Tractor cover, 1-2-3, 2-18 Tractor unit installing, 2-8-10 removing, 1-3-4 Tractor unit slot cover, 2-9 Transporting printer, 4-11 Troubleshooting, 4-1-12 Typestyles, 3-11 - Epson L-1000 | User Manual - Page 127
Quick Reference - Epson L-1000 | User Manual - Page 128
23 7 07 13 0D 24 18 Description Initialize Printer Select Printer Deselect Printer Delete Character Select Unidirectional Mode (one line) Turn ESC 3 n ESC A n ESC J n VT ESC B nn ESC b nn ESC / n 12 0C 67 43 67 43 78 4E 79 4F 10 0A 48 30 50 32 51 33 65 41 74 - Epson L-1000 | User Manual - Page 129
6B 33 21 80 50 77 4D 103 67 112 70 15 OF 15 OF 18 12 14 0E 14 0E a7 57 20 14 119 77 69 45 70 46 71 47 Letter Quality or Draft Select Typestyle Family Master Select Select 10 CPI Select 12 CPI Select 15 CPI Turn Proportional Mode On/Off Select Condensed Mode Select - Epson L-1000 | User Manual - Page 130
Graphics Mode Reassign Graphics Mode ON OFF See table on page 3-8 " " " " See table on page 3-8 " " Condensed Graphic ON Normal Italic OFF ON OFF 12 inches 11 inches A4 size Letter size ON OFF ON OFF 8 Kbytes 1 Kbytes Bidirectional Unidirectional See table on page 3-8 * I - Epson L-1000 | User Manual - Page 131
any damages or problems arising from the use of any options other than those designated as Original Epson Products by Seiko Epson Corporation. ActionPrinter is a trademark of Epson America, Inc. Centronics is a registered trademark of Centronics Data Computer Corporation. Epson and Epson ESC/P are - Epson L-1000 | User Manual - Page 132
90505 L-1000 KEY FEATURES: n Fast Print Speeds n Letter Quality Output n Tractor and Friction Feed n Four Built-In Letter Quality Fonts n Graphics Capability n Front Panel Control Operation n Quiet Printing n Perfect Companion Product for all MS-DOS@ Computers and Application Software n One - Epson L-1000 | User Manual - Page 133
- Epson L-1000 | User Manual - Page 134
- Epson L-1000 | User Manual - Page 135
Input buffer capacity 2-6 Print direction for graphics* 2-7 Character pitch 2-8 ON 12 inches A4 size (65 lines) ON ON 8 Kbytes Bidirect. OFF 11 OFF ON OFF OFF ON ON ON OFF OFF ON OFF OFF Country U.S.A. France Germany U.K. Denmark 1 Sweden Italy Spain 1 Font selection SW1-4 SW1-5 - Epson L-1000 | User Manual - Page 136
Printer Operation/Data Control Code Dec Hex Function ESC @ 64 40 Initialize Printer DC1 17 11 Select Printer DC3 19 13 Deselect Printer 9-9 9-10 9-10 9-10 9-11 9-11 9-12 9-12 9-12 9-12 9-13 9-13 Vertical Motion/Horizontal Motion FF 12 0C Form Feed ESC C 67 43 Select Page
-
 1
1 -
 2
2 -
 3
3 -
 4
4 -
 5
5 -
 6
6 -
 7
7 -
8
-
9
-
10
-
11
-
12
-
13
-
14
-
15
-
16
-
17
-
18
-
19
-
20
-
21
-
22
-
23
-
24
-
25
-
26
-
27
-
28
-
29
-
30
-
31
-
32
-
33
-
34
-
35
-
36
-
37
-
38
-
39
-
40
-
41
-
42
-
43
-
44
-
45
-
46
-
47
-
48
-
49
-
50
-
51
-
52
-
53
-
54
-
55
-
56
-
57
-
58
-
59
-
60
-
61
-
62
-
63
-
64
-
65
-
66
-
67
-
68
-
69
-
70
-
71
-
72
-
73
-
74
-
75
-
76
-
77
-
78
-
79
-
80
-
81
-
82
-
83
-
84
-
85
-
86
-
87
-
88
-
89
-
90
-
91
-
92
-
93
-
94
-
95
-
96
-
97
-
98
-
99
-
100
-
101
-
102
-
103
-
104
-
105
-
106
-
107
-
108
-
109
-
110
-
111
-
112
-
113
-
114
-
115
-
116
-
117
-
118
-
119
-
120
-
121
-
122
-
123
-
124
-
125
-
126
-
127
-
128
-
129
-
130
-
131
-
132
-
133
-
134
-
135
-
136
 |
 |
