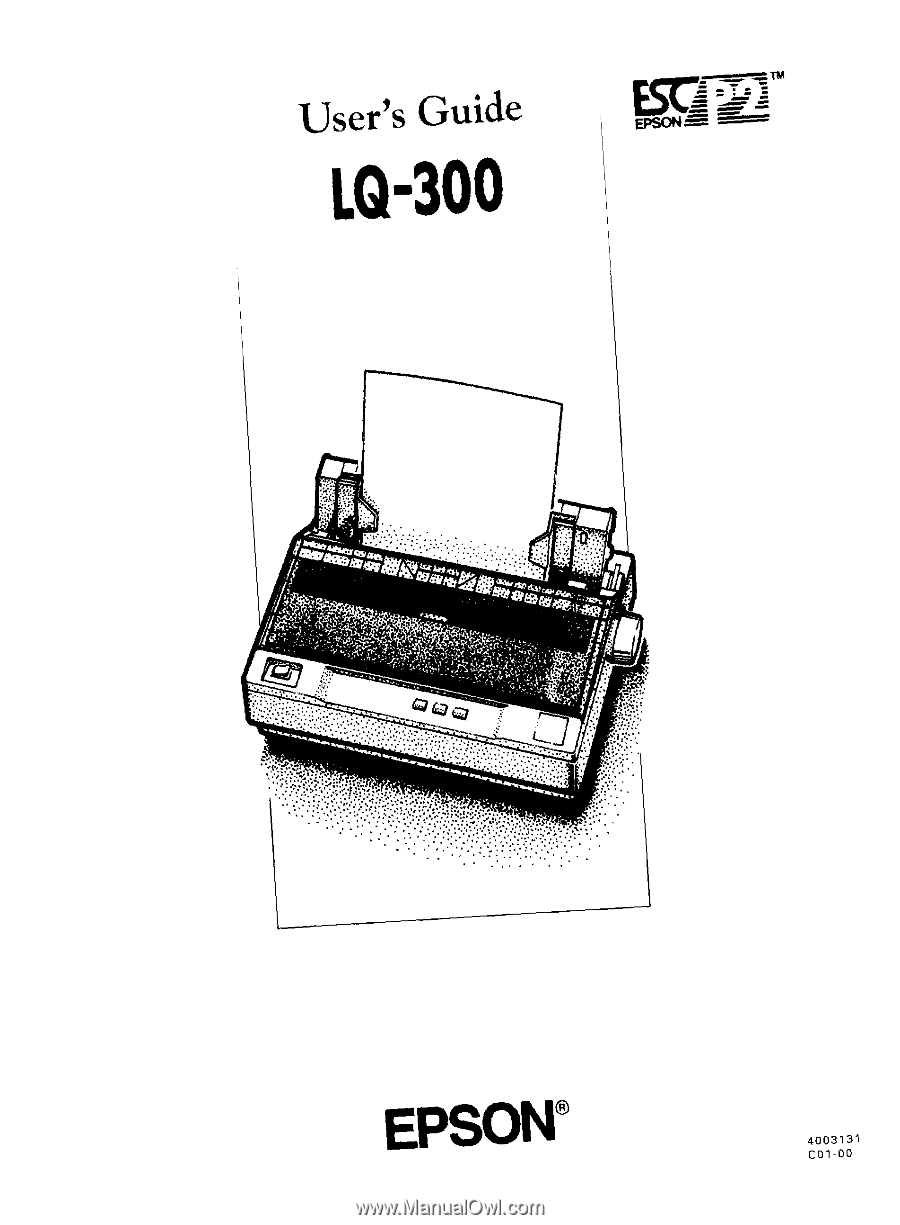
Epson LQ-300 User Manual
Epson LQ-300 - Impact Printer Manual
 |
View all Epson LQ-300 manuals
Add to My Manuals
Save this manual to your list of manuals |
Epson LQ-300 manual content summary:
- Epson LQ-300 | User Manual - Page 1
- Epson LQ-300 | User Manual - Page 2
- Epson LQ-300 | User Manual - Page 3
as Original EPSON Products or EPSON Approved Products by Seiko Epson Corporation. EPSON and EPSON ESC/P are registered trademarks and EPSON Stylus and EPSON ESC/P 2 are trademarks of Seiko Epson Corporation. Action Printer is a trademark and EPSON Connection is a service mark of Epson America, Inc - Epson LQ-300 | User Manual - Page 4
installation. This equipment generates, uses and can radiate radio frequency energy and, if not installed and used in accordance with the instructions, may cause harmful interference to radio or television reception, However, there is no guarantee that interference will not occur in a particular - Epson LQ-300 | User Manual - Page 5
following support services through the EPSON ConnectionSM at (800) 922-8911: Assistance in locating your nearest Authorized EPSON Reseller or Service Center Technical assistance with the installation, configuration, and operation of EPSON products Sales of the ESC/P® Reference Manual Epson technical - Epson LQ-300 | User Manual - Page 6
of the product. All claims under this guarantee MUST be supported by evidence of purchase, normally the bill of sale invoice, and it users are requested to contact the Service Co-ordinator Manager at Epson (UK) Limited. Epson (UK) Limited, or Epson Appointed Distributors, will at their discretion - Epson LQ-300 | User Manual - Page 7
. The guarantee does not cover visits to the user's premises or the repair or commissioning of the product on site. Use of options Epson (UK) Limited shall not be liable against any damages or problems arising from the use of any options or consumable products other than those designated as Original - Epson LQ-300 | User Manual - Page 8
The brown wire must be connected to the terminal in the plug marked with the letter L or coloured white. If damage occurs to the plug, replace the cord set or consult a qualified electrician. Replace fuses only with a fuse of the correct size and rating. vi - Epson LQ-300 | User Manual - Page 9
3 Important Safety Instructions 4 Chapter 1 Setting Up the Printer Unpacking the Printer 1-2 Choosing a Place for the Printer 1-3 Assembling the Printer 1-4 Installing the knob 1-4 Attaching the paper supports 1-5 Installing the ribbon cartridge 1-6 Plugging in the printer 1-9 Running the - Epson LQ-300 | User Manual - Page 10
-bin Cut-Sheet Feeder 2-29 Pull Tractor Unit 2-33 Color Upgrade Kit 2-35 Chapter 3 Troubleshooting Problems and Solutions 3-2 Power Supply 3-2 Power is not being supplied 3-2 Printing 3-3 The printer does not print 3-3 The print is faint or uneven 3-4 Dots are missing in printed characters - Epson LQ-300 | User Manual - Page 11
Printing Paper Mechanical Electrical Environmental Safety approvals Interface Specifications Parallel interface Serial interface Command Summary Sending printer commands Using the command summary General operation Paper feeding Page format Print position motion Font selection - Epson LQ-300 | User Manual - Page 12
Introduction Features Your EPSON® 24-pin dot matrix printer offers these outstanding features: High-speed printing. Upgrade Kit (C83211*) adds visual interest to printed documents with a color ribbon cartridge. Pull Tractor Unit (CS0030*) for printing continuous paper and multi-part forms (used - Epson LQ-300 | User Manual - Page 13
20 million tons. The Energy Star emblem does not represent EPA endorsement of any product or service. Finding Your Way Around This manual provides fully illustrated, step-by-step instructions for setting up and operating your printer. Chapter 1 describes how to unpack, set up, test, and connect the - Epson LQ-300 | User Manual - Page 14
Warnings, Cautions, and Notes Warnings must be followed carefully to avoid bodily injury. Cautions must be observed to avoid damage to your equipment. Notes contain important information and useful tips on the operation. of your printer. Introduction 3 - Epson LQ-300 | User Manual - Page 15
Read all of these instructions before you set up your printer. Follow all warnings and instructions marked on the printer. Unplug the printer from the wall outlet before you clean it, and use a damp cloth for cleaning, not liquid or aerosol cleaners. Do not use your printer near water or spill - Epson LQ-300 | User Manual - Page 16
shock. Except as specifically explained in the user's manual, do not attempt to repair the printer yourself. This could expose you to dangerous voltage points or other risks. Refer all servicing in those compartments to service personnel. Unplug the printer from the wall outlet and have it repaired - Epson LQ-300 | User Manual - Page 17
Setting Up the Printer Unpacking the Printer 1-2 Choosing a Place for the Printer 1-3 Assembling the Printer 1-4 Installing the knob 1-4 Attaching the paper supports 1-5 Installing the ribbon cartridge 1-6 Plugging in the printer 1-9 Running the Self Test 1-10 Connecting the Printer to Your - Epson LQ-300 | User Manual - Page 18
Unpacking the Printer Your printer box should include these items. Printout guide Knob Paper supports In some locations, the power cord is attached to the printer. 1-2 Setting Up the Printer - Epson LQ-300 | User Manual - Page 19
If you do not have the cut-sheet feeder now, store the printout guide at the back of the printer cover in case you need it later. Choosing a P/ace for the Printer When selecting a place to set up your printer, choose a convenient location that provides the following: A flat, stable surface Adequate - Epson LQ-300 | User Manual - Page 20
on a stand, follow these guidelines: Use a stand that supports at least 9 kg (19 lb). Never use a stand that tilts the printer. Always keep it level. Provide enough clearance below the stand and between the legs of the stand so your continuous paper flows smoothly. Place cables - Epson LQ-300 | User Manual - Page 21
Attaching the paper supports 1. Raise the paper guide. 2. Hold one of the wire paper supports and push the tips into the notches on the edge guide 3. Repeat for the other paper support. Lower the paper guide. Setting Up the Printer 1-5 - Epson LQ-300 | User Manual - Page 22
Installing the ribbon cartridge Before installing the ribbon cartridge, make sure the printer is turned off. 1. Open the printer cover to the upright position, then pull it up to remove it. Warning: Never move the print head while the printer is turned on; this can damage the printer. Also, if you - Epson LQ-300 | User Manual - Page 23
2. Slide the print head to the middle of the printer. 3. Turn the ribbon-tightening knob in the direction of the arrow to remove any slack from the ribbon so it is easier to install. Setting Up the Printer 1-7 - Epson LQ-300 | User Manual - Page 24
as shown; then press both sides of the cartridge down firmly to fit the plastic hooks into the printer slots. 5. Use a pointed object, such as a ball point pen, to guide the ribbon between the print head and ribbon guide. Turn the ribbon-tightening knob to help feed the ribbon into place; it should - Epson LQ-300 | User Manual - Page 25
, first move the print head to the center of the printer. Then grasp the ribbon cartridge handle on either side and lift it out of the printer. Plugging in the printer 1. Make sure the power switch on the printer is turned off. It is off when the O side of the switch is pressed down. 2. Check - Epson LQ-300 | User Manual - Page 26
Self Test The built-in self test function demonstrates that the printer is working properly. You can run the test with either print head prints directly on the platen. 1. Make sure the printer is turned off and the paper-release lever is pushed back to the single-sheet position. Raise the - Epson LQ-300 | User Manual - Page 27
LF/FF button, turn on the printer. Release the button after the Pause light flashes. The beeper sounds three times, indicating the printer is out of paper. 3. Slide the left edge guide until it locks in place at the triangular guide mark. Next, adjust the right edge guide to match the width of your - Epson LQ-300 | User Manual - Page 28
4. Slide a sheet of paper down firmly between the edge guides until it meets resistance. The printer loads the sheet and begins printing automatically. Caution: Always close the printer cover while the printer is printing. The printer cover helps the paper feed properly. 5. To stop printing - Epson LQ-300 | User Manual - Page 29
includes both a Centronics®-compatible parallel interface and an EIA-232D serial interface. Before you begin, place the printer upright, as shown below. (This makes it easier to connect the cable.) Connect your computer to the desired interface as described below. You can connect - Epson LQ-300 | User Manual - Page 30
interface. Squeeze the wire clips together until they lock in place on either side of the connector. 2. Guide the interface cable through the slot on the side of the printer as shown in the illustration on page 1-16 so that it does not block the paper supply. Note: If there is ground - Epson LQ-300 | User Manual - Page 31
Connecting to the serial interface 1. Turn off both the computer and the printer. Plug the serial cable connector securely into the printer's serial interface. Tighten the screws on either side of the connector. Setting Up the Printer 1-15 - Epson LQ-300 | User Manual - Page 32
2. Guide the interface cable through the slot on the side of the printer so that it does not block the paper supply. 3. Plug it to the ground connector at the back of the computer.) 4. Use the Printer Setting mode to change the baud rate, parity bit, data length, or ETX/ACK handshaking if necessary. See - Epson LQ-300 | User Manual - Page 33
system, follow the steps below to install the right driver for your printer. Your printer will work correctly for all your Windows programs, such LQ-570+ Stylus TM 800 LQ-870 ActionPrinter 3250 Any LQ printer EPSON printer 5. Choose the Install button. A dialog box may instruct you to insert - Epson LQ-300 | User Manual - Page 34
, you must choose either ActionPrinter 3260, LQ-150, LQ-860, or LQ-2550. The other printers cannot use color. ActionPrinter 3260 LQ-150 LQ-860 LQ-2550 LQ-570+ Stylus 800 LQ-870 ActionPrinter 3250 Any LQ printer EPSON printer If your software does not list the LQ-300, you may want to contact the - Epson LQ-300 | User Manual - Page 35
2-17 Adjusting the paper-thickness lever 2-17 Multi-part forms 2-19 Labels 2-20 Envelopes 2-21 Using the Printer Setting Mode 2-22 Printer setting descriptions 2-23 Changing the printer settings 2-25 Installing and Using Options 2-29 Single-bin Cut-Sheet Feeder 2-29 Pull Tractor Unit 2-33 - Epson LQ-300 | User Manual - Page 36
the beeper sounds three times. The light also flashes when you can tear off the last sheet of continuous paper at the edge of the printer cover. The Pause light goes on and the beeper sounds if an error occurs. Font 1 and Font 2 lights The green Font lights, 1 and 2, indicate the - Epson LQ-300 | User Manual - Page 37
self test. To start the self test, hold down the LF/FF button while you turn on the printer. For complete instructions, see page 1-10. Pause button Press the Pause button to stop the printer temporarily during printing or the self test. Press it again to resume activity. Paper Park Press the Font - Epson LQ-300 | User Manual - Page 38
of the available selections; stop when you reach the desired font. Your selection stays in effect until you change it again or turn off the printer. However, any font choices you make with your software will cancel your control panel selection. The table below shows how the Font lights appear for - Epson LQ-300 | User Manual - Page 39
Printing on Single Sheets You can use the paper guide to print on single sheets with a width of 182 page, follow these steps (these instructions also work when you use the pull or push tractor): 1. With paper loaded, hold down the Pause button until the printer beeps once and the Font lights begin - Epson LQ-300 | User Manual - Page 40
in your software program as described below. 1. When you install a software program, it normally asks you what printer you are using. Make sure you choose the correct printer. See Chapter 1 for instructions. 2. Many programs have an option that you can use to set the maximum lines per page. If you - Epson LQ-300 | User Manual - Page 41
If yes, use the tractor in the push tractor position. (The printer comes with the tractor installed in this position.) See the following section. Are yes, use the tractor as a pull tractor. See page 2-13 for instructions. If your documents require a more precise print position, use the optional pull - Epson LQ-300 | User Manual - Page 42
settings" on page 2-25. Here's how to load continuous paper using the push tractor: 1. Make sure the printer is turned off. Remove the paper guide and place the paper-release lever in the continuous paper position. 2. Release the sprocket units by pulling the sprocket locks forward. 2-8 Using - Epson LQ-300 | User Manual - Page 43
the scale on the printer as a guide. The printer prints to the right of the position marked 0. Push the sprocket lock lever back to lock it in place. Then slide the right sprocket unit to match the width of your paper, but do not lock it. Move the paper support so it is midway - Epson LQ-300 | User Manual - Page 44
; Otherwise the top-of-form position may be altered from the next page. Make sure your paper supply is positioned within 1 meter (3 feet) of the printer. 2-10 Using the - Epson LQ-300 | User Manual - Page 45
- Epson LQ-300 | User Manual - Page 46
the loading position. Switching back to single sheets To switch to single sheets, press the Font and LF/FF buttons at the same time; the printer feeds the paper backward into the paper-park position. Then follow the steps in "Loading single sheets" on page 2-5. Caution: Always tear off paper before - Epson LQ-300 | User Manual - Page 47
to step 5. Caution: When using the pull tractor, set the auto tear Off feature in the Printer Setting mode to off; otherwise the paper may jam. 1. Turn the printer off; then remove the paper guide. Pull the paper-release lever forward to the continuous paper position as shown in the illustration on - Epson LQ-300 | User Manual - Page 48
3. Lift the tractor forward to the mounting slot at the top of the printer and tilt it into place as shown below. Then push the tractor onto the posts until the notches snap into place. 4. Release the sprocket units by pulling the sprocket locks forward. 2-14 Using the Printer - Epson LQ-300 | User Manual - Page 49
and pull it up. Position the paper using the scale on the printer as a guide. The printer prints to the right of the position marked 0. Note: Make sure your paper supply is positioned within 1 meter (3 feet) of the printer. 6. Slide the left sprocket unit so that its sprockets match the position - Epson LQ-300 | User Manual - Page 50
the incoming paper from the printed paper, attach the paper guide. Hold it horizontally and fit its notches over the printer's mounting posts. Then slide the paper guide toward the back of the printer until you feel it click. 9. Slide the left edge guide to the center until it stops at the diamond - Epson LQ-300 | User Manual - Page 51
loading position. To eject the paper, tear off the paper entering the printer; then press the LF/FF button to feed the paper forward. Printing Paper In addition to printing on single sheets and continuous forms, your printer can also print on a wide variety of paper types, including multi-part - Epson LQ-300 | User Manual - Page 52
off and open the cover. The paper-thickness lever is on the left side of the printer. The numbers next to the lever indicate the thickness setting. For normal use, the lever should always to position 0. Note: When you choose lever positions 2-6, the print speed is reduced. 2-18 Using the Printer - Epson LQ-300 | User Manual - Page 53
Load multi-part forms with the tractor only, not in the cut-sheet feeder or paper guide. For instructions, see "Printing on Continuous Paper" on page 2-7. Use only multi-part forms that are -part forms, raise the paper guide as shown. Note: If you print on multi-part form without raising the paper - Epson LQ-300 | User Manual - Page 54
thickness lever should be set to 1. See page 2-13 for loading instructions. Because labels are especially sensitive to temperature and humidity, use them Appendix for specifications.) Do not leave labels loaded in the printer between jobs; they curl around the platen and may jam when you resume - Epson LQ-300 | User Manual - Page 55
Test" on page 1-10. Insert the wide edge of the envelope into the printer first, printable-side down. When you insert the envelope between the paper guides, push it firmly and hold it until it feeds into the printer. Use envelopes only under normal temperature and humidity conditions. Make sure the - Epson LQ-300 | User Manual - Page 56
has internal settings that control simple functions such as the page length and character set. These settings take effect each time you turn on the printer, so they are also called default settings. For most users, the factory settings are best, but you can change these settings if necessary. The - Epson LQ-300 | User Manual - Page 57
set the page length to 8 1/2, 11, 12, or 70/6 (the length of A4 paper) inches. Skip-over-perforation When you turn on this feature, the printer skips over the perforations of continuous paper, providing a 1-inch margin between the last line printed on one page and the first line printed on the - Epson LQ-300 | User Manual - Page 58
You can select the kind of printer commands used by your printer. When you select ESC/P 2TM, the printer emulates an EPSON ESC / P 2 printer. When you select IBM X24E, the printer operates as an IBM ProprinterTM X24E. If possible, choose an EPSON ESC/ P 2 printer in your software programs. This will - Epson LQ-300 | User Manual - Page 59
, and ETX/ACK These options are available only when the interface is set to Serial. See your computer manual for the appropriate settings. State reply For normal operation, leave this option set to Off (default). Changing the printer settings If you cannot use your software program to change the - Epson LQ-300 | User Manual - Page 60
Press the LF/FF to select the language. The printer prints the current settings in the language of your choice, and then stops. 5. Press the Font button now to print help text that guides you through the operations. The printed instructions include submenu tables that list all of the settings you - Epson LQ-300 | User Manual - Page 61
6. At this point, you are in Table B. Press the Font or LF/FF button to move through the printer settings listed in Table B, and notice how the control panel lights change to indicate your position. Table B Font lights 1 2 Pause light Setting Go to submenu - Epson LQ-300 | User Manual - Page 62
the Font button while in a submenu table. 9. When the control panel lights match your desired setting, press the Pause button to make your selection. The printer saves the new setting and returns to Table B. 10. Repeat steps 6 through 9 for each additional setting you want to change, or skip to step - Epson LQ-300 | User Manual - Page 63
bond paper ( 82 g/m2 or 22 lb) without reloading. Follow these steps to install the cut-sheet feeder: 1. Make sure the printer is turned off. Remove the paper guide. 2. If the tractor is installed in the pull-tractor position, remove it and reinstall it in the push-tractor position. 3. Make sure - Epson LQ-300 | User Manual - Page 64
triangular guide mark. Next, slide the right edge guide to roughly match the width of your paper. Slide the paper support midway between the edge guides. 6. Pull the paper-set levers all the way forward until the edge guides retract and lock open to allow for paper loading. 2-30 Using the Printer - Epson LQ-300 | User Manual - Page 65
edge guide. 9. Adjust the position of the right edge guide so that it matches your paper's width. Make sure the position of the guide allows the guide rollers. 11. To reinstall the paper guide, remove the wire paper supports from the edge guides of the paper guide. Insert the two stacker supports - Epson LQ-300 | User Manual - Page 66
12. Attach the paper guide to the cut-sheet feeder as shown below. 13. Open the printer cover. Place the printout guide in the middle. Close the printer cover. Note: The printout guide comes packed with your printer, not with the cut-sheet feeder. See "Unpacking the Printer" on page 1-2. 2-32 Using - Epson LQ-300 | User Manual - Page 67
continuous paper, fold the first printed page forward at the perforation affer it emerges from below the printer cover. This helps the printer feed the printed pages properly and prevents paper jams. To remove the paper guide from the cut-sheet feeder, press both release tabs and pull out the paper - Epson LQ-300 | User Manual - Page 68
the pull tractor to remove the slack. 7. See that the paper is not crooked or wrinkled and lock the sprocket units in place. 8. Reinstall the printer cover and the paper guide. 2-34 Using the - Epson LQ-300 | User Manual - Page 69
Upgrade Kit (C83211*) includes a color ribbon cartridge and a motor unit. Here's how to install the kit: 1. Turn off the printer and remove the printer cover. If the original ribbon cartridge is installed, remove it. Then slide the connector cover on the printer and pull it out as shown. 2. Install - Epson LQ-300 | User Manual - Page 70
the motor unit plug into the connector on the printer. 4. Slide the print head to the middle of the printer. Remove the retaining tape from the cartridge and then slide the movable ribbon guide on the color ribbon to the center of the cartridge. 5. Turn the ribbon-tightening knob in the direction of - Epson LQ-300 | User Manual - Page 71
6. Insert the ribbon cartridge into the printer as shown; then press both sides of the cartridge firmly to fit the plastic hooks into the printer slots. 7. Turn the ribbon-tightening knob to help feed the ribbon into place; it should not be twisted or creased. 8. Replace the printer cover. After you - Epson LQ-300 | User Manual - Page 72
and then install the black ribbon as shown on page 1-6. To remove the color ribbon, press down on the motor unit and pull out the cartridge as shown below. You do not have to remove the motor unit. 2-38 Using the - Epson LQ-300 | User Manual - Page 73
Chapter 3 Troubleshooting Problems and Solutions 3-2 Power Supply 3-2 Power is not being supplied 3-2 Printing 3-3 The printer does not print 3-3 The print is faint or uneven 3-4 Dots are missing in printed characters or graphics . . . . . 3-5 Printed characters are not what you expected 3-5 - Epson LQ-300 | User Manual - Page 74
dealer or qualified service person for assistance. Note: If you are an experienced user or a programmer, you can print a hexadecimal dump to isolate communication problems between the printer and computer. To into the outlet to determine whether the outlet is operating properly. 3-2 Troubleshooting - Epson LQ-300 | User Manual - Page 75
the printer beeps three times. The printer may be out of paper. Load paper in the printer. The printer sounds like it is printing, but nothing is printed. The ribbon cartridge may not be installed properly. See page 1-6. The ribbon may be worn out. Replace the ribbon cartridge. Troubleshooting 3-3 - Epson LQ-300 | User Manual - Page 76
qualified service person. The print is faint or uneven Printed characters have parts missing at the bottom. The ribbon cartridge may not be installed properly. See page 1-6. The printout is faint. The ribbon may be worn out. Replace the ribbon cartridge as described on page 1-6. 3-4 Troubleshooting - Epson LQ-300 | User Manual - Page 77
has come loose. Reinstall the ribbon cartridge as described on page 1-6. Printed characters are not what you expected The typestyles or characters you sent with your software did not print. Check that the software is correctly configured for your printer. For instructions, see page 1-16. The font - Epson LQ-300 | User Manual - Page 78
page length set by your software and adjust it if necessary. If you are using continuous paper, change the page length in the Printer Setting mode. See "Changing the printer settings" on page 2-25. Regular gaps occur in the printout. Skip-over-perforation may be on. Set skip-over-perforation to Off - Epson LQ-300 | User Manual - Page 79
sheet. Move the paper a little to the left. Paper feeding is crooked or the paper jams. Turn off the printer and pull out the paper. Insert a new sheet straight into the paper guide. Be sure you're using the right type of paper. See the paper specifications in the Appendix. Check to - Epson LQ-300 | User Manual - Page 80
1 meter (3 feet) of the printer. Make sure the printer cover is closed. Make sure the edge guide positions are correct. Position the edge guides at the diamond-shaped guide marks. Check that the holes on the the specified range. See the paper specifications in the Appendix. 3-8 Troubleshooting - Epson LQ-300 | User Manual - Page 81
light comes on. You may have tried to change the paper-release lever position while paper remained in the printer. Return the paper-release lever to the previous position and eject the paper. Then change the paper-release 's bin. Make sure the bin contains no more than 50 sheets. Troubleshooting 3-9 - Epson LQ-300 | User Manual - Page 82
. Look for a paper jam and remove it. Make sure the edge guide positions on the paper guide are correct. Position the edge guides at the diamond-shaped guide marks. There may be only one sheet left in the bin. Add are correct. See "Getting the results you expect" on page 2-6. 3-10 Troubleshooting - Epson LQ-300 | User Manual - Page 83
edge guides are positioned correctly. With the color upgrade installed, the printer does not operate properly The lights on the control panel do not go on. The motor in the color upgrade kit may not be installed or may not be installed correctly. Follow the instructions on page 2-35. Troubleshooting - Epson LQ-300 | User Manual - Page 84
properly for color printing. Use the program's setup (or install) procedure to check the printer settings and adjust as needed. If your software program is capable of sending control codes, is properly adjusted. The ribbon cartridge may not be installed properly. See page 2-35. 3-12 Troubleshooting - Epson LQ-300 | User Manual - Page 85
A-4 Mechanical A-6 Electrical A-7 Environmental A-7 Safety approvals A-8 Interface Specifications A-8 Parallel interface A-8 Serial interface A-8 Command Summary A-10 Sending printer commands A-10 Using the command summary A-10 General operation A-11 Paper feeding A-11 Page format A-11 - Epson LQ-300 | User Manual - Page 86
speed. Printing direction: Bidirectional logic-seeking for text and unidirectional for graphics. (Bidirectional for graphics can be selected with the Printer Setting mode or a software command.) Line spacing: 1/6 inch, 1/8 inch, or programmable in increments of 1/360 inch. Paper feed speed - Epson LQ-300 | User Manual - Page 87
Character fonts: Font Epson Draft Epson Roman Epson Sons Serif Epson Courier Epson Prestige Epson Script 10 cpi 12 cpi Scalable fonts: Font Epson Roman Epson Sans Serif Epson Roman T EPSON Sons Serif H Min pt 8 8 8 8 15 cpi Proportional I Max pt 32 32 32 32 Increments 2 Pt 2 Pt 2 Pt 2 Pt - Epson LQ-300 | User Manual - Page 88
sheets (CSF): Width: Length: Thickness: Weight: Single sheets (manual insertion): Width: Length: Thickness: Weight: Continuous paper: Width: the tractor. When using side-crimped multi-part forms, raise the paper guide to keep the printing position accurate. When using the push tractor, the printing - Epson LQ-300 | User Manual - Page 89
Labels: Size: Thickness: Weight: 101 to 254 mm (4.0 to 10.0 inches) width for backing sheet 63.5 x 23.8 mm (2.50 x 0.94 inches) minimum for a label 0.07 to 0.09 mm (0.0028 to 0.0031 inch) for backing sheet 0.16 to 0.19 mm (0.0063 to 0.0075 inch) total 68 g/m2 (17 lb) for label only Use only - Epson LQ-300 | User Manual - Page 90
tractor (with optional pull tractor C80030*) Cut-sheet feeder (option C80637*) Ribbon: Type Black ribbon cartridge (#7753) Film ribbon cartridge (#7768) Color ribbon cartridge (SO1 5077) Life expectancy at 48-dot character 2 million characters 0.2 million characters Black: 1 million characters - Epson LQ-300 | User Manual - Page 91
Dimensions and weight: (Without tractor unit) Width: 366 mm (14.4 inches) Depth: 275 mm (10.8 inches) Height: 141 mm (5.6 inches) Weight: Approx. 4.3 kg (9.5 lb) Electrical 120 V model: Rated voltage Input voltage range Rated frequency range Input frequency range Rated current Power consumption - Epson LQ-300 | User Manual - Page 92
0878 part 3, part 30) EN 55022 (CISPR Pub. 22) Class B Interface Specifications Your printer is equipped with an EIA-232D serial interface and a Centronics-compatible parallel interface. The printer switches automatically to the appropriate interface when it receives data. Parallel interface The - Epson LQ-300 | User Manual - Page 93
RS) Signal Ground (SG) Direction - out In out - Reverse Channel out Data Terminal Ready out (DTR/ER) Description Printer's chassis ground Printer has transmitted serial data Printer has received serial data Always positive Return path for data control signals Connected to Pin 20 Positive when - Epson LQ-300 | User Manual - Page 94
instruct the printer to print in a particular typeface, feed the paper a certain amount after printing each line, start printing at a particular place on the page, and so on. The commands your printer printer commands, see the comprehensive ESC/P Reference Manual published by EPSON. A-10 Appendix - Epson LQ-300 | User Manual - Page 95
General operation ASCII ESC @ ESC U 1/0 ESC EM n Dec. Hex. Description 64 40 Initialize Printer 85 55 Turn Unidirectional Mode On/ Off 25 19 Control Paper Loading/Ejecting n = "R" Eject a sheet Paper feeding ASCII CR FF LF ESC 0 ESC 2 ESC 3 n ESC + n - Epson LQ-300 | User Manual - Page 96
ASCII ESC C 0 n ESC N n ESC O ESC l n ESC Q n Dec. Hex. Description 67 43 Set Page Length in Inches n = Number of inches (1-22) 78 4E Set Bottom Margin for Continuous Paper n = Number of lines (1-127) 79 4F Cancel Top/Bottom Margin for Continuous Paper 108 6C Set Left Margin n = - Epson LQ-300 | User Manual - Page 97
ASCII ESC ( v nn ESC D nn HT ESC B nn VT ESC J n Dec. Hex. 40 118 28 76 68 44 9 09 66 42 11 OB 74 4A Description Set Relative Vertical Print Position ESC ( v 2 0 n1 n2 n = n1 + n2 x 256 n: Moves current print position in defined units Set Horizontal Tabs Up to 32 tabs (1-255) entered in - Epson LQ-300 | User Manual - Page 98
ASCII ESC I' ESC M ESC g ESC p l/O ESC x n ESC 4 ESC 5 ESC E ESC F ESC ! n Dec. H e x . Description 80 50 Select 10.5 Point, 10 cpi 77 4D Select 10.5 Point, 12 cpi 103 67 Select 10.5 Point, 15 cpi 112 70 Turn Proportional Mode On/Off 120 78 Select Draft or Letter Quality n = 0: Draft - Epson LQ-300 | User Manual - Page 99
ASCII ESC ( - nn ESC- 1/0 ESC q n Dec. 40 45 45 113 Hex. 28 2D 2D 71 Description Select Line /Score ESC ( -301 n1 n2 n1 = 1: Underline 2: Strikethrough 3: Overscore n2 = 0: Cancel score line selected by n 1: Single continuous line 2: Double continuous line 5: Single broken line 6: Double broken - Epson LQ-300 | User Manual - Page 100
Character handing ASCII ESC ( t nn Dec. Hex. 40 116 28 74 ESC t n 116 74 Description Assign Character Table ESC (t 30 d1 d2 d3 Assign character table set by d2 and d3 to table d1 d1 = 0, 1, 2, 3, "0", "1", "2", or "3" d2 d3 Character Table 0 0 Italic 1 0 PC 437 (USA, standard Europe) 1 16 PC - Epson LQ-300 | User Manual - Page 101
ASCII ESC R n ESC & nn ESC : 0 n 0 ESC % n ESC 6 ESC 7 ESC ( ^ nn Dec. 82 38 58 37 54 55 40 94 Hex. 52 26 3A 25 36 37 28 5E Description Select an International Character Set n = 0: U.S.A. 8: Japan 1: France 9: Norway 2: Germany 10: Denmark II 3: U.K. 11: Spain II 4: Denmark I 12: Latin - Epson LQ-300 | User Manual - Page 102
Bit image ASCII ESC * nn Dec. Hex. Description 42 2A Select Bit Image ESC * m n1 n2 data n = n1 + n2 x 256 n: Total columns Total data = (n1 + n2 x 256) x t f = Number of data bytes per column m: Specifies dot density Horizontal Vertical m density (dpi) density (dpi) Pins 0 60 1 120 - Epson LQ-300 | User Manual - Page 103
Graphics ASCII ESC ( G nn ESC . nn Dec. 40 71 46 Hex. 28 47 2E Description Select Graphics Mode ESC ( G 10 n n = 1 or 49 Cancel Graphics mode with ESC @ Print Raster Graphics ESC . c v h m n1 n2 data c = 0: Full graphics mode 1: Compressed mode v = 10, 20: Dot density for vertical in 3600/v dpi h - Epson LQ-300 | User Manual - Page 104
Character Tables These character tables are selected with the Printer Setting mode or by using a command. All tables except the italic character table are the same as the PC437 table for hex codes 00 through - Epson LQ-300 | User Manual - Page 105
PC850 (Multilingual) PC860 (Portuguese) PC863 (Canadian-French) PC865 (Norwegian) Appendix A-21 - Epson LQ-300 | User Manual - Page 106
PC861 (Icelandic) BRASCII (Braz. Portuguese) Abicomp (Braz. Portuguese) PC437 Greek (Greek)* A-22 A p p e n d i x - Epson LQ-300 | User Manual - Page 107
PC869 (Greek)* IS0 8859-7 (Latin/Greek)* PC853 (Turkish)* PC857 (Turkish)* Appendix A-23 - Epson LQ-300 | User Manual - Page 108
ISO Latin IT (Turkish)* PC855 (Cyrillic)* PC866 (Russian)* PC852 (East Europe)* A-24 Appendix - Epson LQ-300 | User Manual - Page 109
- Epson LQ-300 | User Manual - Page 110
ITALIC No characters are available for hex code 15 in the italic character table. A-26 Appendix - Epson LQ-300 | User Manual - Page 111
International character sets You can select one of the following international character sets with the ESC R command. For example, when you select "Italic France," the characters in the "France" row on the table below are used in the italic character table. Country ASCII code hex 23 24 40 5B 5C - Epson LQ-300 | User Manual - Page 112
Characters available with the ESC ( ^ command To print the characters in the table below, first send the ESC ( ^ command. A-28 Appendix - Epson LQ-300 | User Manual - Page 113
printer, 1-4-9 Attaching paper supports, 1-5 Auto line feed, 2-22, 2-24 tear off, 2-22-23 B Bit rate, 2-22, 2-25 Buttons, 2-2-3 C Changing printer you expect, 2-6 Graphic print direction, 2-22, 2-24 H Handle, ribbon cartridge, 1-9 Help for United States users, iii I Important safety information, v-vi - Epson LQ-300 | User Manual - Page 114
guide, 2-36 Multi-part forms, 2-19 N Non-Windows software, 1-18 O Options installing and using, 2-29-39 troubleshooting Plugging in the printer, 1-9 Power supply, troubleshooting, 3-2-3 Printer assembling, 1-4-9 on special paper, 2-17-21 troubleshooting, 3-3-6 Problems and solutions, 3-2 Pull tractor - Epson LQ-300 | User Manual - Page 115
25 T Tractor, 1, 2-7 pull, 2-7, 2-13-17 push, 2-7-12 unit, 2-33-34 Troubleshooting, 3-1-12 U Unpacking printer, 1-2 Upgrade kit, color, 2-35-38 Using command summary, A-10 control panel, 2-2-4 parallel interface, 1-13-14 printer, 2-1-38 serial interface, 1-13, 1-15-16 W Warnings, cautions, and notes - Epson LQ-300 | User Manual - Page 116
287 Nanking E. Road, Sec. 3, Taipei, Taiwan, R.O.C. Phone: (02) 717-7360 Fax: (02) 712-9164 EPSON ITALIA S.p.A. V.le F.lli Casiraghi 427 20099 Sesto S.Giovanni Ml, Italy Phone: 2-262331 Fax: 2-2440750 EPSON IBERICA S.A. Av. de Roma, 18-26 08290 Cerdanyola del Valles Barcelona, Spain Phone: 582.15 - Epson LQ-300 | User Manual - Page 117
-
 1
1 -
 2
2 -
 3
3 -
 4
4 -
 5
5 -
 6
6 -
 7
7 -
8
-
9
-
10
-
11
-
12
-
13
-
14
-
15
-
16
-
17
-
18
-
19
-
20
-
21
-
22
-
23
-
24
-
25
-
26
-
27
-
28
-
29
-
30
-
31
-
32
-
33
-
34
-
35
-
36
-
37
-
38
-
39
-
40
-
41
-
42
-
43
-
44
-
45
-
46
-
47
-
48
-
49
-
50
-
51
-
52
-
53
-
54
-
55
-
56
-
57
-
58
-
59
-
60
-
61
-
62
-
63
-
64
-
65
-
66
-
67
-
68
-
69
-
70
-
71
-
72
-
73
-
74
-
75
-
76
-
77
-
78
-
79
-
80
-
81
-
82
-
83
-
84
-
85
-
86
-
87
-
88
-
89
-
90
-
91
-
92
-
93
-
94
-
95
-
96
-
97
-
98
-
99
-
100
-
101
-
102
-
103
-
104
-
105
-
106
-
107
-
108
-
109
-
110
-
111
-
112
-
113
-
114
-
115
-
116
-
117
 |
 |