Epson TM T88II Technical Reference - Page 36
Installing the Driver - driver for windows 7
 |
View all Epson TM T88II manuals
Add to My Manuals
Save this manual to your list of manuals |
Page 36 highlights
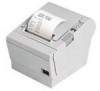
Note: Before removing the DC cable connector from the EPSON PS-180 (current model power supply) or the PS-170 (legacy model), make sure the power supply cable has been removed from the power supply unit, then grasp the arrow-marked section of the connector and pull straight out. 2.5.2 Connecting the Drawer Kick-out Cable WARNING: Prepare a drawer that meets printer specifications. Otherwise, the drawer kick-out solenoid or other parts in the drawer might burn and cause a fire. This may also cause the printer to malfunction at the same time. Do not insert a telephone line into the drawer kick-out connector. Doing so may damage the telephone line or printer. Connect the connector of the drawer kick-out cable to the printer. Figure 2-16 Connecting the drawer-kick cable 2.6 Installing the Driver To use the TM printer, either the Advanced Printer Driver (APD) (Windows driver) or the EPSON OPOS ADK (OCX driver) must be installed. For an outline of each driver, refer to "Introducing the Control Methods" (page 3-1). For details on installation methods, refer to the manual for the respective driver. Note: The TM-T88III also can be operated using the driver for TM-88II. Functions, however, are restricted as follows: • The maximum print speed is restricted to 120 mm/s {4.72"/s} or less. • Some baud rates (38400, 2400 bps) are not available in serial communications. ESC/POS commands are also available for directly controlling the printer without the user of a driver. For details on ESC/POS commands, also refer to "ESC/POS Commands" (page 3-5). 2-16 Setup Rev. A
-
 1
1 -
2
-
3
-
4
-
5
-
6
-
7
-
8
-
9
-
10
-
11
-
12
-
13
-
14
-
15
-
16
-
17
-
18
-
19
-
20
-
21
-
22
-
23
-
24
-
25
-
26
-
27
-
28
-
29
-
30
-
 31
31 -
 32
32 -
 33
33 -
 34
34 -
 35
35 -
 36
36 -
 37
37 -
 38
38 -
 39
39 -
 40
40 -
 41
41 -
42
-
43
-
44
-
45
-
46
-
47
-
48
-
49
-
50
-
51
-
52
-
53
-
54
-
55
-
56
-
57
-
58
-
59
-
60
-
61
-
62
-
63
-
64
-
65
-
66
-
67
-
68
-
69
-
70
-
71
-
72
-
73
-
74
-
75
-
76
-
77
-
78
-
79
-
80
-
81
-
82
-
83
-
84
-
85
-
86
-
87
-
88
 |
 |
