Fisher and Paykel CDV3-304H-N Installation Guide - Page 11
Installation, Electrical requirements, MODEL, VOLTAGE, MAX. CURRENT, FREQUENCY
 |
View all Fisher and Paykel CDV3-304H-N manuals
Add to My Manuals
Save this manual to your list of manuals |
Page 11 highlights
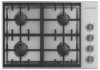
INSTALLATION ELECTRICAL REQUIREMENTS The electrical supply must be a correctly polarized, grounded 120 V AC, 60 Hz, single phase circuit suitable for the maximum current draw of the model, as detailed in the table below. Please verify your model's current draw by checking the rating label on the cooktop. If turning the product over to fit the elbow, place the product Required grounding method 1 on a protected surface and take This appliance is factory equipped with a power supply cord with a three-prong grounding care to ensure ignitors don't get plug (with polarized parallel blades). It must be plugged into a mating grounding type damaged. receptacle, connected to a correctly polarized 120 Volt circuit. If the circuit does not have a grounding type receptacle, it is the responsibility and obligation of the installer to have the existing receptacle changed to a properly grounded and polarized receptacle in accordance with all applicable local codes and ordinances by a qualified electrician. In the absence of local codes and ordinances, the receptacle replacement shall be in accordance with the National Electrical Code. The third prong should not, under ANY circumstances, be cut or removed. Gently lower the cooktop into the cutout 2 ensuring you have access below the countertop to fit and secure the brackets. MODEL VOLTAGE MAX. CURRENT FREQUENCY CDV3 36" models 120 V 0.10 A 60 Hz CDV3 30" models 120 V 0.10 A 60 Hz z This cooktop must be grounded. z Always disconnect electric supply cord from the wall outlet or service disconnect before servicing this appliance. z Observe all governing codes and ordinances when grounding, in absence of which, observe National Electrical Code ANSI / NFPA No. 70. 3 Fix the four supplied brackets to the base of the cooktop. The rating label is located on Tighten all screws to secure the the base of the 4 cooktop to the countertop. cooktop towards the front right. Ensure cooktop is level. A wiring diagram label is attached to the bottom of the cooktop. 11
-
 1
1 -
2
-
3
-
4
-
5
-
 6
6 -
 7
7 -
 8
8 -
 9
9 -
 10
10 -
 11
11 -
 12
12 -
 13
13 -
 14
14 -
 15
15 -
 16
16
 |
 |
