Frigidaire FHPC3660LS Complete Owner's Guide (English) - Page 10
Danger, Important
 |
View all Frigidaire FHPC3660LS manuals
Add to My Manuals
Save this manual to your list of manuals |
Page 10 highlights
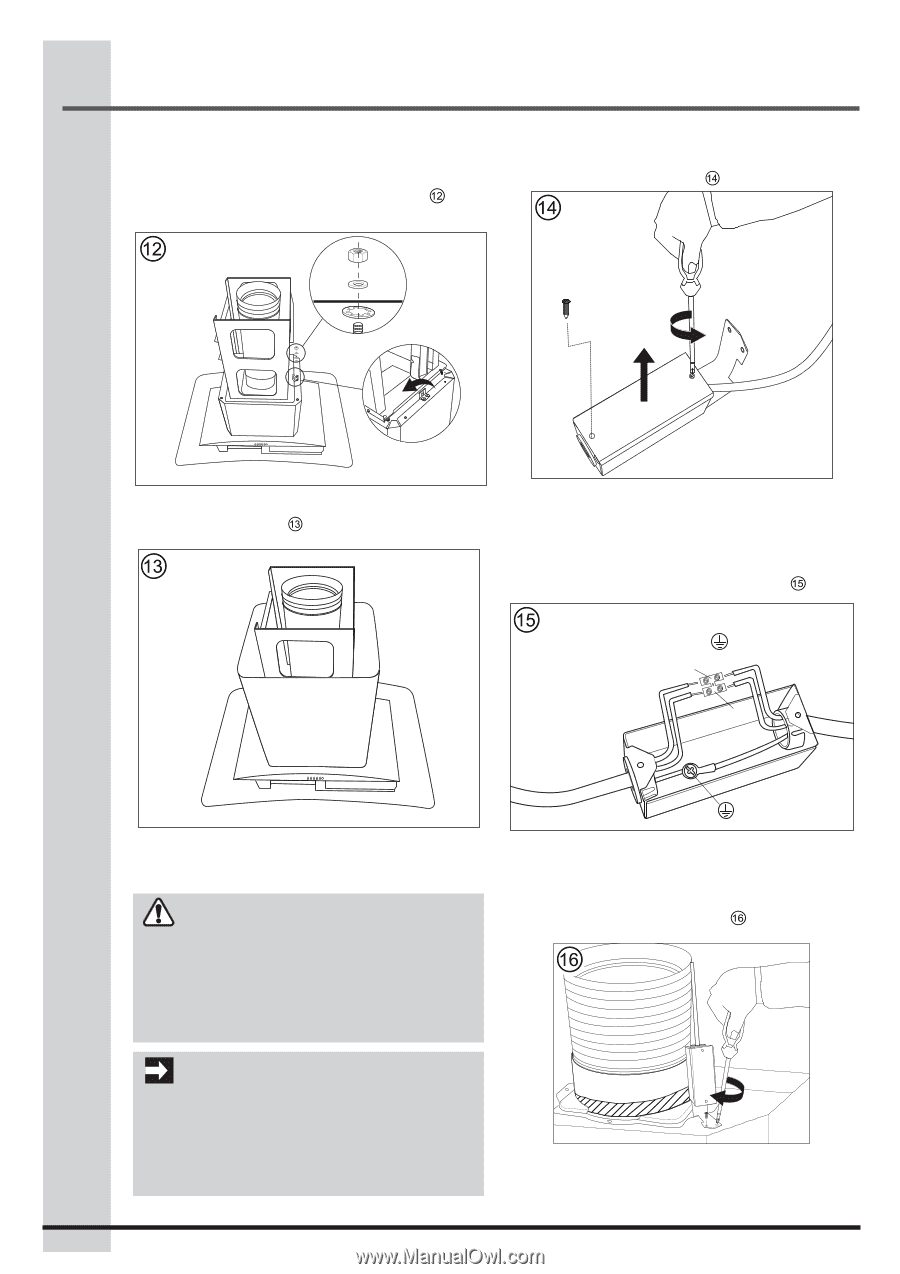
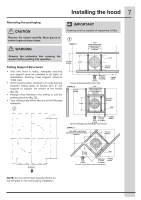
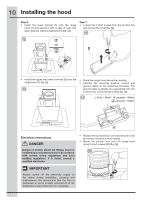
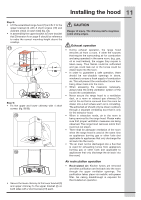
10 Installing the hood Step 6: • Install the lower bracket (5) onto the range hood (1) and secure it with 4 sets of nuts (13), span washers (14) and washers (15) (fig. ). Step 7: • Loosen the 2 short screws from the junction box and remove the cover (fig. ). • Install the upper and lower chimney (3) onto the range hood (1) (fig. ). • Place the range hood above the cooktop. • Connect the incoming positive, neutral and ground cables to the respective terminals. The ground cable is already pre-assembled onto the junction box to provide grounding (fig. ). L (live) = Black N (neutral) = White (ground) = Green L N Electrical connections DANGER Danger of electric shock! All fittings must be installed by a competent person in accordance with current wiring regulations and local building regulations. If in doubt, consult a qualified electrician. • Replace the junction box cover and secure it with previously removed 2 short screws. • Mount the junction box onto the range hood using 2 short screws (20) (fig. ). IMPORTANT Always switch off the electricity supply at the mains during installation, cleaning and maintenance. We recommend that the fuse is withdrawn or circuit breaker switched off at the distribution board while work is in progress.
-
 1
1 -
2
-
3
-
4
-
 5
5 -
 6
6 -
 7
7 -
 8
8 -
 9
9 -
 10
10 -
 11
11 -
 12
12 -
 13
13 -
 14
14 -
 15
15
 |
 |