Fujitsu FI 4220C Operator Manual - Page 57
Setting the SCSI ID, turn the scanner OFF. Disconnect the AC cable - image scanner
 |
View all Fujitsu FI 4220C manuals
Add to My Manuals
Save this manual to your list of manuals |
Page 57 highlights
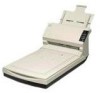
I Setting the SCSI ID The factory default setting for SCSI ID is "ID 5". The following shows the procedure for setting (changing) the SCSI ID. 1. If the scanner is ON, press the power button to turn the scanner OFF. Disconnect the AC cable from the outlet. 2. Set the device address using the SCSI ID switch on the back of the image scanner. 456 Click 23 78 901 ID No. 0 to7 8, 9 Description These address numbers can be set. The factory default value (SCSI ID = 5) is used for these numbers. 3. Press the power button to turn the scanner ON. When the scanner is turned ON, the SCSI ID set in step 2. is enabled. After setting the address number corresponding to the target SCSI ID, connect the AC cable to the outlet and turn on the scanner. 28 2.2 Connecting the Scanner to a PC
-
 1
1 -
2
-
3
-
4
-
5
-
6
-
7
-
8
-
9
-
10
-
11
-
12
-
13
-
14
-
15
-
16
-
17
-
18
-
19
-
20
-
21
-
22
-
23
-
24
-
25
-
26
-
27
-
28
-
29
-
30
-
31
-
32
-
33
-
34
-
35
-
36
-
37
-
38
-
39
-
40
-
41
-
42
-
43
-
44
-
45
-
46
-
47
-
48
-
49
-
50
-
51
-
 52
52 -
 53
53 -
 54
54 -
 55
55 -
 56
56 -
 57
57 -
 58
58 -
 59
59 -
 60
60 -
 61
61 -
 62
62 -
63
-
64
-
65
-
66
-
67
-
68
-
69
-
70
-
71
-
72
-
73
-
74
-
75
-
76
-
77
-
78
-
79
-
80
-
81
-
82
-
83
-
84
-
85
-
86
-
87
-
88
-
89
-
90
-
91
-
92
-
93
-
94
-
95
-
96
-
97
-
98
-
99
-
100
-
101
-
102
-
103
-
104
-
105
-
106
-
107
-
108
-
109
-
110
-
111
-
112
-
113
-
114
-
115
-
116
-
117
-
118
-
119
-
120
-
121
-
122
-
123
-
124
-
125
-
126
-
127
-
128
-
129
-
130
-
131
-
132
-
133
-
134
-
135
-
136
-
137
-
138
-
139
-
140
-
141
-
142
-
143
-
144
-
145
-
146
-
147
-
148
-
149
-
150
-
151
-
152
-
153
-
154
-
155
-
156
-
157
-
158
-
159
-
160
-
161
-
162
-
163
-
164
-
165
-
166
-
167
-
168
-
169
-
170
-
171
-
172
-
173
-
174
-
175
-
176
-
177
-
178
-
179
-
180
-
181
-
182
-
183
-
184
-
185
-
186
-
187
-
188
-
189
-
190
-
191
-
192
-
193
-
194
-
195
-
196
 |
 |
