Fujitsu ST4121 User Guide - Page 59
Checking the full computer name and workgroup, Setting [File and Printer Sharing for Microsoft
 |
View all Fujitsu ST4121 manuals
Add to My Manuals
Save this manual to your list of manuals |
Page 59 highlights
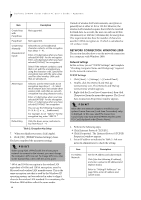
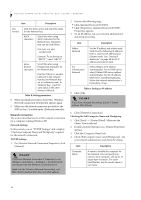
Wireless LAN User's Guide Item Description For Infrastructure Network Select [Obtain an IP address automatically]: For the DNS server, select [Obtain DNS server address automatically]. For the IP address, DNS server, and default gateway, follow the network administrator's instructions, if any. Table 3: Setting an IP Address 6. Click [OK]. The [Local Area Connection Properties] window appears again. 7. Click [OK]. When a message appears prompting you to restart the computer, click [Yes]. Checking the full computer name and workgroup 1. Click [Start] -> [Settings] -> [Control Panel]. 2. Double-click the [System] icon. [System Properties] appears. 3. Click the [Network Identification] tab. 4. Check [Full computer name] and [Workgroup]. Ask your network administrator and check the setting. Sharing In this section, you set sharing of the drive, folder, and printer. You only need to set this when you are sharing files or a printer with other computers on the network. When you share a drive, folder, or printer, you can use them from any computer on the network. Setting [File and Printer Sharing for Microsoft Networks] 1. Click [Start] -> [Settings] -> [Control Panel]. 2. Double-click the [Network and Dial-up Connections] icon. The [Network and Dial-up Connections] windows appears. 3. Right click the [Local Area Connection], then click [Properties] from the menu that appears. [Local Area Connection Properties] appears. POINT More than one network adapter is installed in your system if more than one [Local Area Connection] entry is displayed. In this case, select the [Local Area Connection] entry with [Intersil PRISM Wireless LAN PCI Card] displayed under [Device Name]. Item Description Full Computer Name Workgroup A name to identify the computer on the network. You can specify any name to each computer. For easier identification, use the model name or user name. A name for the network group: ■ AdHoc Network: Specify the same name to all computers within the same network. ■ Infrastructure Network: Specify a workgroup name to connect to. To change the setting, click [Properties], and follow the instructions on the screen. [System Properties] appears again. Table 4: Checking computer name and workgroup 5. Click [OK]. When a message appears prompting you to restart the computer, click [Yes]. 4. If [File and Printer Sharing for Microsoft Networks] is displayed in the list, make sure that it is checked. If it is not checked, check it and click [OK]. You do not have to perform the following steps. Go to the next section, entitled "Sharing Files." If [File and Printer Sharing for Microsoft Networks] is not found in the list, click [Install], and perform Step 5 and subsequent steps. When you click [Install], the [Select Network Component Type] window appears. 5. Perform the following steps. ■ Click [Service]. ■ Click [Add]. The [Select Network Service] window appears. 6. Perform the following steps. ■ Click [File and Printer Sharing for Microsoft Networks]. ■ Click [OK]. You will go back to [Local Area Connection Properties], and [File and Printer Sharing for Microsoft Networks] is added to the list. 7. Click [OK]. POINT If you have changed the setting, [Close] is shown instead. Click [Close]. 49
-
 1
1 -
2
-
3
-
4
-
5
-
6
-
7
-
8
-
9
-
10
-
11
-
12
-
13
-
14
-
15
-
16
-
17
-
18
-
19
-
20
-
21
-
22
-
23
-
24
-
25
-
26
-
27
-
28
-
29
-
30
-
31
-
32
-
33
-
34
-
35
-
36
-
37
-
38
-
39
-
40
-
41
-
42
-
43
-
44
-
45
-
46
-
47
-
48
-
49
-
50
-
51
-
52
-
53
-
 54
54 -
 55
55 -
 56
56 -
 57
57 -
 58
58 -
 59
59 -
 60
60 -
 61
61 -
 62
62 -
 63
63 -
 64
64 -
65
-
66
-
67
-
68
-
69
-
70
-
71
-
72
-
73
-
74
 |
 |