Garmin Edge 1000 Quick Start Manual - Page 5
History, ANT+ Sensors - speed sensor
 |
View all Garmin Edge 1000 manuals
Add to My Manuals
Save this manual to your list of manuals |
Page 5 highlights
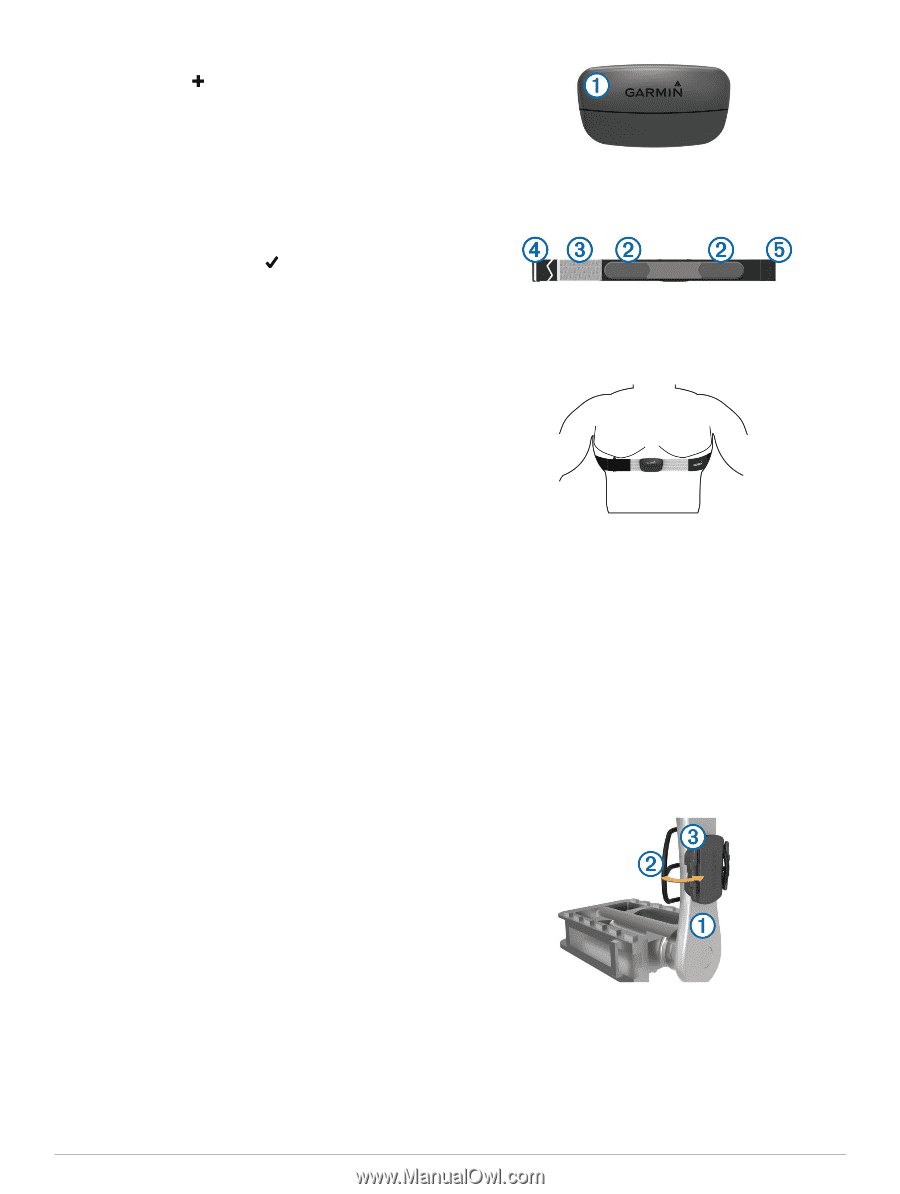
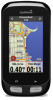
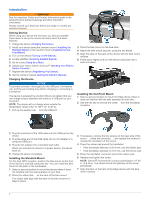
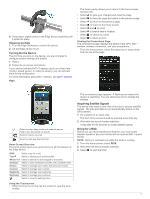
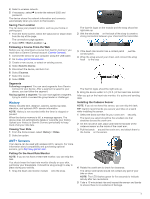
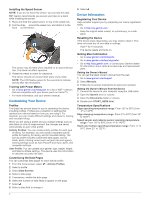
4 Select a wireless network. 5 If necessary, select to enter the network SSID and password. The device stores the network information and connects automatically when you return to this location. Saving Your Location You can save your present location, such as your home or parking spot. 1 From the home screen, select the status bar or swipe down from the top of the page. The connections page appears. 2 Select GPS > Mark Location > . Following a Course From the Web Before you can download a course from Garmin Connect, you must have a Garmin Connect account (Garmin Connect). 1 Connect the device to your computer using the USB cable. 2 Go to www.garminconnect.com. 3 Create a new course, or select an existing course. 4 Select Send to Device. 5 Disconnect the device, and turn it on. 6 Select Courses. 7 Select the course. 8 Select RIDE. Segments Following a segment: You can send segments from Garmin Connect to your device. After a segment is saved to your device, you can follow the segment. Racing against a segment: You can race against a segment, trying to match or exceed the group leader or challenger. History History includes time, distance, calories, speed, lap data, elevation, and optional ANT + sensor information. NOTE: History is not recorded while the timer is stopped or paused. When the device memory is full, a message appears. The device does not automatically delete or overwrite your history. Upload your history to Garmin Connect periodically to keep track of all your ride data. Viewing Your Ride 1 From the home screen, select History > Rides. 2 Select an option. The Garmin logos on the module and the strap should be right-side up. 2 Wet the electrodes Á on the back of the strap to create a strong connection between your chest and the transmitter. 3 If the heart rate monitor has a contact patch Â, wet the contact patch. 4 Wrap the strap around your chest, and connect the strap hook à to the loop Ä. The Garmin logos should be right-side up. 5 Bring the device within 3 m (10 ft. ) of the heart rate monitor. After you put on the heart rate monitor, it is active and sending data. Installing the Cadence Sensor NOTE: If you do not have this sensor, you can skip this task. TIP: Garmin recommends you secure your bike on a stand while installing the sensor. 1 Select the band size that fits your crank arm À securely. The band you select should be the smallest one that stretches across the crank arm. 2 On the non-drive side, place and hold the flat side of the cadence sensor on the inside of the crank arm. 3 Pull the bands Á around the crank arm, and attach them to the hooks  on the sensor. ANT + Sensors Your device can be used with wireless ANT + sensors. For more information about compatibility and purchasing optional sensors, go to http: / / buy .garmin .com. Putting On the Heart Rate Monitor NOTE: If you do not have a heart rate monitor, you can skip this task. You should wear the heart rate monitor directly on your skin, just below your breastplate. It should be snug enough to stay in place during your activity. 1 Snap the heart rate monitor module À onto the strap. 4 Rotate the crank arm to check for clearance. The sensor and bands should not contact any part of your bike or shoe. NOTE: The LED flashes green for five seconds to indicate activity after two revolutions. 5 Take a 15 minute test ride and inspect the sensor and bands to ensure there is no evidence of damage. 5
-
 1
1 -
 2
2 -
 3
3 -
 4
4 -
 5
5 -
 6
6 -
 7
7 -
 8
8
 |
 |