Garmin Foretrex 201 Owner's Manual
Garmin Foretrex 201 - Hiking GPS Receiver Manual
 |
UPC - 753759045302
View all Garmin Foretrex 201 manuals
Add to My Manuals
Save this manual to your list of manuals |
Garmin Foretrex 201 manual content summary:
- Garmin Foretrex 201 | Owner's Manual - Page 1
Foretrex™ 201 personal navigator® owner's manual - Garmin Foretrex 201 | Owner's Manual - Page 2
and supplemental information concerning the use and operation of this and other Garmin products. Garmin®, AutoLocate®, Personal Navigator®, MapSource®, TracBack®, and BlueChart® are registered trademarks and PanTrack™ and Foretrex™ are trademarks of Garmin Ltd. or its subsidiaries and may not - Garmin Foretrex 201 | Owner's Manual - Page 3
Package Contents: 1 Foretrex 201 Unit 1 Strap Extension 1 Wrist Strap 1 Owner's Manual 1 Quick Start Guide 1 Cradle for AC and PC connection 1 AC Charging Cable 1 PC Interface Cable Check to see that your package includes the items listed above. If any parts are missing, contact your Garmin dealer - Garmin Foretrex 201 | Owner's Manual - Page 4
for help. The Foretrex 201 does not contain any user-serviceable parts. Repairs should only be made by an authorized Garmin service center. Unauthorized repairs or modifications could result in permanent damage to the equipment and void your warranty and your authority to operate this device. ii - Garmin Foretrex 201 | Owner's Manual - Page 5
License Agreement BY USING THE Foretrex 201, YOU AGREE TO BE BOUND BY THE TERMS AND CONDITIONS OF THE FOLLOWING SOFTWARE LICENSE AGREEMENT. PLEASE READ THIS AGREEMENT CAREFULLY. Garmin grants you a limited license to use the software embedded in this device (the "Software") in binary executable form - Garmin Foretrex 201 | Owner's Manual - Page 6
period, Garmin will at its sole option repair or replace any components that fail in normal use. Such repairs or replacement will be made at no charge to the to you. Garmin retains the exclusive right to repair or replace the unit or software or offer a full refund of the purchase price at its sole - Garmin Foretrex 201 | Owner's Manual - Page 7
, SO51 9AQ U.K. Tel. 44/1794.519944 Fax. 44/1794.519222 The Garmin Foretrex 201 has no user-serviceable parts. Should you ever encounter a problem with your unit, please take it to an authorized Garmin dealer for repairs. The Foretrex 201 is sealed shut. Any attempt to open the case to change or - Garmin Foretrex 201 | Owner's Manual - Page 8
, it is the sole responsibility of the owner/operator of the Foretrex 201 to secure the GPS unit so that it will not cause damage or personal injury in the event of an accident. Do not mount the Foretrex 201 over airbag panels or in a place where the driver or passengers are likely to have an impact - Garmin Foretrex 201 | Owner's Manual - Page 9
the Foretrex 201 is a precision electronic NAVigation AID (NAVAID), any NAVAID can be misused or misinterpreted and, therefore, become unsafe. WARNING: This unit contains a Lithium-ion rechargeable battery. The unit must be disposed of properly. Use only under specified operating instructions - Garmin Foretrex 201 | Owner's Manual - Page 10
, such as waypoints and routes will be retained in the unit's memory without the need for external power. It is always a good practice to back up important user data by manually recording it or downloading it to a PC (transferring it to MapSource). Immersing the Unit in Water The Foretrex 201 is - Garmin Foretrex 201 | Owner's Manual - Page 11
Foretrex 201 Overview 1 Using the Buttons 2 Using the Wrist Strap 3 Charging the Battery 5 Connecting the Foretrex 201 to your Computer 5 Turning on the Foretrex 201 9 Map Page 10 Using the Map Page 10 Map Page Options 10 Navigation Page 13 Using the Navigation Page 13 Navigation Page - Garmin Foretrex 201 | Owner's Manual - Page 12
Waypoint 26 Route Setup 37 Route Setup Options 37 Editing a Route 38 Navigating a Route 40 Using the Setup Menu 41 Setup Menu: Set Interface 51 Set Interface Page 51 Setup Menu: Set System 52 Set System Page 52 GPS Mode 53 Owner Info 53 Appendix 54 Specifications 54 Accessories 55 Data - Garmin Foretrex 201 | Owner's Manual - Page 13
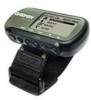
rugged, and waterproof Foretrex 201 unit is perfect for easily maneuver- ing from one waypoint to the next. With handy and convenient wrist-strap design, the powerful Foretrex 201 allows you to store up to 500 waypoints and 20 routes in the unit's memory. The unit also provides PC and external power - Garmin Foretrex 201 | Owner's Manual - Page 14
release to turn display backlight on and off • Press and hold PAGE, then simultaneously press POWER to reset the unit The GOTO button: • Press to initiate a GOTO (navigate to a specific destination/waypoint) The PAGE button: • Press to switch between the main Pages • Press to back out or escape out - Garmin Foretrex 201 | Owner's Manual - Page 15
, wear the Foretrex 201 like a watch, with the top face of the unit oriented towards the sky. A strap extension provides additional length and easily attaches to the existing strap. To fasten the Foretrex 201 to your wrist: 1. With the strap open, place the Foretrex 201 on your wrist. 2. Slide the - Garmin Foretrex 201 | Owner's Manual - Page 16
While holding the Foretrex 201 steady with one hand, use a jeweler's band pin removing tool or a very soft flat head screwdriver. Catch the spring bar's loaded stem and pull it back enough for the band to clear the case's edge. To replace the wrist strap on the Foretrex 201: 1. To reinstall, insert - Garmin Foretrex 201 | Owner's Manual - Page 17
as the battery ages. Overview Getting Started Snapping the Foretrex 201 into the cradle Serial Connector Back of Cradle Connecting the Foretrex 201 to your Computer To connect your Foretrex 201 to your computer, place the unit in the cradle as described above. Connect the PC Interface Cable to - Garmin Foretrex 201 | Owner's Manual - Page 18
Started Turning on the Foretrex 201 After the Foretrex 201 is completely charged, it is ready for use. Allow the Foretrex 201 time to track satellites and determine your position the first time you use it. Upon startup, the GPS signal bar appears. As the Foretrex 201 locates more satellites and - Garmin Foretrex 201 | Owner's Manual - Page 19
Using the Main Pages All of the information needed to operate the Foretrex 201 is found on six main 'pages' (or display screens). These pages are the Satellite, Map, Navigation, Trip Computer, Timer (if enabled), and Main Menu. Switching Between the Main Pages Simply press the PAGE button to switch - Garmin Foretrex 201 | Owner's Manual - Page 20
your Foretrex 201 for the first time, have moved over 500 miles from the location you last used your Foretrex 201 unit, or have not used your Foretrex 201 in more the Advanced Sky View page, you can set the orientation of the map by toggling between Orient Sky Ahead and Orient Sky Northward. You can - Garmin Foretrex 201 | Owner's Manual - Page 21
Adjusting the Backlighting and Contrast If the lighting conditions make it hard for you to see the screen, adjust the contrast or turn on the backlight. You may also make these adjustments through the Main Menu Page. See the "Setup Menu: Set Display" section on page 46 for more information. To use - Garmin Foretrex 201 | Owner's Manual - Page 22
travel (the animated figure 'walks') and leaves a 'trail' (track log). Waypoint names and symbols are also shown on the map. To help you better visualize the 'real world', Foretrex 201 automatically rotates the map as you move, so that waypoints that are ahead of you are always displayed above the - Garmin Foretrex 201 | Owner's Manual - Page 23
a GOTO, MARK a waypoint, or ZOOM In or Out. The following option is shown only if you are actively navigating to a destination: Stop Navigation: Press ENTER when this is highlighted to stop any active navigation. Navigation refers to any time you are using the Foretrex to guide you to a destination - Garmin Foretrex 201 | Owner's Manual - Page 24
the PAGE button until you see the Map Page. Press ENTER to display the Map Page Options. 2. Press UP/DOWN to highlight 'MEASURE DISTANCE' from the options menu. Press ENTER. 3. Press ENTER when the field to the right of 'FROM' is highlighted to select a waypoint from which to measure. Use the arrow - Garmin Foretrex 201 | Owner's Manual - Page 25
. For a complete list and description of the data fields available in the Foretrex, refer to page 55-56. Restore Defaults: Press ENTER when this is highlighted to restore the unit to the default Navigation Page settings. When you are navigating to a destination the following option is also displayed - Garmin Foretrex 201 | Owner's Manual - Page 26
list and description of the data fields available in the Foretrex, refer to page 55-56. Reset Max Speed: Press ENTER when this is highlighted to reset the Maximum Speed achieved during a trip. Reset Trip Data: Press ENTER when this is highlighted to reset the trip time, trip distance (odometer - Garmin Foretrex 201 | Owner's Manual - Page 27
to set the timer to count down. For more information about setting up the timer, refer to the "Setup Menu: Set Timer" section of this guide. Main Pages Timer Page Timer Page: Timer running Set Timer Page: Show Timer 15 - Garmin Foretrex 201 | Owner's Manual - Page 28
the time entered in the steps above. For complete information about the 'Set Timer' Page, refer to the "Setup Menu: Set Timer" section in this manual. - Garmin Foretrex 201 | Owner's Manual - Page 29
time is entered, you can use the timer for a variety of applications, such as running and sailboat racing. The synchronization and quick reset capabilities make the Foretrex an extremely handy timer. To stop and start the timer: 1. Press the PAGE button until the Timer Page is displayed. 2. To start - Garmin Foretrex 201 | Owner's Manual - Page 30
Menu Page Basics The Main Menu Page gives you access to the Foretrex 201 unit's waypoints, tracks, routes, and setup screens. When the Main Menu Page is displayed, use the UP or DOWN buttons to highlight the desired sub-page (Waypoints, Tracks, Routes, or Setup), and press ENTER to open that page - Garmin Foretrex 201 | Owner's Manual - Page 31
the alphabetical tab containing the desired waypoint, then press the ENTER button. 4. Press the UP or DOWN button to select the waypoint and press the ENTER button to display the Review Waypoint Page. Main Pages Waypoints Menu Page Waypoints Menu Mark Waypoint Page List All Waypoints Page 19 - Garmin Foretrex 201 | Owner's Manual - Page 32
see a listing of the nine closest waypoints by name and distance from your location. Waypoints Menu Nearest Waypoints Page 3. Press the UP or DOWN button to select the waypoint and press the ENTER button to display the Review Waypoint Page. To delete all waypoints: 1. From the Main Menu Page press - Garmin Foretrex 201 | Owner's Manual - Page 33
. Highlight OK? and press ENTER to save the waypoint. You may also edit elements of an existing waypoint using the same methods. The only difference is that you will be editing from the Waypoint Review Page instead of the Mark Waypoint Page. Main Pages Waypoints Menu Page Mark Waypoint Page 21 - Garmin Foretrex 201 | Owner's Manual - Page 34
change the symbol: 1. From the Main Menu Page press the UP or DOWN button to highlight 'MARK'. Press the ENTER button to display the Mark Waypoint Page. 2. Press the UP or DOWN button and highlight the symbol in the flag. 3. Press the ENTER button to display the list of - Garmin Foretrex 201 | Owner's Manual - Page 35
change the elevation: 1. From the Main Menu Page press the UP or DOWN button to highlight 'MARK'. Press the ENTER button to display the Mark Waypoint Page. 2. Press the UP or DOWN button and highlight the 'ELEV' field and press the ENTER button to display the ENTER CORRECT ELEVATION Page. 3. Use - Garmin Foretrex 201 | Owner's Manual - Page 36
Main Pages Waypoints Menu Page Review Waypoint Page Delete Waypoint Page Review Waypoint Page The Review Waypoint Page allows you to change the waypoint symbol, name, eleva- tion and location (just as on the Mark Waypoint Page). You can also delete the waypoint, display the waypoint on the Map Page - Garmin Foretrex 201 | Owner's Manual - Page 37
to reach your destination. GOTO Waypoint: Navigation Page displaying NOTE: You can directly GoTo to a waypoint by pressing the GOTO button any time a waypoint is selected: Press the GOTO button on the Waypoint Review Page, the Waypoint List Page when a waypoint is highlighted, or the Route - Garmin Foretrex 201 | Owner's Manual - Page 38
Pages Waypoints Menu Page Waypoint Options Project Waypoint Page Edit Number Page 26 Projecting a Waypoint Using the Project waypoint feature, the Foretrex 201 can create a waypoint at a specified distance and bearing using an existing waypoint as a reference. You can also change the waypoint name - Garmin Foretrex 201 | Owner's Manual - Page 39
Menu Page. 2. Highlight 'List All' and press Enter to display the Waypoint List Page. 2. Select a waypoint from the list and press the ENTER button to display the Review Waypoint Page. 2. Use the UP or DOWN button to highlight 'OPTIONS' and press ENTER. 3. Use the UP or DOWN button to highlight - Garmin Foretrex 201 | Owner's Manual - Page 40
Menu Page. 2. Highlight 'LIST ALL' and press ENTER to display the Waypoint List Page. 2. Select a waypoint from the list and press the ENTER button to display the Review Waypoint Page. 2. Use the UP or DOWN button to highlight 'OPTIONS' and press ENTER. 3. Use the UP or DOWN button to highlight - Garmin Foretrex 201 | Owner's Manual - Page 41
draws an electronic breadcrumb trail or 'track log' on the Map Page as you travel. The Track Log contains information about points along its path, including time, and position. The Foretrex 201 uses this information to allow you to navigate using the saved track. The track log starts recording as - Garmin Foretrex 201 | Owner's Manual - Page 42
log or use the 'TracBack' feature, clear the Track Log before you start traveling. GOTO guides you from your current location to the point selected and creates a waypoint called 'map'. Mark creates a new waypoint for later use. Refer to page 21 for complete information . Zoom adjusts the level of - Garmin Foretrex 201 | Owner's Manual - Page 43
Using the Setup Track Page Recording: Turn the track log recording 'ON' and 'OFF'. Record Interval: You can set the track recording interval to change based on 'DISTANCE', 'TIME', or 'AUTO'. If 'DISTANCE' or 'TIME' is selected, enter a value (a specific distance or time) in the next field. If 'AUTO' - Garmin Foretrex 201 | Owner's Manual - Page 44
'LIST SAVED' and press ENTER to display the Saved Tracks List. 3. Highlight a track and press ENTER to display the options for that track: 'NAVIGATE', 'SHOW MAP', 'RENAME', and 'DELETE'. To delete all saved tracks: 1. Press the PAGE button to access the Main Menu. Press the ENTER button when 'TRACKS - Garmin Foretrex 201 | Owner's Manual - Page 45
to display the options for that track. Navigate: Press ENTER to navigate this track. Select to begin navigation from the beginning point or the end point. Main Pages Tracks Menu Page Navigate Tracks Page Show Map: Press ENTER to display the track on the Map Page. Rename: Press ENTER to display the - Garmin Foretrex 201 | Owner's Manual - Page 46
Route Page Add Point to Route Page 34 Routes Menu Page Route navigation allows you to create a sequence of intermediate waypoints that lead you to your final destination. The Foretrex 201 stores 20 routes, each with up to 125 waypoints. The Routes Menu Page provides access to your routes and allows - Garmin Foretrex 201 | Owner's Manual - Page 47
in your Foretrex 201 is displayed route. Refer to "Editing a Route" on page 38 of this manual for information about editing the elements of the route. To delete a to select the point you would like to navigate to and press ENTER. 3. The Navigation Page automatically opens. Simply follow the arrow - Garmin Foretrex 201 | Owner's Manual - Page 48
Main Pages Routes Menu Page Routes Menu Page Deleting All Routes You can quickly delete all routes from the Route Menu Page. This is especially helpful after a vacation where the stored routes no longer apply to your location. You can also delete points within the route. See page 39 to learn how to - Garmin Foretrex 201 | Owner's Manual - Page 49
. Distance: Press ENTER to enter a specific number of feet from the next waypoint for the Foretrex 201 to begin guiding you to that waypoint. For example, if you enter 1000 feet, the Foretrex 201 will begin guiding you to the next waypoint (the next leg of the route) when you are within a 1000 feet - Garmin Foretrex 201 | Owner's Manual - Page 50
a Route You can edit many elements of a route, such as the route name and the route order. You can add waypoints at any point along the route. You can also remove waypoints from the route. To edit a route, highlight the desired route from the Route List and press ENTER to display the - Garmin Foretrex 201 | Owner's Manual - Page 51
highlight 'INSERT' then press ENTER. 3. Use the UP, DOWN, and ENTER buttons to select the desired waypoint in the Add Point to Route Page. 4. The selected waypoint then appears in the route. To remove a waypoint from the route: 1. With the Route Page displaying, use the UP and DOWN buttons to select - Garmin Foretrex 201 | Owner's Manual - Page 52
Features Routes Menu Page Route Page Inserting a waypoint Navigating a Route A Route can be navigated using the Map Page or the Navigation Page. The Map Page displays your movement, the route line, and waypoints on the route. The Navigation Page shows the direction you need to travel using the - Garmin Foretrex 201 | Owner's Manual - Page 53
Using the Setup Menu The Setup Menu allows you to setup several aspects of the Foretrex 201, such as the timer, display, interface, and system. You must access the Setup Menu and then select one of the options in the Setup Menu to access the individual Setup Pages. - Garmin Foretrex 201 | Owner's Manual - Page 54
the timer to count down from a particular time. For example, if you are in a race that has a two-minute warning before the start, program your Foretrex to count down from two minutes. You can also set the action the timer takes when it expires. To set the Timer: 1. Press the PAGE - Garmin Foretrex 201 | Owner's Manual - Page 55
To set the expired action: 1. Press the PAGE button until the Main Menu Page is displayed. 2. Use the UP and DOWN buttons to highlight 'SETUP' and press ENTER. 3. Use the UP and DOWN buttons to highlight 'SET TIMER' and press ENTER. 4. Use the UP and DOWN buttons to highlight the field below 'STOP' - Garmin Foretrex 201 | Owner's Manual - Page 56
12-hour time formatting, the clock will read like a standard clock with 12-hour AM and 12-hour PM cycles. The 24hour option sets the Foretrex 201 to display a 24-hour cycle (Military Time). To change the time format: 1. Press the PAGE button until the Main Menu Page is displayed. Use the - Garmin Foretrex 201 | Owner's Manual - Page 57
the built-in almanac to auto- matically change the clock settings when daylight savings goes into or out of effect). You can choose 'YES' to manually add daylight savings or 'NO' to remain on standard time. To change the daylight saving field: 1. Press the PAGE button until the Main Menu Page - Garmin Foretrex 201 | Owner's Manual - Page 58
Main Pages Setup Menu: Set Display Setup Menu Set Display Page Selecting the light timeout 46 Set Display Page Light Timeout The 'LIGHT TIMEOUT' option allows you to set the display backlight timeout (stays on, 15 or 30 seconds, and 1 or 2 minutes) and to adjust the display contrast. To change the - Garmin Foretrex 201 | Owner's Manual - Page 59
The Foretrex 201 supports both the UTM/UPS and latitude/longitude grids, which define position location for the entire globe. For more information about using paper maps with your Garmin unit, refer to "Using a Garmin GPS with Paper Land Maps", available for download at http://www.garmin.com/manuals - Garmin Foretrex 201 | Owner's Manual - Page 60
Setup Menu: Set Units Set Units Page Selecting the Map Datum Map Datums A map datum is a reference model of the earth's shape. Every map uses a map datum which is usually listed in the title block of the map. The default datum in the Foretrex 201 is WGS 84 (World Geodetic Survey, 1984). You should - Garmin Foretrex 201 | Owner's Manual - Page 61
Distance/Speed, Elevation, and Vertical Speed The Foretrex 201 allows you to customize speed and distance readouts. To change the Distance/Speed, Elevation, or Vertical Speed: 'DEFAULTS' and press the ENTER button. Main Pages Setup Menu: Set Units Set Units Page Selecting the Map Datum 49 - Garmin Foretrex 201 | Owner's Manual - Page 62
. Magnetic North is the direction in which a compass needle points. Due to errors introduced when map makers flatten the earth's sphere onto paper, not all of the grid lines drawn on the map point exactly to the north pole, so the north indicated by the grid lines is called Grid North. The difference - Garmin Foretrex 201 | Owner's Manual - Page 63
FORMAT') for connecting external NMEA devices, a DGPS beacon receiver, a personal computer, etc. Effective use of this feature requires a working knowledge of these formats: GARMIN: The proprietary format used to exchange waypoint, track, and map data with a PC. GARMIN DGPS: Allows DGPS input using - Garmin Foretrex 201 | Owner's Manual - Page 64
The System Page allows you to select the GPS Mode, Beeper, and Language. You can also enter and view Owner Information and reset the unit to the defaults. GPS Mode: Enable ('NORMAL') and disable ('OFF') the GPS Receiver. You can also enable WAAS, Battery Save, or Demo modes. See the following page - Garmin Foretrex 201 | Owner's Manual - Page 65
a WAAS satellite near your location and then receives data for correcting differentials in the GPS satellite signals and the WAAS satellite numbers Administration Web site at http://gps.faa.gov. Battery Save: When the Foretrex 201 is in 'BATTERY SAVE' mode, the GPS receiver turns on and off - Garmin Foretrex 201 | Owner's Manual - Page 66
C) (operating) Performance Receiver: Acquisition battery Up to 15 hours typical use1 Specifications subject to change without notice. 1Extensive use of screen backlighting may reduce battery life. Standard Accessories Optional Accessories Owner's Manual Bicycle Mounting Kit Quick Start Guide - Garmin Foretrex 201 | Owner's Manual - Page 67
mm.mmm' and WGS 84. (Trip computer only) Location-You current GPS location displayed in the format you selected in for the 'POSITION FORMAT' fi reset. Next Dest (Destination)-The next waypoint on your route. Next Dist (Distance)-The remaining distance to the next waypoint on the route. Appendix Data - Garmin Foretrex 201 | Owner's Manual - Page 68
Data Field Options Next ETA-The estimated time of day you will reach the next waypoint on the route. Next ETE-The estimated time elapsed until you reach the next waypoint all time since last reset. Trip Odom (Odometer)-A running tally of distance travelled since last reset. Turn-The angle difference - Garmin Foretrex 201 | Owner's Manual - Page 69
Battery Save 53 Beacon Receiver Setup 51 Bearing 55 Buttons 2 DOWN 2 ENTER 2 GOTO 2, 25 PAGE 2 POWER 2 UP 2 C Cable 5 Charge the Unit 5 Cleaning viii Clear Track Log 10, 12 Waypoint 20, 36 Computer PC 5, 51 Trip 1, 7, 14, 55 Contrast 9, 46 Count Down 16, 42 Count Up 43 Course 55 Cradle 5, i Create - Garmin Foretrex 201 | Owner's Manual - Page 70
O Odometer 56 Off Course 56 Orient Map 11 Overall Speed 56 Overview 1 P Pan Track Log 11, 30 PC 5, 51 PC Interface Cable 5 Position Format 48, 55 Power 2, 5, 6, 54 Project a Waypoint 26 R Recharge 5 Record Tracks Interval 31 Reset Max Speed 14 Reset Trip 14 Review Waypoint Page 24 Route 34, 35, 37 - Garmin Foretrex 201 | Owner's Manual - Page 71
the TImer 17 Stop Navigation 11, 13 Stop the Out 51 Time 56 Timer 15, 17, 41 Quick Reset 17 Synchronization 17 Tones 43 Timer Page 15, 16, 56 Vertical Speed 56 View Nearest waypoints 20 View Waypoint 24 VMG 56 W WAAS 1, 52, 53 Waterproof 54, viii Waypoint 11, 19 Project 26 Waypoints 1, 10, 18, 19, 20 - Garmin Foretrex 201 | Owner's Manual - Page 72
the latest free software updates (excluding map data) throughout the life of your Garmin products, visit the Garmin Web site at www.garmin.com. © Copyright 2004-2006 Garmin Ltd. or its subsidiaries Garmin International, Inc. 1200 East 151st Street, Olathe, Kansas 66062, U.S.A. Garmin (Europe) Ltd
-
 1
1 -
 2
2 -
 3
3 -
 4
4 -
 5
5 -
 6
6 -
 7
7 -
8
-
9
-
10
-
11
-
12
-
13
-
14
-
15
-
16
-
17
-
18
-
19
-
20
-
21
-
22
-
23
-
24
-
25
-
26
-
27
-
28
-
29
-
30
-
31
-
32
-
33
-
34
-
35
-
36
-
37
-
38
-
39
-
40
-
41
-
42
-
43
-
44
-
45
-
46
-
47
-
48
-
49
-
50
-
51
-
52
-
53
-
54
-
55
-
56
-
57
-
58
-
59
-
60
-
61
-
62
-
63
-
64
-
65
-
66
-
67
-
68
-
69
-
70
-
71
-
72
 |
 |

owner’s manual
Foretrex
™
201
personal navigator
®