Garmin GRA 55 Maintenance Manual - Page 14
Using the GRA 55/5500 Retrofit Installation Tool, Installation Tool s
 |
View all Garmin GRA 55 manuals
Add to My Manuals
Save this manual to your list of manuals |
Page 14 highlights
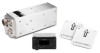
3.3 Using the GRA 55/5500 Retrofit Installation Tool Once the GRA 55/5500 Retrofit Installation Tool has been installed: 1. Connect the PC to the GRA 55/5500 2. Start the GRA 55/5500 Retrofit Installation Tool from the provided "Start Menu" shortcut, or launch the application from its program folder 3. Power-up the GRA 55/5500 by applying aircraft power 4. The connection status in the lower, right-hand corner of the GRA 55/5500 Retrofit Installation Tool will transition from "Not Connected," to "Connected." 5. If the GRA 55/5500 Retrofit Installation Tool does not display "Connected" in the lower, righthand corner, check the installation and make sure the GRA 55/5500 has been powered-up and that the USB cable is properly connected to the PC. If the PC displays a "Found New Hardware" wizard, the GRA 55/5500 Retrofit Installation Tool was not able to automatically install the device driver. It may be necessary to manually install the device drivers. Copies of the drivers' ".inf" and ".dll" files are located in the target installation directory selected during installation. Consult the PC's operating system documentation on manually installing drivers. 3.4 Installation Tool Pages The Installation Tool contains five tabbed pages, all of which can be useful in troubleshooting a problem. The pages are: Status, Configuration, Software, Diagnostics, and Utilities (See Figure 3-1). Figure 3-1. Installation Tool Page Tabs 190-01277-A3 Rev. 1 System Maintenance Manual GRA 55/5500 Bell 206 STC Page 3-2
-
 1
1 -
2
-
3
-
4
-
5
-
6
-
7
-
8
-
 9
9 -
 10
10 -
 11
11 -
 12
12 -
 13
13 -
 14
14 -
 15
15 -
 16
16 -
 17
17 -
 18
18 -
 19
19 -
20
-
21
-
22
-
23
-
24
-
25
-
26
-
27
-
28
-
29
-
30
-
31
-
32
-
33
-
34
-
35
-
36
-
37
-
38
-
39
-
40
-
41
-
42
-
43
-
44
-
45
-
46
-
47
-
48
 |
 |
