Gateway E-9722R Gateway E-9722R Server User Guide - Page 32
Caution, Important, Installing Components
 |
View all Gateway E-9722R manuals
Add to My Manuals
Save this manual to your list of manuals |
Page 32 highlights
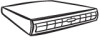
CHAPTER 4: Installing Components 5 Remove the screw (1) at the front of the top cover, then press and hold the release button (2). Caution For correct cooling and air flow, always reinstall the top covers before you turn on the server. Operating the server without the covers in place will cause the server to overheat. Important The hard drive carriers shown in these illustrations may look different than the actual hard drive carriers in your server. 6 Slide the top cover (3) toward the back of the case, then lift it off the case. 7 Move the fixed tabs (right and left) toward the middle of the server, then slide the front top cover (2) toward the back of the server and lift it off. 26
-
 1
1 -
2
-
3
-
4
-
5
-
6
-
7
-
8
-
9
-
10
-
11
-
12
-
13
-
14
-
15
-
16
-
17
-
18
-
19
-
20
-
21
-
22
-
23
-
24
-
25
-
26
-
 27
27 -
 28
28 -
 29
29 -
 30
30 -
 31
31 -
 32
32 -
 33
33 -
 34
34 -
 35
35 -
 36
36 -
 37
37 -
38
-
39
-
40
-
41
-
42
-
43
-
44
-
45
-
46
-
47
-
48
-
49
-
50
-
51
-
52
-
53
-
54
-
55
-
56
-
57
-
58
-
59
-
60
-
61
-
62
-
63
-
64
-
65
-
66
-
67
-
68
-
69
-
70
-
71
-
72
-
73
-
74
-
75
-
76
-
77
-
78
-
79
-
80
-
81
-
82
-
83
-
84
-
85
-
86
-
87
-
88
-
89
-
90
-
91
-
92
-
93
-
94
-
95
-
96
-
97
-
98
-
99
-
100
-
101
-
102
-
103
-
104
-
105
-
106
-
107
-
108
 |
 |

CHAPTER 4: Installing Components
26
5
Remove the screw (1) at the front of the top cover, then press and hold the release button (2).
6
Slide the top cover (3) toward the back of the case, then lift it off the case.
7
Move the fixed tabs (right and left) toward the middle of the server, then slide the front
top cover (2) toward the back of the server and lift it off.
Caution
For correct cooling and air flow, always reinstall the top covers before you
turn on the server. Operating the server without the covers in place will cause the
server to overheat
.
Important
The hard drive carriers shown in these illustrations may look different than
the actual hard drive carriers in your server.