| Section |
Page |
| English |
2 |
| Contents |
2 |
| Getting Help |
8 |
| Thank you for purchasing our computer! |
9 |
| Using the Gateway Web site |
9 |
| Using Help and Support |
10 |
| To start Help and Support: |
10 |
| Searching for a topic |
10 |
| Getting help in Media Center |
11 |
| To access Media Center help: |
11 |
| Using online help |
12 |
| Microsoft Certificate of Authenticity |
12 |
| Using Your Computer |
14 |
| Working safely |
15 |
| Reducing eye strain |
15 |
| Setting up your computer desk and chair |
16 |
| Setting up your computer and computer accessories |
16 |
| Sitting at your computer |
16 |
| Avoiding discomfort and injury from repetitive strain |
16 |
| Protecting from power source problems |
17 |
| Checking the voltage selection |
17 |
| To set the voltage selection switch: |
17 |
| Starting your computer |
17 |
| To start your computer: |
17 |
| Waking up your computer |
17 |
| Turning off your computer |
18 |
| To turn off your computer: |
18 |
| Restarting (rebooting) your computer |
18 |
| To close unresponsive programs and restart your computer: |
18 |
| Using the keyboard |
19 |
| Premium multimedia keyboard features |
19 |
| Elite multimedia keyboard features |
20 |
| Using the mouse |
21 |
| Adjusting the volume |
22 |
| To adjust the overall volume using hardware controls: |
22 |
| To adjust the overall volume from Windows: |
23 |
| To adjust device volume levels: |
23 |
| Configuring the audio jacks |
25 |
| To configure the audio jacks: |
25 |
| Connecting the dial-up modem |
25 |
| To connect the modem: |
25 |
| Connecting to a cable or DSL modem or to a wired Ethernet network |
26 |
| To connect to a cable or DSL modem or to an Ethernet network: |
26 |
| Installing a printer, scanner, or other device |
26 |
| Using Windows XP |
28 |
| Using the Windows desktop |
29 |
| Using the Start menu |
30 |
| To use the Start menu: |
30 |
| Adding icons to the desktop |
30 |
| To add icons to the desktop: |
30 |
| Identifying window items |
31 |
| Working with files and folders |
32 |
| Viewing drives |
32 |
| To view the drives on your computer: |
32 |
| To see the files and folders on a drive: |
32 |
| Creating folders |
33 |
| To create a folder: |
33 |
| Copying and moving files and folders |
33 |
| To copy a file or folder to another folder: |
34 |
| To move a file or folder to another folder: |
34 |
| Deleting files and folders |
34 |
| To delete files or folders: |
34 |
| To recover files or folders from the Recycle Bin: |
35 |
| To empty the Recycle Bin: |
35 |
| Searching for files |
35 |
| Using the Windows Search utility |
36 |
| To find files and folders using the Search utility: |
36 |
| Using advanced search options |
37 |
| Browsing for files and folders |
37 |
| To browse for a file: |
37 |
| Working with documents |
38 |
| Creating a new document |
38 |
| To create a new document: |
38 |
| Saving a document |
39 |
| To save a document: |
39 |
| Opening a document |
40 |
| To open a document: |
40 |
| Printing a document |
40 |
| To print a document: |
40 |
| Shortcuts |
41 |
| Recovering Your System |
42 |
| System recovery options |
43 |
| Drivers and applications recovery |
43 |
| Creating drivers and applications recovery discs |
44 |
| To record a set of drivers and applications recovery discs: |
44 |
| Copying drivers and applications recovery files to a network |
46 |
| To copy drivers and applications recovery files to a network: |
46 |
| Creating discs from recovery files on a network |
47 |
| To create recovery discs from recovery files stored on a network: |
47 |
| Recovering your system |
47 |
| Recovering specific files and software |
48 |
| To recover specific drivers and software: |
48 |
| Recovering your system using Microsoft System Restore |
49 |
| To restore using Microsoft System Restore: |
49 |
| Recovering your system from the hard drive |
50 |
| To recover from the hard drive: |
50 |
| Using the Internet and Faxing |
52 |
| Learning about the Internet |
53 |
| Setting up an Internet account |
54 |
| Accessing your Internet account |
54 |
| Using the World Wide Web |
54 |
| Connecting to a Web site |
55 |
| To connect to a Web site: |
55 |
| Downloading files |
56 |
| To download files or programs from a Web site: |
56 |
| Using e-mail |
56 |
| Sending e-mail |
57 |
| To send e-mail using Outlook or Outlook Express: |
57 |
| Checking your e-mail |
57 |
| To check your e-mail using Outlook Express: |
57 |
| Installing and configuring Microsoft Fax |
57 |
| Installing Fax |
58 |
| To install Fax: |
58 |
| Configuring Microsoft Fax |
58 |
| To configure Microsoft Fax: |
58 |
| Setting up your cover page template |
60 |
| To set up your fax cover page template: |
60 |
| Sending a fax |
61 |
| Sending a quick fax |
61 |
| To send a simple fax: |
61 |
| Faxing from programs |
62 |
| To fax a document directly from most programs: |
62 |
| Faxing a scanned document |
62 |
| To fax a document that you have scanned: |
62 |
| Automatically retry sending a fax |
63 |
| To automatically retry sending a fax: |
63 |
| Canceling a fax |
63 |
| To cancel a fax that has not been sent: |
63 |
| Automatically canceling a fax |
63 |
| To automatically cancel a failed fax: |
63 |
| Receiving and viewing a fax |
64 |
| To receive and view a fax: |
64 |
| Protecting Your Computer |
66 |
| Hardware security |
67 |
| Kensington lock slot |
67 |
| Data security |
67 |
| About startup and hard drive passwords |
67 |
| About Windows XP user accounts |
67 |
| Protecting your computer from viruses |
68 |
| Using McAfee SecurityCenter |
69 |
| Starting McAfee SecurityCenter |
70 |
| To start McAfee SecurityCenter: |
70 |
| Scanning for and removing viruses |
70 |
| To scan for viruses: |
70 |
| To remove a virus: |
71 |
| Updating your virus definitions |
71 |
| To update your virus definitions: |
71 |
| Using Windows XP Security Center |
72 |
| Modifying security settings |
72 |
| To modify security settings: |
72 |
| Security updates |
73 |
| Windows Update |
73 |
| Windows XP Security Center |
74 |
| To schedule automatic updates: |
74 |
| BigFix |
75 |
| Using Drives and Ports |
76 |
| Using the memory card reader |
77 |
| Memory card types |
77 |
| Using a memory card |
77 |
| To insert a memory card: |
77 |
| To remove a memory card: |
78 |
| Using the CD or DVD drive |
78 |
| Identifying drive types |
78 |
| Inserting a CD or DVD |
79 |
| To insert a CD or DVD: |
79 |
| Playing a CD |
79 |
| Playing a DVD |
80 |
| Creating audio and video files |
80 |
| Playing music and movies |
80 |
| Playing WAV audio files |
80 |
| To play a WAV audio file in Sound Recorder: |
80 |
| Playing audio and video files |
81 |
| To play a file using Windows Media Player: |
81 |
| Playing CDs or DVDs |
82 |
| Playing a CD or DVD using Windows Media Player |
82 |
| To play a CD or DVD: |
82 |
| Playing a DVD using CyberLink PowerDVD |
84 |
| To play a DVD using CyberLink PowerDVD: |
84 |
| Creating audio files and music libraries |
84 |
| Creating music files |
84 |
| Recording WAV audio files |
84 |
| To record a WAV audio file: |
85 |
| Creating WMA and MP3 music files |
85 |
| To create WMA or MP3 files: |
85 |
| Building a music library |
87 |
| Editing track information |
87 |
| To edit track information: |
87 |
| Creating and editing videos |
88 |
| Editing videos |
88 |
| Transferring your video to your computer |
88 |
| To transfer your video to your computer: |
88 |
| Editing your video |
89 |
| Saving your video |
90 |
| Creating music CDs and video DVDs |
90 |
| Creating a music CD |
90 |
| To create a music CD using Windows Media Player: |
90 |
| Creating a video DVD |
91 |
| To create a video DVD using Windows Media Center: |
91 |
| Using Windows Media Center |
93 |
| To use the Media Center remote control: |
94 |
| Manually updating the Media Center Program Guide |
94 |
| To manually update the Media Center Program Guide: |
94 |
| Networking Your Computer |
96 |
| Introduction to Networking |
97 |
| Ethernet, Fast Ethernet, or Gigabit Ethernet |
97 |
| Using a router |
97 |
| Example router-based Ethernet network |
98 |
| Equipment you need for a router-based Ethernet network |
98 |
| Determining if an Ethernet card is already installed on your computer |
99 |
| To determine if an Ethernet card is already installed on your computer: |
99 |
| Creating an Ethernet network |
99 |
| Installing Ethernet cards and drivers |
99 |
| Making sure your broadband connection works |
99 |
| Naming the computers and the workgroup |
99 |
| To identify this computer on the network: |
99 |
| Configuring the TCP/IP protocol |
100 |
| Terms you should know |
100 |
| Using a DHCP server |
100 |
| To use a DHCP server |
100 |
| Setting up an Ethernet network |
102 |
| Setting up a network using a router |
102 |
| To set up a network using a router: |
103 |
| Configuring your router |
103 |
| Testing your network |
104 |
| Sharing resources |
104 |
| Sharing drives and printers |
104 |
| Sharing drives or folders |
104 |
| To share drives or folders: |
104 |
| Un-sharing drives and folders |
105 |
| To un-share drives or folders: |
105 |
| Sharing printers |
106 |
| To share printers: |
106 |
| Using the network |
106 |
| Viewing shared drives and folders |
106 |
| To view shared drives and folders: |
106 |
| Mapping a network drive |
107 |
| To map a network drive: |
107 |
| Opening files across the network |
107 |
| To open files across the network: |
107 |
| Copying files across the network |
107 |
| To copy files across the network: |
107 |
| Printing files across the network |
108 |
| To print files across the network: |
108 |
| Adding a printer to your network |
108 |
| Customizing Your Computer |
110 |
| Adjusting the screen and desktop settings |
111 |
| Adjusting the color depth |
111 |
| To change the color depth: |
111 |
| Adjusting the screen resolution |
112 |
| To adjust the screen resolution: |
112 |
| Changing the colors on your Windows desktop |
113 |
| To change desktop colors: |
113 |
| To create a new color scheme as part of a desktop theme: |
113 |
| Changing the desktop background |
114 |
| To change the desktop background: |
114 |
| Selecting a screen saver |
114 |
| To select a screen saver: |
114 |
| Using an extended desktop |
116 |
| To turn on extended desktop: |
116 |
| Using a second monitor |
116 |
| To use a projector or additional monitor: |
116 |
| Viewing the display on a television |
118 |
| To view your computer display on a television: |
118 |
| Modifying television settings |
120 |
| To modify television settings: |
120 |
| Changing the mouse settings |
121 |
| To change your mouse settings: |
121 |
| Adding and modifying user accounts |
122 |
| User account tips |
122 |
| To add, delete, or modify user accounts: |
122 |
| To change between user accounts: |
122 |
| Changing power-saving settings |
123 |
| Changing the power scheme |
123 |
| To change the power scheme: |
123 |
| Changing advanced power settings |
123 |
| To change advanced power management settings: |
123 |
| Activating and using Hibernate mode |
124 |
| To activate Hibernate mode: |
124 |
| To use Hibernate mode: |
125 |
| Installing an uninterruptible power supply |
125 |
| To install an uninterruptible power supply (UPS): |
125 |
| Maintaining Your Computer |
126 |
| Setting up a maintenance schedule |
127 |
| Caring for your computer |
127 |
| Cleaning your computer |
128 |
| Cleaning the exterior |
128 |
| Cleaning the keyboard |
128 |
| Cleaning the computer display |
128 |
| Cleaning the mouse |
128 |
| To clean your mouse: |
128 |
| Cleaning CDs or DVDs |
129 |
| Updating Windows |
129 |
| Using BigFix |
129 |
| To start BigFix: |
129 |
| To learn more about using BigFix: |
129 |
| Managing hard drive space |
130 |
| Checking hard drive space |
130 |
| To check hard drive space: |
130 |
| Deleting unnecessary files |
131 |
| To use the Windows Disk Cleanup program: |
131 |
| Checking the hard drive for errors |
131 |
| To check the hard drive for errors: |
132 |
| Defragmenting the hard drive |
132 |
| To defragment the hard drive: |
133 |
| Backing up files |
133 |
| Scheduling maintenance tasks |
134 |
| To start the Scheduled Task Wizard: |
134 |
| Moving from your old computer |
134 |
| Using the Files and Settings Transfer Wizard |
134 |
| To open the Files and Settings Transfer Wizard: |
134 |
| Transferring files |
135 |
| Finding your files |
135 |
| To find files in the My Documents folder: |
135 |
| To find files using Find or Search: |
136 |
| Transferring Internet settings |
136 |
| Setting up your ISP |
136 |
| To use the Internet Connection Wizard: |
136 |
| Transferring your e-mail and address book |
136 |
| Transferring your Internet shortcuts |
136 |
| Installing your old printer or scanner |
137 |
| Installing a USB printer or scanner |
137 |
| Installing a parallel port printer |
137 |
| To install your old printer: |
137 |
| Installing your old programs |
138 |
| Troubleshooting |
140 |
| Safety guidelines |
141 |
| First steps |
141 |
| Troubleshooting |
142 |
| Add-in cards |
142 |
| The computer does not recognize an add-in card |
142 |
| Audio |
142 |
| Battery |
142 |
| CD or DVD drives |
142 |
| The computer does not recognize a disc or the CD or DVD drive |
142 |
| Audio CD does not produce sound |
143 |
| A DVD movie will not play |
143 |
| Computer |
143 |
| The computer will not start |
143 |
| DVD drives |
143 |
| Ethernet |
144 |
| You cannot see the other computers on your network |
144 |
| The computer does not recognize an add-in Ethernet card |
144 |
| Your Ethernet network is running slower than you expect |
144 |
| File management |
144 |
| A file was accidentally deleted |
144 |
| To restore deleted files: |
144 |
| Hard drive |
145 |
| You see an “Insufficient disk space” error message |
145 |
| You see a “Data error” message |
145 |
| The hard drive cannot be accessed, or you see a “General failure reading drive C” error message |
145 |
| Internet |
145 |
| You cannot connect to the Internet |
145 |
| You see an “Unable to locate host” message and are unable to browse the Internet |
145 |
| Connecting to a Web site takes too long |
146 |
| People are sending you e-mail messages, but you have not received any mail |
146 |
| Keyboard |
146 |
| The keyboard does not work |
146 |
| A keyboard character keeps repeating or you see a “keyboard stuck” or “key failure” error message |
146 |
| Liquid spilled in the keyboard |
146 |
| Media Center |
146 |
| The Media Center video display look bad on your TV |
147 |
| You need to configure your Media Center to output to a TV |
148 |
| You want to change display settings to get better TV or DVD image quality |
148 |
| You want to know whether you can burn programs that were recorded with your Media Center computer to a DVD |
148 |
| You want to know whether you can play recorded programs on other computers |
148 |
| You want to know whether you can play recorded programs on your home DVD player |
148 |
| You get the following “Download Error” message when the Media Center tries to update the Program Guide: |
149 |
| Memory |
149 |
| You see a “Memory error” message |
149 |
| You see a “Not enough memory” error message |
149 |
| Memory card reader |
149 |
| Drive letters for the memory card slots do not appear in the My Computer window |
149 |
| Modem (cable or DSL) |
149 |
| Modem (dial-up) |
149 |
| Your modem does not dial or does not connect |
150 |
| To check the dialing properties: |
150 |
| You cannot connect to the Internet |
151 |
| Your 56K modem does not connect at 56K |
151 |
| Your fax communications program only sends and receives faxes at 14,400 bps when you have a 56K modem |
151 |
| The modem is not recognized by your computer |
151 |
| To run modem diagnostics: |
151 |
| The modem is noisy when it dials and connects |
152 |
| To turn down the modem volume: |
152 |
| Monitor |
152 |
| The screen resolution is not correct |
152 |
| The computer is running but there is no picture |
152 |
| The color is not uniform |
153 |
| Why is there a horizontal line or wire visible across the monitor screen? |
153 |
| The text on the display is dim or difficult to read |
153 |
| Mouse |
153 |
| The mouse does not work |
153 |
| The mouse works erratically |
153 |
| Networks |
154 |
| You cannot connect to your company network |
154 |
| Passwords |
154 |
| Your computer does not accept your password |
154 |
| Power |
154 |
| Your computer will not turn on |
154 |
| Printer |
154 |
| The printer will not turn on |
154 |
| The printer is on but will not print |
154 |
| To set a default printer: |
154 |
| You see a “Printer queue is full” error message |
155 |
| To make sure that the printer is not set to work offline: |
155 |
| You see a “Printer is out of paper” error message |
155 |
| Sound |
155 |
| You are not getting sound from the speakers |
155 |
| Telephone support |
156 |
| Before calling Gateway Customer Care |
156 |
| Telephone numbers |
157 |
| Self-help |
157 |
| Safety, Regulatory, and Legal Information |
158 |
| Index |
166 |
| A |
166 |
| B |
166 |
| C |
166 |
| D |
166 |
| E |
167 |
| F |
167 |
| G |
167 |
| H |
167 |
| I |
168 |
| K |
168 |
| L |
168 |
| M |
168 |
| N |
169 |
| O |
169 |
| P |
169 |
| R |
169 |
| S |
169 |
| T |
170 |
| U |
170 |
| V |
171 |
| W |
171 |
| X |
171 |
| Français |
172 |
| Table des matières |
172 |
| Obtenir de l’aide |
178 |
| Nous vous remercions d’avoir acheté notre ordinateur ! |
179 |
| Utilisation du site Web Gateway |
179 |
| Obtenir de l’aide et un support technique |
180 |
| Pour accéder au Centre d’aide et de support, procédez comme suit : |
180 |
| Recherche d’une rubrique |
181 |
| Obtenir de l’aide dans Media Center |
181 |
| Pour accéder à l’aide de Media Center, procédez comme suit : |
181 |
| Utilisation de l’aide en ligne |
182 |
| Certificat d’authenticité Microsoft. |
182 |
| Utilisation de votre ordinateur |
184 |
| Travailler en toute sécurité |
185 |
| Diminution de la fatigue visuelle |
185 |
| Préparation du bureau et de la chaise |
186 |
| Préparation de l’ordinateur et des accessoires |
186 |
| Position devant l’ordinateur |
186 |
| Éviter les douleurs et les blessures dues à la fatigue répétitive |
186 |
| Protection contre les problèmes de source d’alimentation |
187 |
| Vérification de la tension |
187 |
| Pour régler le commutateur de tension : |
187 |
| Démarrage de l’ordinateur |
187 |
| Pour démarrer votre ordinateur : |
187 |
| Activation de l’ordinateur |
188 |
| Mise hors tension de l’ordinateur |
188 |
| Pour mettre l’ordinateur hors tension : |
188 |
| Redémarrage (réinitialisation) de l’ordinateur |
188 |
| Fermer les programmes qui ne répondent pas et redémarrer l’ordinateur : |
188 |
| Utilisation du clavier |
189 |
| Fonctionnalités des claviers multimédias de luxe |
189 |
| Fonctionnalités des claviers multimédias Elite |
190 |
| Utilisation de la souris |
191 |
| Réglage du volume |
192 |
| Pour régler le volume global à l’aide des contrôles matériels : |
192 |
| Pour régler le volume global à partir de Windows : |
193 |
| Pour régler des niveaux de volume spécifiques aux périphériques : |
193 |
| Configuration des prises audio |
195 |
| Pour configurer les prises audio, procédez comme suit : |
195 |
| Branchement du modem commuté |
195 |
| Pour brancher le modem, procédez comme suit : |
195 |
| Branchement à un modem câble ou DSL ou à un réseau Ethernet |
196 |
| Branchement à un modem câble/DSL ou à un réseau Ethernet |
196 |
| Installation d’une imprimante, d’un scanneur ou d’un autre périphérique |
196 |
| Utilisation de Windows XP |
198 |
| Utilisation du bureau Windows |
199 |
| Utilisation du menu Démarrer |
200 |
| Pour utiliser le menu Démarrer : |
200 |
| Ajout d’icônes sur le bureau |
200 |
| Pour ajouter des icônes sur le bureau : |
200 |
| Identification des éléments de fenêtre |
201 |
| Gestion des fichiers et des dossiers |
202 |
| Affichage des lecteurs |
202 |
| Pour afficher les lecteurs de votre ordinateur : |
202 |
| Pour afficher les fichiers et les dossiers d’un lecteur : |
202 |
| Création de dossiers |
203 |
| Pour créer un dossier : |
203 |
| Copie et déplacement de fichiers et de dossiers |
204 |
| Pour copier un fichier ou un dossier vers un autre dossier : |
204 |
| Pour déplacer un fichier ou un dossier vers un autre dossier : |
204 |
| Suppression de fichiers et de dossiers |
205 |
| Pour supprimer des fichiers ou des dossiers : |
205 |
| Pour récupérer des fichiers ou des dossiers dans la Corbeille : |
205 |
| Pour vider la Corbeille : |
205 |
| Recherche de fichiers |
206 |
| Utilisation de l’utilitaire de recherche Windows |
206 |
| Pour rechercher des fichiers ou des dossiers à l’aide de l’utilitaire de recherche : |
206 |
| Utilisation des options de recherche avancées |
207 |
| Parcourir les fichiers et les dossiers |
208 |
| Pour rechercher un fichier : |
208 |
| Gestion des documents |
209 |
| Création d’un nouveau document |
209 |
| Pour créer un nouveau document : |
209 |
| Enregistrement d’un document |
210 |
| Pour enregistrer un document : |
210 |
| Ouverture d’un document |
211 |
| Pour ouvrir un document : |
211 |
| Impression d’un document |
211 |
| Pour imprimer un document : |
211 |
| Raccourcis |
212 |
| Récupération du système |
214 |
| Options de récupération du système |
215 |
| Récupération des pilotes et des applications |
216 |
| Création de disques de récupération des pilotes et des applications |
216 |
| Pour enregistrer une série de disques de récupération des pilotes et des applications : |
216 |
| Copie des fichiers de récupération des pilotes et des applications sur un réseau |
218 |
| Pour copier les fichiers de récupération des pilotes et des applications sur un réseau : |
218 |
| Création de disques à partir de fichiers de récupération stockés sur un réseau |
219 |
| Pour créer des disques de récupération à partir de fichiers stockés sur un réseau : |
219 |
| Récupération du système |
219 |
| Récupération de fichiers et de logiciels spécifiques |
220 |
| Pour récupérer des fichiers et des logiciels spécifiques : |
220 |
| Récupération du système à l’aide de l’option Restauration du système de Microsoft |
221 |
| Pour restaurer le système à l’aide de l’option Restauration du système de Microsoft : |
221 |
| Récupération du système à partir du disque dur |
222 |
| Pour récupérer le système à partir du disque dur, procédez comme suit : |
222 |
| Utilisation d’Internet et envoi de télécopie |
224 |
| Découvrir Internet |
225 |
| Configuration d’un compte Internet |
226 |
| Accès à votre compte Internet |
226 |
| Utilisation du Web |
226 |
| Connexion à un site Web |
227 |
| Pour vous connecter à un site Web : |
227 |
| Téléchargement de fichiers |
228 |
| Pour télécharger des fichiers ou programmes à partir d’un site Web : |
228 |
| Utilisation de la messagerie |
228 |
| Envoi d’un message électronique |
229 |
| Pour envoyer un message électronique avec Outlook ou Outlook Express : |
229 |
| Consultation du courrier électronique |
229 |
| Pour consulter votre courrier électronique avec Outlook Express : |
229 |
| Installation et configuration de Microsoft Fax |
229 |
| Installation de Fax |
230 |
| Pour installer Fax, procédez comme suit : |
230 |
| Configuration de Microsoft Fax |
230 |
| Pour configurer Microsoft Fax, procédez comme suit : |
230 |
| Configuration du modèle de page de garde |
232 |
| Pour configurer votre modèle de page de garde de télécopie, procédez comme suit : |
232 |
| Envoi d’une télécopie |
233 |
| Envoi rapide d’une télécopie |
233 |
| Pour envoyer une télécopie simple, procédez comme suit : |
233 |
| Envoi de télécopies à partir de programmes |
234 |
| Pour télécopier un document directement à partir de la plupart des programmes, procédez comme suit : |
234 |
| Télécopie d’un document numérisé |
234 |
| Pour télécopier un document que vous avez numérisé, procédez comme suit : |
234 |
| Réessayer automatiquement d’envoyer une télécopie |
235 |
| Pour réessayer automatiquement d’envoyer une télécopie, procédez comme suit : |
235 |
| Annulation d’une télécopie |
235 |
| Pour annuler une télécopie qui n’a pas été envoyée, procédez comme suit : |
235 |
| Annulation automatique d’une télécopie |
236 |
| Pour annuler automatiquement une télécopie en échec, procédez comme suit : |
236 |
| Réception et affichage d’une télécopie |
236 |
| Pour recevoir et afficher une télécopie, procédez comme suit : |
236 |
| Protection de votre ordinateur |
238 |
| Sécurité du matériel |
239 |
| Logement de loquet Kensington |
239 |
| Sécurité des données |
239 |
| À propos du mot de passe de démarrage et du disque dur |
239 |
| À propos des comptes d’utilisateur Windows XP |
240 |
| Protection antivirus de votre ordinateur |
240 |
| Utilisation de McAfee SecurityCenter |
241 |
| Démarrage de McAfee SecurityCenter |
242 |
| Pour démarrer McAfee SecurityCenter : |
242 |
| Recherche et suppression des virus |
242 |
| Pour vérifier s’il n’y pas de virus : |
242 |
| Pour enlever un virus : |
243 |
| Mise à jour des définitions de virus |
243 |
| Pour mettre à jour les définitions de virus : |
243 |
| Utilisation de Windows XP Security Center |
244 |
| Modification des paramètres de sécurité |
244 |
| Pour modifier les paramètres de sécurité : |
244 |
| Mises à jour de sécurité |
245 |
| Windows Update |
245 |
| Windows XP Security Center |
246 |
| Pour programmer des mises à jour automatiques : |
246 |
| BigFix |
247 |
| Utilisation de lecteurs et de ports |
248 |
| Utilisation du lecteur de carte mémoire |
249 |
| Types de carte mémoire |
249 |
| Utilisation d’une carte mémoire |
250 |
| Pour insérer une carte mémoire : |
250 |
| Pour retirer une carte mémoire : |
250 |
| Utilisation du lecteur CD ou DVD |
250 |
| Identification de types de lecteur |
250 |
| Insertion d’un CD ou d’un DVD |
251 |
| Pour insérer un CD ou un DVD : |
251 |
| Lecture d’un CD |
252 |
| Lecture d’un DVD |
252 |
| Création de fichiers audio et vidéo |
252 |
| Écouter de la musique et regarder des films |
253 |
| Lecture de fichier audio WAV |
253 |
| Pour lire un fichier audio WAV avec le Magnétophone : |
253 |
| Lecture de fichiers audio et vidéo |
254 |
| Pour lire un fichier à l’aide du Lecteur Windows Media : |
254 |
| Lecture de CD ou de DVD |
255 |
| Lecture de CD ou de DVD à l’aide du Lecteur Windows Media |
255 |
| Pour lire un CD ou un DVD : |
255 |
| Lecture d’un DVD à l’aide de PowerDVD de CyberLink |
257 |
| Pour lire un DVD à l’aide de PowerDVD de CyberLink : |
257 |
| Création de fichiers audio et de bibliothèques musicales |
257 |
| Création de fichiers musicaux |
257 |
| Enregistrement de fichiers audio WAV |
257 |
| Pour enregistrer un fichier audio WAV : |
258 |
| Création de fichiers musicaux WMA et MP3 |
258 |
| Pour créer des fichiers WMA ou MP3 : |
258 |
| Création d’une bibliothèque musicale |
260 |
| Modifier les informations des pistes |
260 |
| Pour modifier les informations des pistes : |
260 |
| Création et montage de vidéos |
261 |
| Montage de vidéos |
261 |
| Transfert d’une vidéo vers l’ordinateur |
261 |
| Pour transférer une vidéo vers votre ordinateur : |
261 |
| Montage vidéo |
262 |
| Enregistrement d’une vidéo |
263 |
| Création de CD musicaux et de DVD vidéo |
263 |
| Création d’un CD musical |
263 |
| Pour créer un CD musical à l’aide du Lecteur Windows Media : |
263 |
| Création d’un DVD vidéo |
264 |
| Pour créer un DVD vidéo avec Windows Media Center : |
264 |
| Utilisation de Windows Media Center |
266 |
| Pour utiliser la télécommande Media Center : |
267 |
| Mise à jour manuelle du guide des programmes Media Center |
267 |
| Pour mettre à jour manuellement le guide des programmes Media Center : |
267 |
| Mise en réseau de votre ordinateur |
268 |
| Introduction à la mise en réseau |
269 |
| Ethernet, Fast Ethernet, ou Gigabit Ethernet |
269 |
| Utilisation d’un routeur |
269 |
| Exemple de réseau Ethernet utilisant un routeur |
270 |
| Équipement nécessaire pour un réseau Ethernet utilisant un routeur |
270 |
| Comment déterminer si une carte Ethernet est déjà installée sur l’ordinateur |
271 |
| Pour déterminer si une carte Ethernet est déjà installée sur l’ordinateur : |
271 |
| Création d’un réseau Ethernet |
271 |
| Installation de cartes et de pilotes Ethernet |
271 |
| Comment vous assurer que votre connexion haut débit fonctionne |
271 |
| Attribution d’un nom aux ordinateurs et au groupe de travail |
272 |
| Pour identifier cet ordinateur sur le réseau, procédez comme suit : |
272 |
| Configuration du protocole TCP/IP |
272 |
| Termes que vous devez connaître |
272 |
| Utilisation d’un serveur DHCP |
273 |
| Pour utiliser un serveur DHCP, procédez comme suit : |
273 |
| Configuration d’un réseau Ethernet |
274 |
| Configuration d’un réseau utilisant un routeur |
275 |
| Pour configurer un réseau utilisant un routeur, procédez comme suit : |
275 |
| Configuration de votre routeur |
276 |
| Test de votre réseau |
276 |
| Partage des ressources |
276 |
| Partage de lecteurs et d’imprimantes |
276 |
| Partage de lecteurs ou de dossiers |
277 |
| Pour partager des lecteurs ou des dossiers, procédez comme suit : |
277 |
| Désactivation du partage des lecteurs et des dossiers |
278 |
| Pour désactiver le partage de lecteurs ou de dossiers, procédez comme suit : |
278 |
| Partage d’imprimantes |
278 |
| Pour partager des imprimantes, procédez comme suit : |
278 |
| Utilisation du réseau |
278 |
| Affichage des lecteurs et dossiers partagés |
279 |
| Pour afficher des lecteurs et dossiers partagés, procédez comme suit : |
279 |
| Mappage d’un lecteur réseau |
279 |
| Pour mapper un lecteur réseau, procédez comme suit : |
279 |
| Ouverture de fichiers sur le réseau |
280 |
| Pour ouvrir des fichiers sur le réseau, procédez comme suit : |
280 |
| Copie de fichiers sur le réseau |
280 |
| Pour copier des fichiers sur le réseau, procédez comme suit : |
280 |
| Impression de fichiers sur le réseau |
280 |
| Pour imprimer des fichiers sur le réseau, procédez comme suit : |
280 |
| Ajout d’une imprimante au réseau |
281 |
| Personnalisation de votre ordinateur |
282 |
| Réglage des paramètres de l’écran et du bureau |
283 |
| Modification de l’intensité de couleur |
283 |
| Pour modifier l’intensité de couleur : |
283 |
| Ajustement de la résolution de l’écran |
284 |
| Pour régler la résolution de l’écran, procédez comme suit : |
284 |
| Modification des couleurs du bureau de Windows |
285 |
| Pour modifier les couleurs du bureau, procédez comme suit : |
285 |
| Pour créer un nouveau modèle de couleurs dans le cadre d’un thème de bureau, procédez comme suit : |
285 |
| Modification de l’arrière-plan du bureau |
286 |
| Pour modifier l’arrière-plan du bureau, procédez comme suit : |
286 |
| Sélection d’un écran de veille |
287 |
| Pour sélectionner un écran de veille, procédez comme suit : |
287 |
| Utilisation d’un bureau étendu |
288 |
| Pour activer le bureau étendu, procédez comme suit : |
288 |
| Utilisation d’un deuxième moniteur |
289 |
| Pour utiliser un projecteur ou un moniteur additionnel : |
289 |
| Visualisation de l’affichage sur un téléviseur |
290 |
| Pour visualiser l’affichage de votre ordinateur sur un téléviseur : |
290 |
| Modification des paramètres du téléviseur |
292 |
| Pour modifier les paramètres du téléviseur : |
292 |
| Modification des paramètres de la souris |
293 |
| Pour modifier les paramètres de la souris, procédez comme suit : |
293 |
| Ajout ou modification de comptes d’utilisateur |
294 |
| Conseils relatifs aux comptes d’utilisateur |
294 |
| Pour ajouter, supprimer ou modifier des comptes d’utilisateur : |
294 |
| Pour basculer entre les comptes d’utilisateur : |
294 |
| Changement des paramètres d’économie d’énergie |
295 |
| Modification du schéma d’alimentation |
295 |
| Pour modifier le schéma d’alimentation, procédez comme suit : |
295 |
| Modification des paramètres d’alimentation avancés |
295 |
| Pour modifier les paramètres avancés de la gestion de l’alimentation, procédez comme suit : |
295 |
| Activation et utilisation du mode Veille prolongée |
296 |
| Pour activer le mode Veille prolongée, procédez comme suit : |
296 |
| Pour utiliser le mode Veille prolongée, procédez comme suit : |
297 |
| Installation d’un onduleur |
297 |
| Pour installer un onduleur (UPS), procédez comme suit : |
297 |
| Maintenance de votre ordinateur |
298 |
| Définition d’un calendrier d’entretien |
299 |
| Entretien de votre ordinateur |
299 |
| Nettoyage de votre ordinateur |
300 |
| Nettoyage de l’extérieur |
300 |
| Nettoyage du clavier |
300 |
| Nettoyage de l’affichage de l’ordinateur |
300 |
| Nettoyage de la souris |
300 |
| Pour nettoyer la souris, procédez comme suit : |
300 |
| Nettoyage des CD ou des DVD |
301 |
| Mise à jour de Windows |
301 |
| Utilisation de BigFix |
301 |
| Pour démarrer BigFix, procédez comme suit : |
301 |
| Pour en savoir davantage sur l’utilisation de BigFix, procédez comme suit : |
301 |
| Gestion de l’espace disque |
302 |
| Vérification de l’espace disque |
302 |
| Pour vérifier l’espace disque, procédez comme suit : |
302 |
| Suppression des fichiers inutiles |
303 |
| Pour utiliser l’utilitaire Nettoyage de disque de Windows, procédez comme suit : |
303 |
| Recherche d’erreurs sur le disque dur |
304 |
| Pour rechercher des erreurs sur le disque dur, procédez comme suit : |
304 |
| Défragmentation du disque dur |
305 |
| Pour défragmenter le disque dur, procédez comme suit : |
305 |
| Sauvegarde de fichiers |
306 |
| Planification des tâches d’entretien |
306 |
| Pour démarrer l’Assistant Tâches planifiées, procédez comme suit : |
306 |
| Déplacement depuis votre ancien ordinateur |
307 |
| Utilisation de l’Assistant Transfert de fichiers et de paramètres |
307 |
| Pour ouvrir l’Assistant Transfert de fichiers et de paramètres, procédez comme suit : |
307 |
| Transfert de fichiers |
307 |
| Recherche des fichiers |
307 |
| Pour rechercher des fichiers dans le dossier Mes documents, procédez comme suit : |
307 |
| Pour trouver des fichiers à l’aide des fonctionnalités de recherche, procédez comme suit : |
308 |
| Transfert de paramètres Internet |
308 |
| Configuration du FSI |
308 |
| Pour utiliser l’Assistant Connexion Internet, procédez comme suit : |
309 |
| Transfert de vos messages et de votre carnet d’adresses |
309 |
| Transfert des raccourcis Internet |
309 |
| Installation de votre ancien scanneur ou imprimante |
309 |
| Installation d’une imprimante ou d’un scanneur USB |
309 |
| Installation d’une imprimante sur le port parallèle |
309 |
| Pour installer votre ancienne imprimante, procédez comme suit : |
310 |
| Installation de vos anciens programmes |
310 |
| Dépannage |
312 |
| Directives de sécurité |
313 |
| Premières étapes |
313 |
| Dépannage |
314 |
| Cartes d’extension |
314 |
| L’ordinateur ne reconnaît pas une carte d’extension |
314 |
| Audio |
314 |
| Batterie |
314 |
| Lecteurs de CD ou de DVD |
314 |
| L’ordinateur ne reconnaît pas un disque ou le lecteur de CD/DVD |
314 |
| Un CD audio ne produit pas de son |
315 |
| Un film DVD ne fonctionne pas |
315 |
| Ordinateur |
316 |
| L’ordinateur ne démarre pas |
316 |
| Lecteurs de DVD |
316 |
| Ethernet |
316 |
| Vous ne pouvez pas voir les autres ordinateurs sur votre réseau |
316 |
| L’ordinateur ne reconnaît pas une carte d’extension Ethernet |
316 |
| Votre réseau Ethernet fonctionne plus lentement que prévu |
316 |
| Gestion de fichiers |
317 |
| Un fichier a été supprimé par accident |
317 |
| Pour restaurer des fichiers supprimés : |
317 |
| Disque dur |
317 |
| Vous voyez apparaître un message d’erreur « espace disque insuffisant » |
317 |
| Vous voyez apparaître un message « Erreur de données » |
317 |
| Vous ne pouvez pas accéder au disque dur ou vous voyez un message d’erreur « Échec général de lecture du lecteur C ». |
317 |
| Internet |
318 |
| Vous ne pouvez pas vous connecter à Internet |
318 |
| Vous voyez apparaître un message « Impossible de trouver l’hôte » et vous ne pouvez pas naviguer dans Internet. |
318 |
| La connexion à un site Web prend trop de temps |
318 |
| On vous envoie des courriers électroniques, mais vous n’en recevez aucun |
318 |
| Clavier |
319 |
| Le clavier ne fonctionne pas |
319 |
| Un caractère du clavier se répète ou vous voyez apparaître un message d’erreur « Clavier bloqué » ou « Touche défectueuse ». |
319 |
| Du liquide a été renversé sur le clavier |
319 |
| Media Center |
319 |
| La qualité de l’affichage vidéo de Media Center est médiocre sur le téléviseur |
319 |
| Vous devez configurer votre Media Center pour envoyer le signal de sortie à un téléviseur |
321 |
| Vous souhaitez modifier les paramètres d’affichage pour améliorer la qualité de l’image TV ou DVD |
321 |
| Vous voulez savoir si vous pouvez graver sur DVD des programmes enregistrés sur votre ordinateur Media Center |
321 |
| Vous voulez savoir si vous pouvez lire des programmes enregistrés sur d’autres ordinateurs |
321 |
| Vous voulez savoir si vous pouvez lire des programmes enregistrés sur votre lecteur de DVD de salon |
321 |
| Le message « Erreur de téléchargement » suivant s’affiche lorsque l’ordinateur Media Center essaie de mettre le guide des programmes à jour : |
321 |
| Mémoire |
322 |
| Vous voyez apparaître un message « Erreur de mémoire » |
322 |
| Vous voyez apparaître un message d’erreur « Mémoire insuffisante » |
322 |
| Lecteur de carte mémoire |
322 |
| Les lettres de lecteur correspondant aux logements de carte mémoire n’apparaissent pas dans la fenêtre Poste de travail. |
322 |
| Modem (câblé ou DSL) |
322 |
| Modem (commuté) |
322 |
| Votre modem ne compose pas les numéros ou n’établit pas la connexion |
322 |
| Pour vérifier les propriétés de numérotation : |
322 |
| Vous ne pouvez pas vous connecter à Internet |
323 |
| Votre modem de 56 Kbit/s ne se connecte pas à 56 Kbit/s |
323 |
| Le programme de communication de votre télécopieur n’envoie et ne reçoit des télécopies qu’à 14 400 bit/s si vous disposez d’un modem de 56 Kbit/s |
324 |
| Le modem n’est pas reconnu par votre ordinateur |
324 |
| Pour exécuter les diagnostics de modem de Windows : |
324 |
| Le modem est bruyant lorsqu’il compose un numéro et établit la connexion |
324 |
| Pour diminuer le volume du modem : |
325 |
| Moniteur |
325 |
| La résolution de l’écran n’est pas adéquate. |
325 |
| L’ordinateur est allumé mais aucune image n’est affichée |
325 |
| Les couleurs ne sont pas uniformes |
325 |
| Pourquoi y a-t-il une ligne ou un fil horizontal sur l’écran du moniteur ? |
326 |
| Le texte de l’affichage est trop pâle ou difficile à lire |
326 |
| Souris |
326 |
| La souris ne fonctionne pas |
326 |
| La souris fonctionne de façon irrégulière |
326 |
| Réseaux |
326 |
| Vous ne pouvez pas vous connecter au réseau de votre entreprise |
326 |
| Mots de passe |
327 |
| Votre ordinateur n’accepte pas votre mot de passe |
327 |
| Alimentation |
327 |
| L’ordinateur ne s’allume pas |
327 |
| Imprimante |
327 |
| L’imprimante ne s’allume pas |
327 |
| L’imprimante est allumée mais n’imprime pas |
327 |
| Pour définir une imprimante par défaut : |
327 |
| Vous voyez apparaître un message d’erreur « La file d’attente de l’imprimante est saturée » |
328 |
| Pour s’assurer que l’imprimante n’est pas configurée pour travailler hors connexion : |
328 |
| Vous voyez apparaître un message d’erreur « L’imprimante n’a plus de papier » |
328 |
| Son |
328 |
| Les haut-parleurs n’émettent aucun son |
328 |
| Support par téléphone |
329 |
| Avant d’appeler le service d’assistance clientèle Gateway |
329 |
| Numéros de téléphone |
330 |
| Autoassistance |
330 |
| Informations relatives à la sécurité, aux règlements et aux questions d’ordre juridique Informations |
332 |
| Index |
340 |
| A |
340 |
| B |
340 |
| C |
340 |
| D |
341 |
| E |
341 |
| F |
342 |
| G |
342 |
| H |
342 |
| I |
342 |
| L |
342 |
| M |
343 |
| N |
343 |
| O |
343 |
| P |
344 |
| R |
344 |
| S |
344 |
| T |
345 |
| U |
345 |
| V |
345 |
| W |
345 |
 1
1 132
132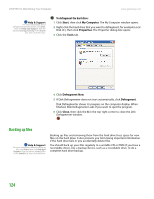 133
133 134
134 135
135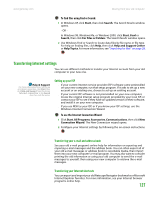 136
136 137
137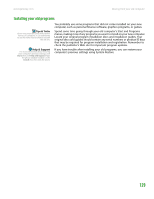 138
138 139
139 140
140 141
141 142
142