Gateway P-6317 8513072 - Gateway Notebook Reference Guide R1 - Page 118
Drivers and Applications, Recovery
 |
View all Gateway P-6317 manuals
Add to My Manuals
Save this manual to your list of manuals |
Page 118 highlights
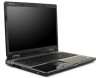
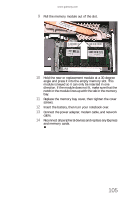
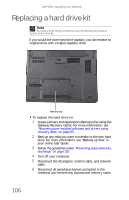
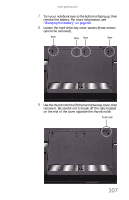
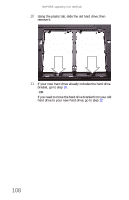
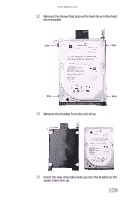
CHAPTER 8: Upgrading Your Notebook 15 Replace the screws that secure the bracket to the drive. 16 Slide the new hard drive kit into your notebook. 17 Replace the cover, then tighten the screws. 18 Insert the battery, then turn your notebook over. 19 Connect the power adapter, modem cable, and network cable. 20 If your notebook uses RAID, read the section "Setting up an optional RAID" on page 52, then go to step 23. -ORIf your notebook does not use RAID and the drive you replaced was the C drive, go to step 21 to install Windows. -ORIf your notebook does not use RAID and the drive you replaced was not the C drive, complete any instructions that came with your drive regarding partitioning and formatting the drive, then go to step 23. 21 Turn on your notebook, open the DVD drive, insert the Windows DVD, close the DVD drive, then restart your notebook. 22 When the prompt "Press any key to boot from CD or DVD" appears, press any key on your keyboard and follow the on-screen instructions. As part of the process you may be prompted to insert your Drivers and Applications Recovery disc. 23 Reconnect all peripheral devices and replace any Express and memory cards. 110
-
 1
1 -
2
-
3
-
4
-
5
-
6
-
7
-
8
-
9
-
10
-
11
-
12
-
13
-
14
-
15
-
16
-
17
-
18
-
19
-
20
-
21
-
22
-
23
-
24
-
25
-
26
-
27
-
28
-
29
-
30
-
31
-
32
-
33
-
34
-
35
-
36
-
37
-
38
-
39
-
40
-
41
-
42
-
43
-
44
-
45
-
46
-
47
-
48
-
49
-
50
-
51
-
52
-
53
-
54
-
55
-
56
-
57
-
58
-
59
-
60
-
61
-
62
-
63
-
64
-
65
-
66
-
67
-
68
-
69
-
70
-
71
-
72
-
73
-
74
-
75
-
76
-
77
-
78
-
79
-
80
-
81
-
82
-
83
-
84
-
85
-
86
-
87
-
88
-
89
-
90
-
91
-
92
-
93
-
94
-
95
-
96
-
97
-
98
-
99
-
100
-
101
-
102
-
103
-
104
-
105
-
106
-
107
-
108
-
109
-
110
-
111
-
112
-
 113
113 -
 114
114 -
 115
115 -
 116
116 -
 117
117 -
 118
118 -
 119
119 -
 120
120 -
 121
121 -
 122
122 -
 123
123 -
124
-
125
-
126
-
127
-
128
-
129
-
130
-
131
-
132
-
133
-
134
-
135
-
136
-
137
-
138
-
139
-
140
-
141
-
142
-
143
-
144
-
145
-
146
-
147
-
148
-
149
-
150
-
151
-
152
-
153
-
154
-
155
-
156
-
157
-
158
-
159
-
160
-
161
-
162
-
163
-
164
-
165
-
166
-
167
-
168
 |
 |