Gateway S-7320 Gateway Notebook Component Replacement Manual - Page 10
Replacing the Wireless Network Module
 |
View all Gateway S-7320 manuals
Add to My Manuals
Save this manual to your list of manuals |
Page 10 highlights
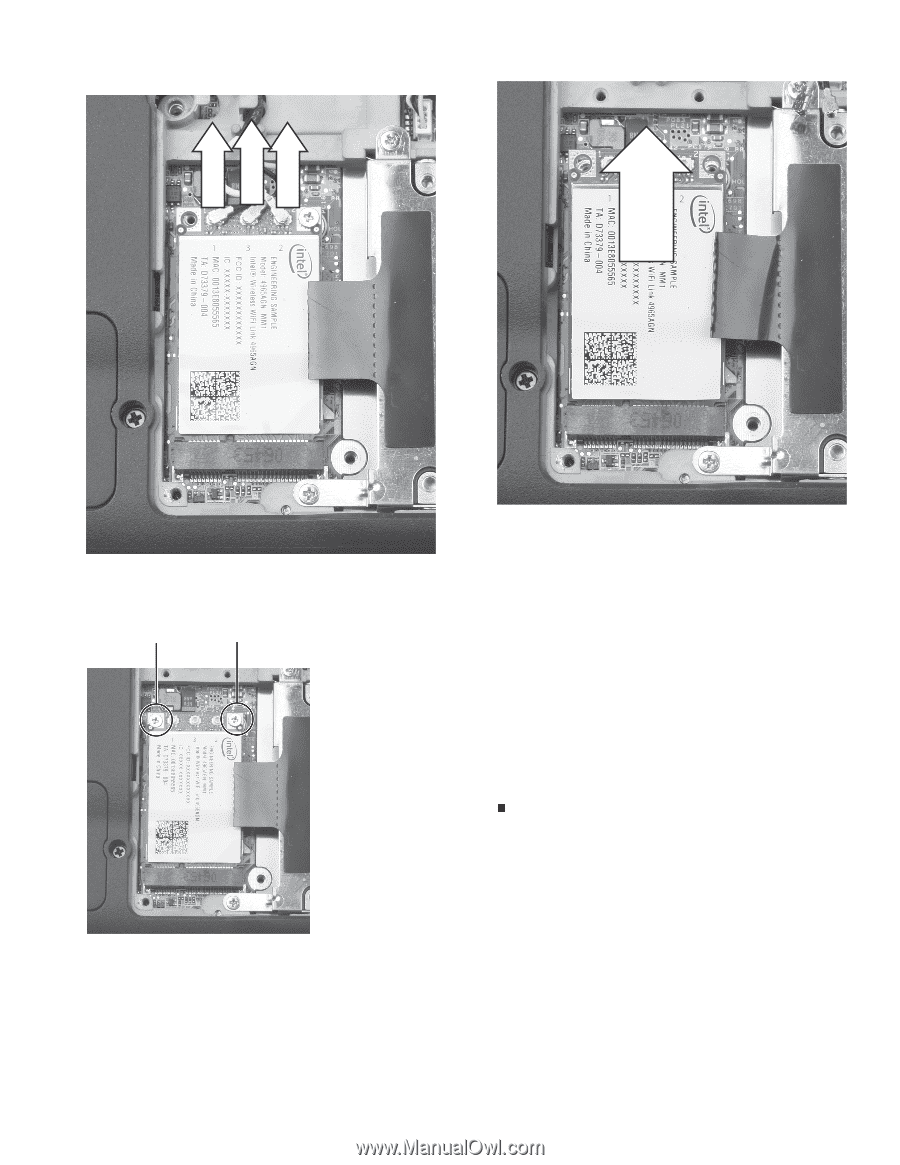
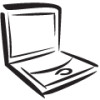
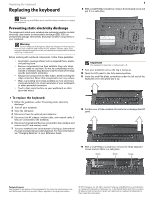
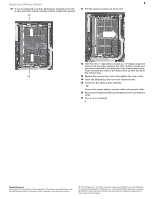
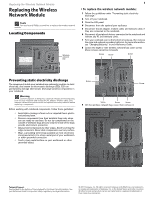
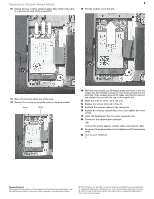
Replacing the Wireless Network Module 2 10 Unplug the two or three antenna cables. Note which color cable is connected to each of the connectors. 13 Pull the module out of the slot. 11 Move the antenna cables out of the way. 12 Remove the screws securing the wireless network module. Screw Screw 14 Hold the new module at a 30-degree angle and insert it into the empty slot. This module is keyed so it can only be inserted in one direction. If the module does not fit, make sure that the notch in the module lines up with the tab in the module slot. 15 Move the antenna wires out of the way. 16 Replace the screws removed in Step 12. 17 Reattach the antenna cables to the connectors. 18 Replace the wireless network bay cover, then tighten the cover screws. 19 Insert the battery(ies), then turn your notebook over. 20 Connect to the optional port replicator. -OR- Connect the power adapter, modem cable, and network cable. 21 Reconnect all peripheral devices and replace any PC and memory cards. 22 Turn on your notebook. Technical Support See the label on the bottom of the notebook for Customer Care Information. See your Reference Guide for important safety, regulatory, and legal information. © 2007 Gateway, Inc. All rights reserved. Gateway and eMachines are trademarks or registered trademarks of Gateway, Inc. in the United States and other countries. All other brands and product names are trademarks or registered trademarks of their respective companies.
-
 1
1 -
2
-
3
-
4
-
 5
5 -
 6
6 -
 7
7 -
 8
8 -
 9
9 -
 10
10
 |
 |