Gateway S-7320 Gateway Notebook Component Replacement Manual - Page 6
Important, Caution
 |
View all Gateway S-7320 manuals
Add to My Manuals
Save this manual to your list of manuals |
Page 6 highlights
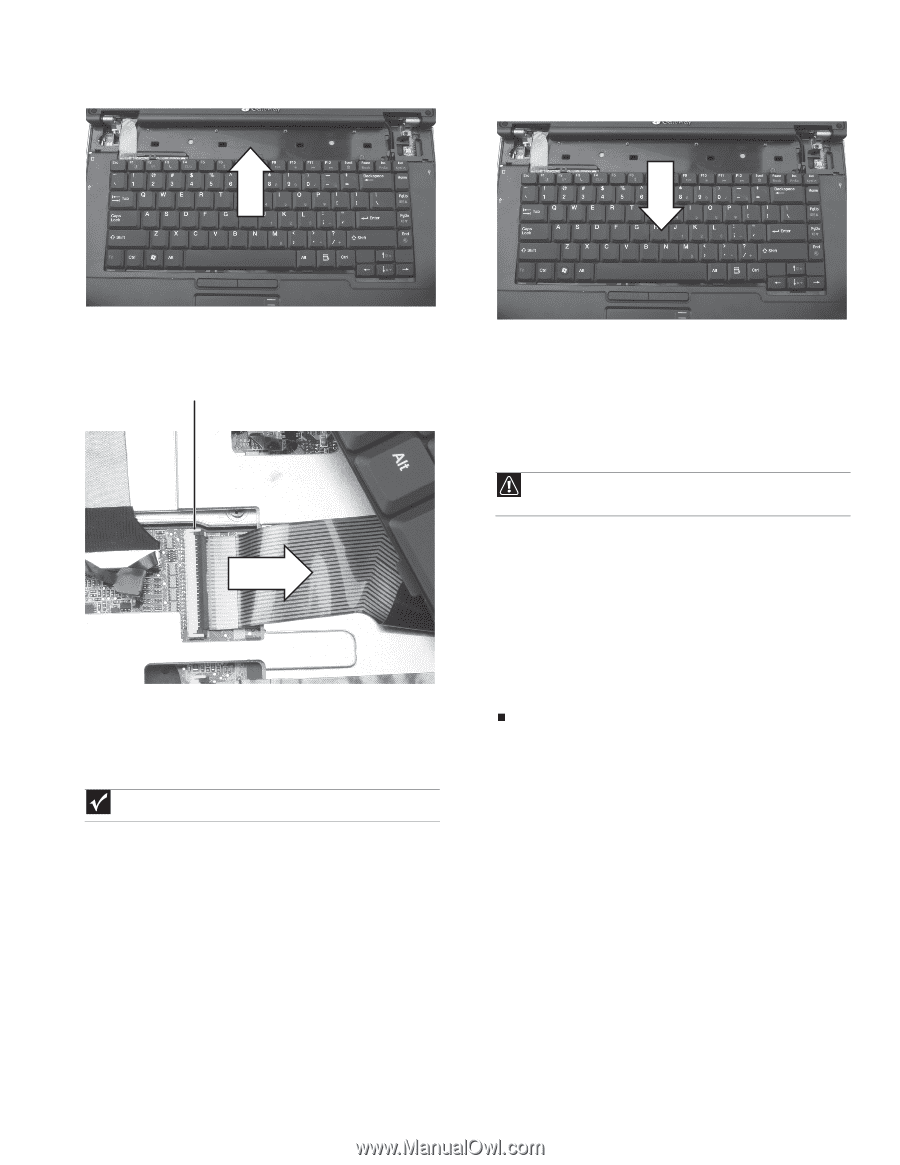
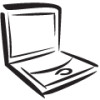
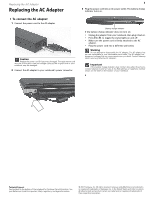
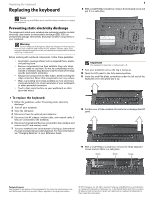
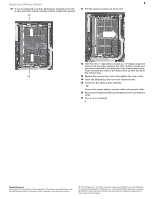
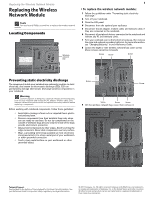
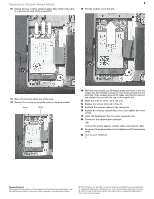
Replacing the keyboard 14 Lift the back edge of the keyboard slightly, then slowly slide it toward the LCD panel to release the keyboard retaining tabs located on the front edge of the keyboard. 2 18 Insert the tabs on the front edge of the keyboard into the slot under the palm rest. You may need to press down on the keyboard keys along the front edge of the keyboard to seat the retaining tabs into their corresponding slots. 15 Swing the brown keyboard connector clip upward, then lift the cable out of the connector. Be careful not to touch or damage any other components. Clip 16 Place the new keyboard keys-down on your notebook with the space bar away you. 17 Make sure the brown keyboard connector clip is swung upward, insert the cable into the connector, then swing the brown clip down to lock the connector in place. Important The keyboard cable is correctly oriented if it is not twisted. 19 Gently press the keyboard down until it is flat all the way across. The keyboard should easily fall into place. Be careful to not damage the LCD panel. 20 Replace the screws removed in Step 13. 21 Replace the keyboard cover. Press down on the cover in several places until it clicks in place. The cover is correctly mounted when you can run you finger along the cover and find no loose spots. The cover should be flat all the way across. Caution If the cover is not correctly replaced, your notebook could be damaged when you try to close the LCD panel. 22 Close the LCD panel. 23 Turn your notebook over so the bottom is facing up. 24 Replace the screw removed in Step 8. 25 Insert the battery(ies), then turn your notebook over. 26 Connect to the optional port replicator. -ORConnect the power adapter, modem cable, and network cable. 27 Reconnect all peripheral devices and replace any PC and memory cards. 28 Turn on your notebook. Technical Support See the label on the bottom of the notebook for Customer Care Information. See your Reference Guide for important safety, regulatory, and legal information. © 2007 Gateway, Inc. All rights reserved. Gateway and eMachines are trademarks or registered trademarks of Gateway, Inc. in the United States and other countries. All other brands and product names are trademarks or registered trademarks of their respective companies.
-
 1
1 -
 2
2 -
 3
3 -
 4
4 -
 5
5 -
 6
6 -
 7
7 -
 8
8 -
 9
9 -
 10
10
 |
 |