GE 25881EE3 User Guide - Page 18
Local Area Code, Registration Link Cordless Handset
 |
UPC - 044319502336
View all GE 25881EE3 manuals
Add to My Manuals
Save this manual to your list of manuals |
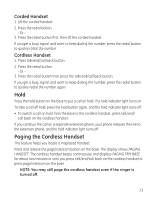
Page 18 highlights
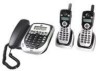
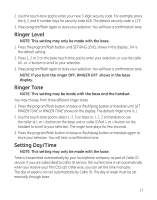
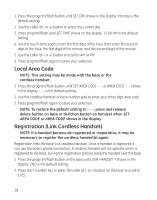
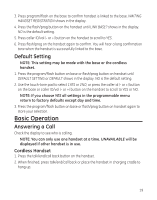
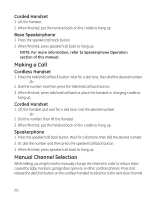
1. Press the program/flash button until SET DAY shows in the display. Monday is the default setting. 2. Use the caller id (- or +) button to select the current day. 3. Press program/flash until SET TIME shows on the display. 12:00 AM is the default setting. 4. Use the touch-tone pad to enter the first digit of the hour, then enter the second digit of the hour, the first digit of the minute, and the second digit of the minute. 5. Use the caller id (- or +) button to scroll to AM or PM. 6. Press program/flash again to store your selection. Local Area Code NOTE: This setting may be made with the base or the cordless handset. 1. Press the program/flash button until SET AREA CODE - - - or AREA CODE - - - shows in the display. - - - is the default setting. 2. Use the cordless handset or base number pad to enter your three digit area code. 3. Press program/flash again to store your selection. NOTE: To restore the default setting to - - -, press and release delete button on base or del/chan button on handset when SET AREA CODE or AREA CODE shows in the display. Registration (Link Cordless Handset) NOTE: If a handset become de-registered or inoperative, it may be necessary to register the cordless handset(s) again. Registration links the base to a cordless handset. Once a handset is registered it can use the base's phone connection. A cordless handset will not operate until it is registered to the base. During the registration process, keep the handset near the base. 1. Press the program/flash button on the base until LINK HANDSET ? shows in the display. 2NO is the default setting. 2. Press the 1 number key or press the caller id (- or +) button on the base to scroll to 1YES. 18
-
 1
1 -
2
-
3
-
4
-
5
-
6
-
7
-
8
-
9
-
10
-
11
-
12
-
 13
13 -
 14
14 -
 15
15 -
 16
16 -
 17
17 -
 18
18 -
 19
19 -
 20
20 -
 21
21 -
 22
22 -
 23
23 -
24
-
25
-
26
-
27
-
28
-
29
-
30
-
31
-
32
-
33
-
34
-
35
-
36
-
37
-
38
-
39
-
40
-
41
-
42
-
43
-
44
-
45
-
46
-
47
-
48
-
49
-
50
-
51
-
52
-
53
-
54
-
55
-
56
-
57
-
58
-
59
-
60
-
61
-
62
-
63
-
64
-
65
-
66
-
67
-
68
-
69
-
70
-
71
-
72
-
73
-
74
-
75
-
76
-
77
-
78
-
79
-
80
-
81
-
82
-
83
-
84
-
85
-
86
-
87
-
88
-
89
-
90
-
91
-
92
-
93
-
94
-
95
-
96
 |
 |