GE FCM25SUWW Use and Care Manual - Page 13
Preparing to Install the Freezer, Freezer Location, Clearances
 |
UPC - 084691162414
View all GE FCM25SUWW manuals
Add to My Manuals
Save this manual to your list of manuals |
Page 13 highlights
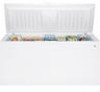
Safety Instructions Operating Instructions Preparing to install the freezer. ge.com Read these instructions completely and carefully. Freezer Location Your freezer should be conveniently located for day-to-day use in a dry, well-ventilated room. Do not install the freezer where the temperature will go below 0°F or above 110°F, because it will not maintain proper temperatures. Be sure to install your freezer on a floor strong enough to support it when it is fully loaded. The freezer must be solidly positioned on the floor if it is to function at its best. Shims may be used to accomplish this wherever the floor is too uneven. If the place selected for the freezer is damp or moist, place 2 X 4's (51 mm X 102 mm) under its entire length to ensure adequate support. Clearances On all models, allow 3″ (76 mm) on top, back and sides for proper air circulation. Turn right to lower Turn left to raise Adjustable Legs (on Upright models) Legs at the front corners of the freezer should be set so the freezer is firmly positioned on the floor, and the front is raised just enough so the door closes easily when opened about halfway. Level Freezer Upright Models: Discard crate screws and wood base. Use a carpenter's level to level the freezer from back to front. Adjust the plastic leveling feet in front 1/2 bubble higher so the door closes easily when left open. Chest Models: If needed, add metal or wood shims between foot pads and floor. Unit Loading (on Upright models) CAUTION: To allow the door to close and seal properly, DO NOT let food packages extend past the front of the shelves. Installation Instructions Troubleshooting Tips Consumer Support 13
-
 1
1 -
2
-
3
-
4
-
5
-
6
-
7
-
 8
8 -
 9
9 -
 10
10 -
 11
11 -
 12
12 -
 13
13 -
 14
14 -
 15
15 -
 16
16 -
 17
17 -
 18
18 -
19
-
20
-
21
-
22
-
23
-
24
-
25
-
26
-
27
-
28
-
29
-
30
-
31
-
32
-
33
-
34
-
35
-
36
-
37
-
38
-
39
-
40
-
41
-
42
-
43
-
44
-
45
-
46
-
47
-
48
-
49
-
50
-
51
-
52
-
53
-
54
-
55
-
56
-
57
-
58
-
59
-
60
 |
 |
