GE GMR04HASCS Use and Care Manual - Page 6
Care and Cleaning, Replacing the Light Bulb - model
 |
UPC - 084691136323
View all GE GMR04HASCS manuals
Add to My Manuals
Save this manual to your list of manuals |
Page 6 highlights
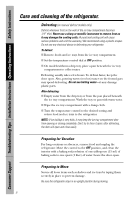
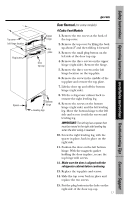
Consumer Support Troubleshooting Tips Installation Instructions Operating Instructions Safety Instructions Care and cleaning of the refrigerator. Cleaning the Outside Keep the outside clean. Wipe with a clean cloth lightly dampened with kitchen appliance wax or mild liquid dish detergent. Dry and polish with a clean, soft cloth. Do not wipe the refrigerator with a soiled dish cloth or wet towel. These may leave a residue that can erode the paint. Do not use scouring pads, powdered cleaners, bleach or cleaners containing bleach because these products can scratch and weaken the paint finish. Protect the paint finish. The finish on the outside of the refrigerator is a high quality, baked-on paint finish. With proper care, it will stay new-looking and rust-free for years. Apply a coat of kitchen/ appliance wax when the refrigerator is new, and then at least twice a year. Cleaning the Inside To help prevent odors, leave an open box of baking soda in the refrigerator. Unplug the refrigerator before cleaning. If this is not practical, wring excess moisture out of sponge or cloth when cleaning around the control. Use warm water and baking soda solution-about a tablespoon (15 ml) of baking soda to a quart (1 liter) of water. This both cleans and neutralizes odors. Rinse and wipe dry. Other parts of the refrigerator-including door gaskets, fruit and vegetable drawers, and all plastic parts-can be cleaned the same way. Do not wash any plastic refrigerator parts in the dishwasher. Replacing the Light Bulb (on some models) Unplug the refrigerator before replacing a burned-out bulb. Setting the controls to OFF does not remove power to the light circuit. The light bulb is located behind the temperature control housing and is visible through the slots in the housing. Reach up through the opening at the bottom of the control housing and gently unscrew the light bulb. Replace with a bulb of the same or lower wattage. 6
-
 1
1 -
 2
2 -
 3
3 -
 4
4 -
 5
5 -
 6
6 -
 7
7 -
 8
8 -
 9
9 -
 10
10 -
 11
11 -
 12
12 -
13
-
14
-
15
-
16
 |
 |
