GE JGRS06BEJBB Use and Care Manual - Page 15
Shelf Positions, Oven Shelves, Oven Moisture, The shelves are designed with stop-locks
 |
UPC - 084691098799
View all GE JGRS06BEJBB manuals
Add to My Manuals
Save this manual to your list of manuals |
Page 15 highlights
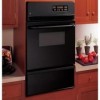
Safety Instructions Operating Instructions ge.com Bump Oven Shelves The shelves are designed with stop-locks so that, when placed correctly on the shelf supports, they will stop before coming completely out of the oven and will not tilt when you are removing food from them or placing food on them. When placing cookware on a shelf, pull the shelf out to the bump on the shelf support. Place the cookware on the shelf, then slide the shelf back into the oven. This will eliminate reaching into the hot oven. To remove a shelf from the oven, pull the shelf toward you, tilt the front end upward and pull the shelf out. To replace, place the shelf on the shelf support with the stop-locks (curved extension of the shelf) facing up and toward the rear of the oven. Tilt up the front and push the shelf toward the back of the oven until it goes past the bump on the shelf support. Then lower the front of the shelf and push it all the way back. Shelf Positions The oven has 4 shelf supports, identified in this illustration as A (bottom), B, C and D (top). Shelf positions for cooking are suggested in the Baking and Roasting sections. Oven Moisture As your oven heats up, the changing temperature of the air in the oven may cause water droplets to form on the door glass. These droplets are harmless and will evaporate as the oven continues to heat up. Troubleshooting Tips Consumer Support 15
-
 1
1 -
2
-
3
-
4
-
5
-
6
-
7
-
8
-
9
-
 10
10 -
 11
11 -
 12
12 -
 13
13 -
 14
14 -
 15
15 -
 16
16 -
 17
17 -
 18
18 -
 19
19 -
 20
20 -
21
-
22
-
23
-
24
-
25
-
26
-
27
-
28
-
29
-
30
-
31
-
32
-
33
-
34
-
35
-
36
 |
 |
