Graco 1757816 Owners Manual - Page 42
Removing and Attaching Base, 2 Adjusting Handle
 |
UPC - 047406106028
View all Graco 1757816 manuals
Add to My Manuals
Save this manual to your list of manuals |
Page 42 highlights
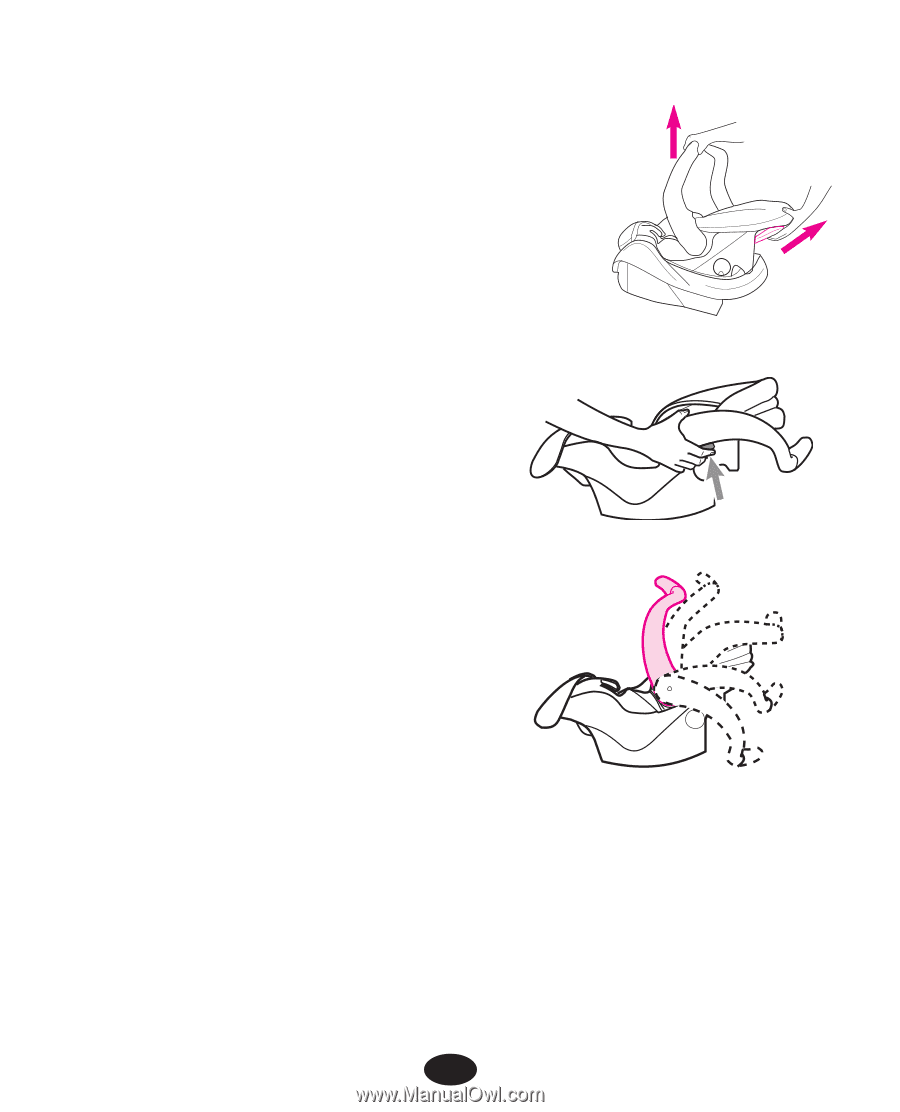
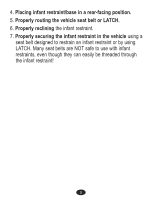
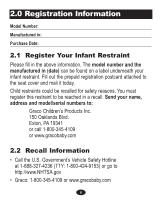
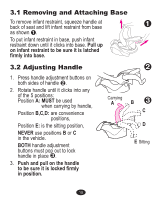
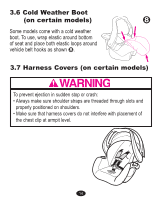
3.1 Removing and Attaching Base To remove infant restraint, squeeze handle at back of seat and lift infant restraint from base – as shown –. To put infant restraint in base, push infant restraint down until it clicks into base. Pull up on infant restraint to be sure it is latched firmly into base. 3.2 Adjusting Handle — 1. Press handle adjustment buttons on both sides of handle —. 2. Rotate handle until it clicks into any of the 5 positions: Position A: MUST be used when carrying by handle, Position B,C,D: are convenience positions, Position E: is the sitting position, NEVER use positions B or C in the vehicle. BOTH handle adjustment buttons must pop out to lock handle in place ˜. 3. Push and pull on the handle to be sure it is locked firmly in position. ˜ Carrying A B C D E Sitting 10
-
 1
1 -
2
-
3
-
4
-
5
-
6
-
7
-
8
-
9
-
10
-
11
-
12
-
13
-
14
-
15
-
16
-
17
-
18
-
19
-
20
-
21
-
22
-
23
-
24
-
25
-
26
-
27
-
28
-
29
-
30
-
31
-
32
-
33
-
34
-
35
-
36
-
 37
37 -
 38
38 -
 39
39 -
 40
40 -
 41
41 -
 42
42 -
 43
43 -
 44
44 -
 45
45 -
 46
46 -
 47
47 -
48
-
49
-
50
-
51
-
52
-
53
-
54
-
55
-
56
-
57
-
58
-
59
-
60
-
61
-
62
-
63
-
64
-
65
-
66
-
67
-
68
-
69
-
70
-
71
-
72
-
73
-
74
-
75
-
76
-
77
-
78
-
79
-
80
-
81
-
82
-
83
-
84
-
85
-
86
-
87
-
88
-
89
-
90
-
91
-
92
-
93
-
94
-
95
-
96
-
97
-
98
-
99
-
100
-
101
-
102
-
103
-
104
-
105
-
106
-
107
-
108
-
109
-
110
-
111
-
112
 |
 |