Haier HWF05XCA User Manual - Page 15
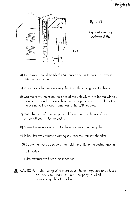
Installseal, Gasket
 |
View all Haier HWF05XCA manuals
Add to My Manuals
Save this manual to your list of manuals |
Page 15 highlights
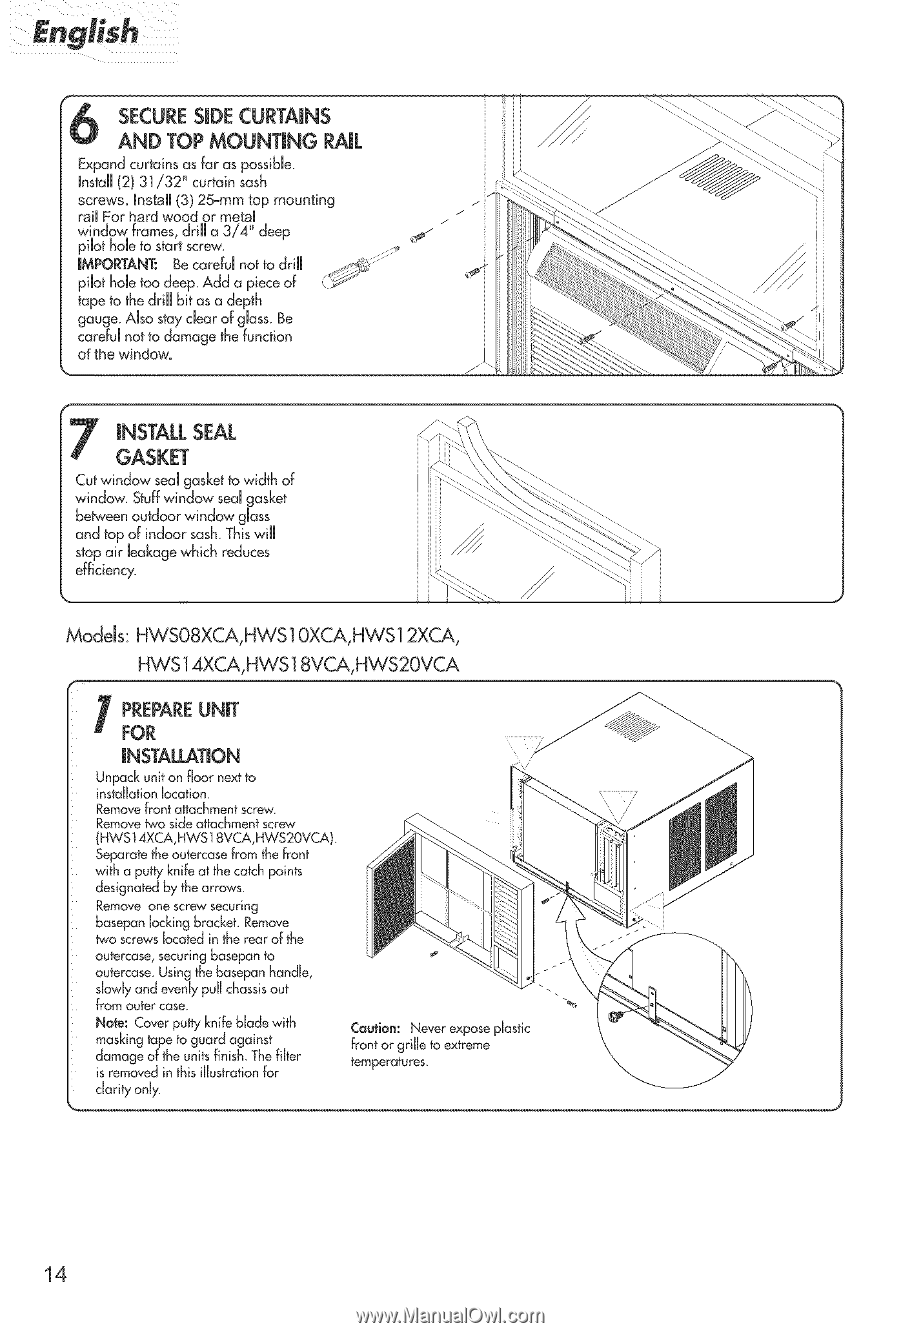
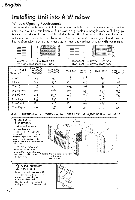
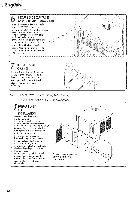
English GiNASSTKAELTLSEAL Cut window seal gasket to w@h of window Stuff window sod gasket between outdoor window gUass and top of indoor sash This will stop air bakage which reduces efficiency. Modds: HWS08XCA, HWS10XCA,HWS12XCA, HWS 14XCA,HWS 18VCA,HWS20VCA I FORERPAREUNiT iNSTALLATiON Unpack unit on floor next to installation bcation Remove front aitachrnent screw Remove two side attachment screw (HWS14XCA,HWSl 8VCA,HWSg0VCA) Separate the outercase from the front with a putty knife at the catch points designated by the arrows Remove one screw securing basepan locking bracket Remove two screws located in the rear of the outercase, securing k,asepan to outercase Using the basepan handle, slowly and evenly pull chassis out from outer case Note: Cover putty knife blade with masking tape to guard against damage of the units finish The filter is removed in this illustration for clarity only Caution: Never expose plastic front or grille to extreme temperatures 14
-
 1
1 -
2
-
3
-
4
-
5
-
6
-
7
-
8
-
9
-
 10
10 -
 11
11 -
 12
12 -
 13
13 -
 14
14 -
 15
15 -
 16
16 -
 17
17 -
 18
18 -
 19
19 -
 20
20 -
21
-
22
-
23
-
24
-
25
-
26
-
27
-
28
-
29
-
30
-
31
-
32
-
33
-
34
-
35
-
36
-
37
-
38
-
39
-
40
-
41
-
42
-
43
-
44
-
45
-
46
-
47
-
48
-
49
-
50
-
51
-
52
-
53
-
54
-
55
-
56
-
57
-
58
-
59
-
60
-
61
-
62
-
63
-
64
-
65
-
66
-
67
-
68
-
69
-
70
-
71
-
72
-
73
 |
 |