Haier HWF05XCA User Manual - Page 20
on the grille. - model
 |
View all Haier HWF05XCA manuals
Add to My Manuals
Save this manual to your list of manuals |
Page 20 highlights
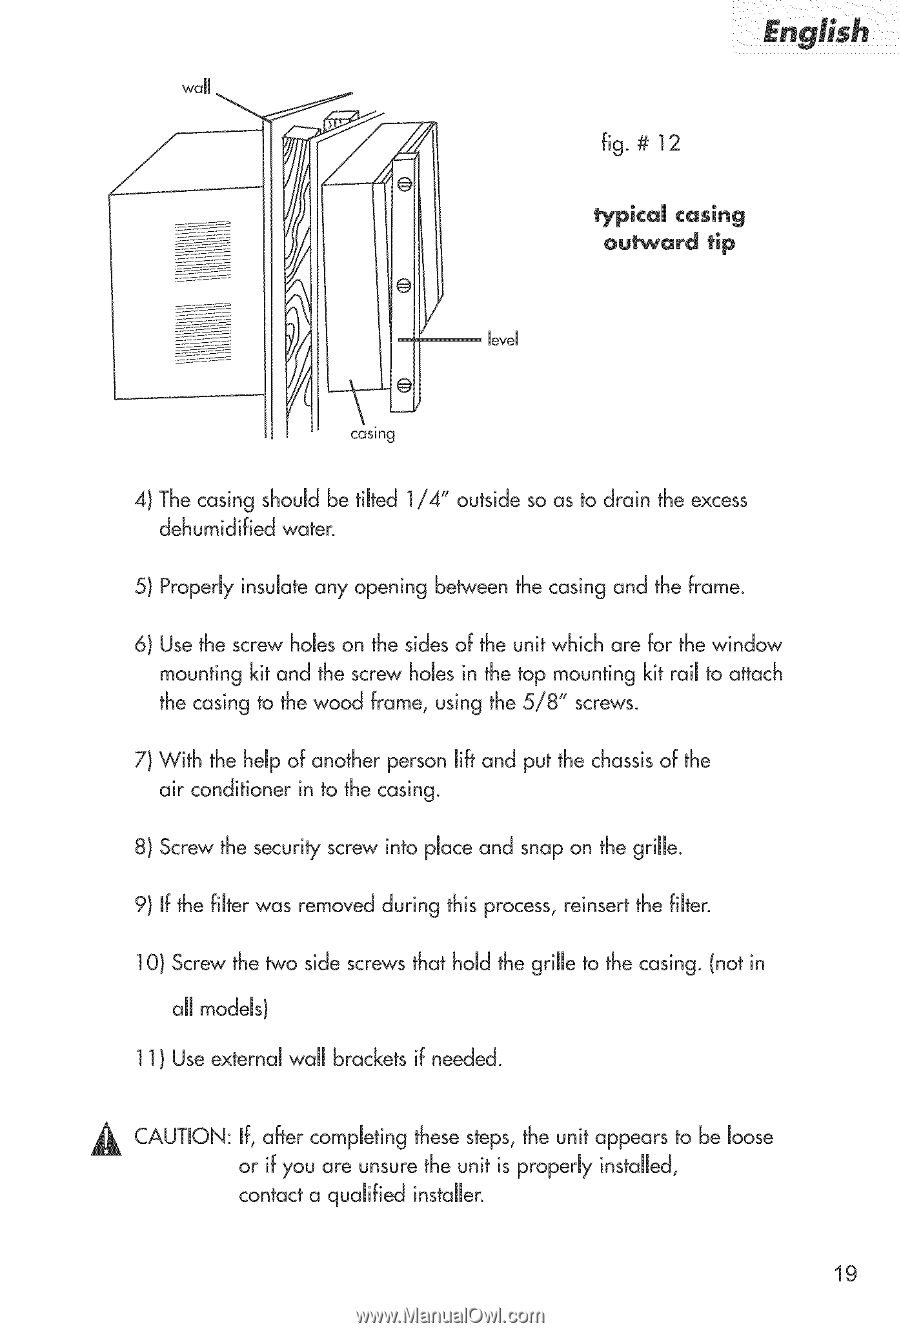
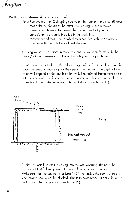
casing fig. # 12 typlcaU casing ou_ard tip level 4) The casing shouJdbe tilted 1/4" outside so as to drain the excess dehumidified water. 5) ProperRyinsulate any opening between the casing and the frame_ 6) Use the screw hobs on the sides of the unit which are for the window mounting kit and the screw holes in the top mounting kit rail to attach the casing to the wood frame, using the 5/8" screws. 7) With the help of another person lift and put the chassisof the air conditioner in to the casing_ 8) Screw the security screw into place and snap on the grille. 9) If the fiJterwas removed during this process, reinsert the filtec ] O) Screw the two side screws that hoJdthe grille to the casing_(not in all models) 11) Use externaJwall brackets if needed. _ CAUTION: If, after completing these steps, the unit appears to be loose or if you are unsure the unit is properly installed, contact a qualified installer. 19
-
 1
1 -
2
-
3
-
4
-
5
-
6
-
7
-
8
-
9
-
10
-
11
-
12
-
13
-
14
-
 15
15 -
 16
16 -
 17
17 -
 18
18 -
 19
19 -
 20
20 -
 21
21 -
 22
22 -
 23
23 -
 24
24 -
 25
25 -
26
-
27
-
28
-
29
-
30
-
31
-
32
-
33
-
34
-
35
-
36
-
37
-
38
-
39
-
40
-
41
-
42
-
43
-
44
-
45
-
46
-
47
-
48
-
49
-
50
-
51
-
52
-
53
-
54
-
55
-
56
-
57
-
58
-
59
-
60
-
61
-
62
-
63
-
64
-
65
-
66
-
67
-
68
-
69
-
70
-
71
-
72
-
73
 |
 |