Hamilton Beach 04150 Use And Care - Page 4
Installing the Carbon Pre-Filter, Setting the Controls - replacement filter
 |
View all Hamilton Beach 04150 manuals
Add to My Manuals
Save this manual to your list of manuals |
Page 4 highlights
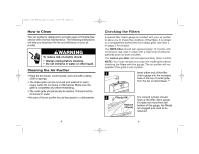
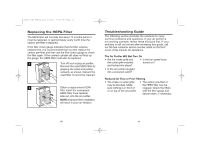
840115800 ENv00.qxd 6/6/03 9:02 AM Page 6 Installing the Carbon Pre-Filter 1 NOTE: The carbon pre-filter should be replaced approxi- mately every three months. Remove the intake grille by carefully pulling the upper two side tabs away from the body of the air purifier and lifting up. 2 Locate the black carbon pre-filter. It will be folded inside a plastic bag. Remove and discard the plastic bag. 3 Unfold and flatten out the black carbon pre-filter. Attach the four corners of the carbon pre-filter to the four hook fasteners on the HEPA filter. 6 4 Insert the two tabs on the bottom of the intake grille into the holes on the bottom ledge of the air purifier. Pivot the intake grille into place and lightly press on the upper corners of the grille to snap it into place. NOTE: The air purifier has a safety switch that prevents operation if the intake grille is not properly installed. DO NOT attempt to override or disable this safety switch. Setting the Controls 1. Power On Indicator - Lights when unit is on. 2. Fan Speed Knob - Turn the fan speed knob to the desired setting. There are four settings: • OFF • WHISPERCLEAN™ - Use for quiet, nighttime operation or for constant low-speed filtration. • MED (Medium) - Provides a higher fan speed; use for quickly filtering dust, pollen, smoke, etc. from a room. • QUICKCLEAN™ - Provides cleaning during acute needs. WARNING: To reduce the risk of electrical shock, never plug in the air purifier while your hands are wet. Always unplug the air purifier before moving or servicing the unit. 7
-
 1
1 -
 2
2 -
 3
3 -
 4
4 -
 5
5 -
 6
6 -
 7
7 -
 8
8 -
 9
9 -
 10
10 -
11
-
12
-
13
-
14
 |
 |
