Harman Kardon ABH 4 Owners Manual - Page 4
Step One: Connect the ABH 4 to the Receiver
 |
View all Harman Kardon ABH 4 manuals
Add to My Manuals
Save this manual to your list of manuals |
Page 4 highlights
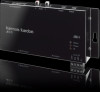
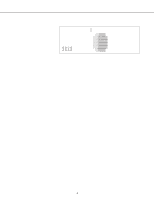
INSTALLATION AND CONNECTION Important Safety Note: Before beginning the installation process, make certain that all electronics products in the system are turned off and disconnected from their A/V power connection. This avoids the possibility of accidental activation that could possibly damage the equipment or cause personal injury. Do not turn on the equipment until instructed. The ABH 4 may be used in two modes of operation. The installation process will vary according to which option you select. • When used in conjunction with an A-BUS/READY Harman Kardon receiver, the ABH 4 provides the power that enables up to four remote rooms to be equipped with A-BUS modules such as the Harman Kardon AB 1, with more room installations possible through the use of additional ABH 4 hubs. • The ABH 4 may also be used with any receiver, preamplifier or surround processor that that has a "tape" or "multiroom" output to send the selected source to A-BUS modules installed in remote rooms. Alternatively, a Tuner or CD player may be connected to the ABH 4 to create a one-source multiroom audio system. Mounting the ABH 4 (optional) Before making any connections to the ABH 4, read the instructions below and carefully plan the placement of any wiring that may be required. The ABH 4 may be mounted on a wall using the screw slots provided on the sides of the unit, or it may simply be placed on any flat surface. • To mount the ABH 4 to a wall, first place the unit against the surface to which it will be mounted, and make certain that there is sufficient clearance at all sides for any cables that will be attached and that they are able to reach their destination. • Although the ABH 4 is relatively light, make certain that the wall surface is able to support the ABH 4. • While holding the ABH 4 to the wall, trace the outline of the slots on the "wings" at the left and right side of the ABH to the wall. • Drill a pilot hole and install an anchor or retaining socket sufficient to accommodate a #10 pan-head Phillips-type wood screw that is at least 1 inch long at each side, under the circular part of the tracing. If you have any questions or doubt about the ability of the wall surface to properly support the weight of the ABH 4, consult a properly trained installer before proceeding. • When the anchor is installed, place a screw through the slot on either side of the ABH 4 and then tighten the screw into the anchor until it is almost completely secured. • Slip the ABH 4 so that it slides down the keyhole notch of the slot and then tighten it securely to the wall. Connections to an A-BUS/READY Receiver Step One: Connect the ABH 4 to the Receiver Using the RJ-45 jumper cable supplied with the ABH 4, connect one end to the Expansion In Jack ¢ on the ABH 4 and the other end to the A-BUS/READY jack on the rear panel of your Harman Kardon receiver. Step Two: Connect the A-BUS Modules Connect the RJ-45 jacks on the Cat. 5 cabling that runs to the remote room modules to the A-BUS Outputs • on the ABH 4. Make certain that the connector is wired in accordance with the standard TIA 568A color-coding. Connect the A-BUS modules in the remote rooms to the Cat. 5 cable in accordance with the instructions for the module. Step Three: Connect the AC Power Supply Connect the AC Power Supply furnished with the ABH 4 to the Power Input ™. Plug the AC power cord into the socket on the Power Supply. Do not connect the power cord to an AC outlet at this time. Optional Step Four: Multiple ABH 4 Connections If you are using more than one ABH 4 in a system, connect the Expansion Out Jack ∞ to the Expansion In Jack ¢ on another ABH 4, using the RJ-45 jumper cable supplied with the second ABH 4. Then, follow steps two and three, as shown above. 3
-
 1
1 -
 2
2 -
 3
3 -
 4
4 -
 5
5 -
 6
6 -
 7
7 -
 8
8 -
 9
9
 |
 |
