Harman Kardon AVR 110 Owners Manual - Page 19
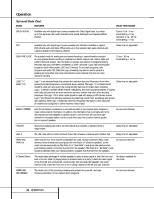
Surround Mode, Selector, Surround Mode Selector, Main Information, Display, PRO LOGIC, Main - won t turn on
 |
View all Harman Kardon AVR 110 manuals
Add to My Manuals
Save this manual to your list of manuals |
Page 19 highlights
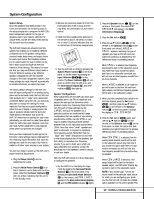
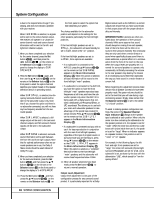
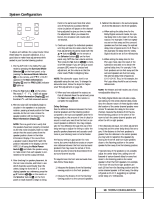
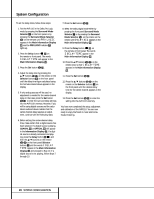
System Configuration LCR LS LFE RS To adjust and calibrate the output levels, follow these steps. For accurate calibration, it is a good idea to make these adjustments while seated in your favorite listening position: 1. Put the AVR 110 in the Dolby Pro Logic mode by pressing the Surround Mode Selector 7 on the front panel, or by pressing the Surround Mode Selector j on the remote, until PRO LOGIC appears in the Main Information Display W and the PRO LOGIC indicator F lights up. 2. Press the Test button h on the remote. The words T-T FL 0dB will appear in the Main Information Display W and the letters FL will flash once each second. 3. The test noise will immediately begin to circulate in the speakers in a clockwise rotation, pausing at each position for three seconds. As the test noise rotates the speaker position will be shown in the Main Information Display W. NOTE: This is a good time to verify that the speakers have been properly connected. As the test noise circulates, listen to make certain that the sound comes from the speaker position shown in the Main Information Display. If the sound from a speaker location does NOT match the position indicated in the display, turn the AVR 110 off using the Main Power Switch 1 and check the speaker wiring to make certain that each speaker is connected to the correct output terminal. 4. After checking for speaker placement, let the test noise circulate, and listen to see which channels sound louder than the others. Using the front left (FL in the display) speaker as a reference, press the ⁄/¤ buttons mq on the remote or the Selector buttons 5 on the front panel on each channel to begin to bring them to the same level. Note that when one of the buttons is pushed, the test noise circulation will pause on the channel being adjusted to give you time to make the adjustment. When you release the button, the circulation will resume after 15 seconds. 5. Continue to adjust the individual speakers until they all have the same volume. Note that adjustments should be made with the ⁄/¤ buttons mq on the remote or the Selector buttons 5 on the front panel only, NOT the main volume controls. Then press the Set button oÔ to memorize the change. If you are using a sound pressure (SPL) meter for precise level adjustment, set the volume so that the meter reads 75dB, C-Weighting Slow. NOTE: The subwoofer output level is not adjustable using the test tone. To change the subwoofer level, follow the steps for Output Level Trim Adjustment on page 26. 6. When you have adjusted the outputs so that all channels have the same level, press the Test button h on the remote to complete the adjustment. Delay Settings Due the different distances between the frontchannel speakers and the listening position compared to the surround speakers and the listening position, the amount of time it takes for sound to reach your ears from the front or surround speakers is different. You may compensate for this difference through the use of the delay settings to adjust the timing to tailor the specific speaker placement and acoustic conditions in your listening room or home theater. The factory setting is appropriate for most rooms, but some installations create an uncommon distance between the front and surround speakers that may cause the arrival of frontchannel sounds to become disconnected from surround-channel sounds. To resynchronize the front and surround channels, follow these steps: 1. Measure the distance from the listening/ viewing position to the front speakers. 2. Measure the distance from the listening/ viewing position to the surround speakers. 3. Subtract the distance to the surround speakers from the distance to the front speakers. a. When setting the delay time for the Dolby Digital surround modes, the optimal delay time is the result of that subtraction. For example, if the front speakers are ten feet away and the surround speakers are five feet away, the optimal delay time is figured as 10-5=5. Thus, in this example, the delay time for Dolby Digital should be set at five milliseconds. b. When setting the delay time for the Pro Logic mode, take the result of the subtraction and add 15 to obtain the optimal delay time. For example, if the front speakers are ten feet away and the surround speakers are five feet away, the optimal delay time is figured as 10-5+15=20. Thus, in this example, the Pro Logic delay should be set at twenty milliseconds. NOTE: The Theater and Hall modes use a fixed, nonadjustable delay time. The Dolby Digital Mode also includes a separate setting for the center-channel delay mode, since the discrete nature of these signals makes the location of the center-channel speaker more critical. To calculate the delay for the center channel, measure the distance from the preferred listening position in the center of the room to both the center-channel speaker and either the left or right speaker. If the distances are equal, no further adjustment is required and the center delay should be set to zero. If the distance to the front speakers is greater than the distance to the center speaker, you may wish to reposition the speakers by moving the front-left and front-right speakers closer to the listening position or the center speaker further away from the listening position. If repositioning of the speakers is not possible, adjust the center delay time, adding one millisecond of center-channel delay for every foot closer to the listening position the center speaker is than the front speakers. For example, if the front-left and front-right speakers are each 10 feet from the listening position and the center-channel speaker is 8 feet away, the delay is figured as 10-8=2, suggesting an optimal center delay of 2 milliseconds. 19 SYSTEM CONFIGURATION
-
 1
1 -
2
-
3
-
4
-
5
-
6
-
7
-
8
-
9
-
10
-
11
-
12
-
13
-
 14
14 -
 15
15 -
 16
16 -
 17
17 -
 18
18 -
 19
19 -
 20
20 -
 21
21 -
 22
22 -
 23
23 -
 24
24 -
25
-
26
-
27
-
28
-
29
-
30
-
31
-
32
-
33
-
34
-
35
-
36
-
37
-
38
-
39
-
40
-
41
-
42
-
43
-
44
 |
 |
