Harman Kardon AVR 3600 Owners Manual - Page 35
Using, Docking Station - reset
 |
View all Harman Kardon AVR 3600 manuals
Add to My Manuals
Save this manual to your list of manuals |
Page 35 highlights
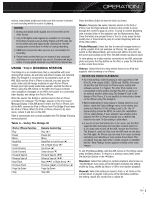
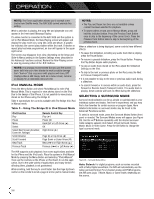
OPERATION section, insert blank media and make sure the recorder is turned on and recording while the source is playing. NOTES: 1. Analog and digital audio signals are not converted to the other format. 2. Only PCM digital audio signals are available for recording. Proprietary formats such as Dolby Digital and DTS may not be recorded using the digital audio connections. Use the analog audio connections to make an analog recording. 3. HDMI and component video sources are not available for recording. 4. Please make certain that you are aware of any copyright restrictions on any material you record. Unauthorized duplication of copyrighted materials is prohibited by federal law. USING DOCKING STATION The Bridge III is an included dock that is compatible with most docking iPod models, 4G and later, and iPhone models (not included). When The Bridge III is connected to its proprietary input on the AVR 3600 and the iPod or iPhone is docked, you may play the audio, video and still-image materials on your iPod or iPhone through your high-quality audio/video system; operate the iPod or iPhone using the AVR remote or the AVR's front-panel controls; view navigation messages on the AVR's front panel or a connected video display; and charge the iPod or iPhone. When the source The Bridge is selected and an iPod or iPhone is docked, the message "The Bridge" appears in the front-panel Message Display. If the AVR doesn't detect the iPod or iPhone, turn off the AVR, remove the iPod or iPhone from The Bridge III and reset the iPod or iPhone. When the iPod or iPhone returns to its main menu, redock it and turn on the AVR. Table 4 summarizes the controls available with The Bridge III during normal playback. Table 4 - Using The Bridge III iPod or iPhone Function Play Pause Menu Back/Exit Select Scroll Reverse Scroll Forward Forward Search Reverse Search Next Track Previous Track Page Up/Down Stop Remote Control Key Play (3) Pause (II ) Menu Back/Exit or Left Arrow (7) OK or Right Arrow (3) Up Arrow (1) Down Arrow (5) Forward Search (33) Reverse Search (77) Next (33I ) or Right Arrow (3) Previous (I77 ) or Left Arrow (7) Page Up/Down Stop ( I ) Press the Menu Button to view the slide-out menu: Music: Navigates the audio materials stored on the iPod or iPhone. Use the Page Up/Down Control on the remote to scroll through the content a page at a time. To jump to content beginning with a desired letter of the alphabet, use the Alphanumeric Keys. Since the letters are grouped three or four to a key, press the key quickly two or three times to jump to content beginning with one of the other letters. Photo/Manual: Select this line to view still images stored on a photo-capable iPod (not available on iPhone). The system will switch to iPod Manual Mode, and control will shift to the iPod. Use the screen and controls on the iPod. The AVR remote may also be used. To view photos on a video monitor connected to the AVR, select the photo and press the Play Button on the iPod, or press the OK Button on the remote three times. Videos: Select this line to view videos stored on an iPod that supports video browsing or an iPhone. NOTES ON VIDEO PLAYBACK: • As of this writing, video browsing is only supported on the iPod 5G, iPod classic (80GB, 120GB and 160GB), iPod nano 3G and 4G, and iPod touch or iPhone (when loaded with software version 2 or higher). For other iPod models, it is not possible to view photos (except iPod 4G) or videos on an external monitor while using The Bridge III. Due to the design of the iPhone, it is not possible to view photos stored on the iPhone using The Bridge III. • Before attempting to view photos or videos stored on your device, check the Video Settings menu on the device and make sure that the TV Out setting is set to On. The TV Signal setting should be NTSC, to match the capabilities of your video display. If your selection was playing and is paused, the iPod or iPhone requires you to reselect the video for the new TV Out setting to take effect. • If you do not see the Videos line in the menu, and the iPod supports video browsing and has video content stored on it, you may need to turn off the AVR, remove the iPod from The Bridge III, reset the iPod, turn the AVR back on and dock the iPod again. An iPhone may not need to be reset, as simply undocking and redocking it may resolve the problem.This procedure may also help when a video program is selected but the "Now Playing" screen appears instead of the video images. To exit iPod Manual Mode, with the AVR remote in The Bridge mode, press the Menu Button. To return to a previous menu level, press the Back/Exit Button or the 7 Button. Random: Select this setting for random playback, also known as "Shuffle Mode". Each press of the OK Button switches the setting: shuffle by Song, shuffle by Album, or Off to end random playback. Repeat: Select this setting to repeat a track or all tracks in the current album or playlist. Each press of the OK Button switches the setting: repeat Off, repeat One or repeat All. 35
-
 1
1 -
2
-
3
-
4
-
5
-
6
-
7
-
8
-
9
-
10
-
11
-
12
-
13
-
14
-
15
-
16
-
17
-
18
-
19
-
20
-
21
-
22
-
23
-
24
-
25
-
26
-
27
-
28
-
29
-
 30
30 -
 31
31 -
 32
32 -
 33
33 -
 34
34 -
 35
35 -
 36
36 -
 37
37 -
 38
38 -
 39
39 -
 40
40 -
41
-
42
-
43
-
44
-
45
-
46
-
47
-
48
-
49
-
50
-
51
-
52
-
53
-
54
-
55
-
56
-
57
-
58
-
59
-
60
-
61
-
62
-
63
-
64
-
65
-
66
 |
 |
