Harman Kardon MAS 102 CD Player and Amplifier Owners Manual - Page 10
Installation
 |
View all Harman Kardon MAS 102 CD Player and Amplifier manuals
Add to My Manuals
Save this manual to your list of manuals |
Page 10 highlights
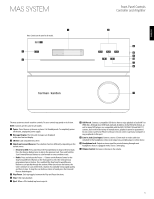
mas system Installation 1. Carefully unpack the controller, amplifier, speakers, FM antenna, DAB antenna (MAS 111 systems only), analog audio cable, ribbon cable, detachable AC power cord, The Bridge III dock for iPod, remote control and batteries. 2. Open the battery compartment of the remote control by firmly grasping the portion of the remote that has the Harman Kardon logo and pulling it downward. Install the batteries in the remote control, following the "+" and "-" symbols in the battery compartment to maintain the correct polarity. Caution: Danger of explosion if batteries are incorrectly replaced. Replace only with the same or equivalent type. 3. With the controller stacked on top of the amplifier, carefully insert one end of the ribbon cable into the connector on the rear panel of the controller, and the other end into the corresponding connector on the rear panel of the amplifier. 4. Connect the FM antenna to its terminal. The system requires a female connector on the antenna. For MAS 111 systems only, connect the DAB antenna to its terminal. 5. Install The Bridge III dock for iPod (iPod is not included). a. Holding the cable with the wider part of the connector at the bottom, gently squeeze the tabs on each side as you insert it into the connector on the rear panel of the controller. b. Place the black insert in The Bridge III, making sure to push it all the way down. See Figure 1. NOTE: Do not place an iPod in The Bridge III unless both the black insert and a dock adapter are installed. Otherwise, the iPod will not connect properly, and both it and The Bridge III may sustain damage that is not covered by the warranty. Dock iPod Install Dock Adapter Insert Step Figure 1: Docking an iPod in The Bridge III If your player has: • A stereo 3.5mm Analog audio output or headphone jack: Plug an analog audio cable (not included) into the output or headphone jack and the front mini-jack, which is located on the right side of the controller. • Pair of RCA-type analog audio outputs: Plug one end of a two-conductor interconnect cable (one cable is included; purchase additional cables for other devices) into the player, and the other end into the TV or Auxiliary Input jacks on the rear panel of the mas system. Use the same-color connector for each channel (usually red for right, and white or black for left). If your device is a turntable with an MM-type cartridge, connect its outputs to the Phono (MM) Inputs on the rear panel of the controller. If it is another type of turntable, do not connect it to the mas system without using a separate phono preamp, available from electronics outlets. Do not connect a turntable to another set of inputs without using a phono preamp. • Optical or coaxial digital audio S/P-DIF output: Plug one end of the digital audio cable (not included) into the player, and the other end into one of the Optical or Coaxial Inputs on the rear panel of the mas system. Remember to select the correct analog or digital input as the source by pressing the Line In or Digital In Source Selector on the remote. 7. To make analog or digital audio recordings, connect the Coaxial Digital Output or the Line Output on the rear panel of the controller to the corresponding input on an audio recorder (not included). The mas system does not convert analog sources to the digital domain, or digital sources to the analog domain for recording. 8. Place the left and right loudspeakers as desired. It is recommended that the speakers be placed so as to form an equilateral triangle with the usual listening position. Thus, each speaker will be the same distance from the other speaker as it is from the listening position. Place the speakers at about the same height as the listener's ears. Connect one end of each included speaker cable to the terminals on the speaker, and the other end to the terminals on the amplifier. To ensure proper performance and bass response, make sure to preserve the correct polarity by connecting the positive terminals (colored red) to each other and the negative terminals (colored black) to each other. 9. Plug all power cords for the mas system and any external sources into unswitched AC outlets. c. Locate the dock adapter that was included with your iPod, or select one of the included dock adapters by referring to Table 1. If your iPod is an older model that does not appear in Table 1 and that did not include an adapter, contact Apple Inc. to purchase one. Place the adapter in The Bridge III insert, as shown in Figure 1. d. Remove the iPod from any case, and dock it in The Bridge III, as shown in Figure 1. 6. The mas system features eight audio inputs for other devices, such as portable players. This step is optional, and may be skipped if you have no external devices. Table 1 - Select the Correct The Bridge III Insert The Bridge III Insert NANO 5G (VIDEO 60GB) 5G (VIDEO 30GB) 13 12, 14 iPod Model iPod nano, 1st and 2nd generations iPod, 5th generation (60GB, 80GB) and iPod classic (160GB) iPod, 5th generation (30GB) and iPod classic (80GB) iPod nano, 3rd generation and 4th generation iPod touch - install large bumper 10
-
 1
1 -
2
-
3
-
4
-
 5
5 -
 6
6 -
 7
7 -
 8
8 -
 9
9 -
 10
10 -
 11
11 -
 12
12 -
 13
13 -
 14
14 -
 15
15 -
16
-
17
-
18
-
19
-
20
 |
 |
