HP 6210 Users Guide - Page 46
Enhance light areas of your copy, Prepare a color iron-on transfer, Start Copy Black, Start Copy Color
 |
View all HP 6210 manuals
Add to My Manuals
Save this manual to your list of manuals |
Page 46 highlights
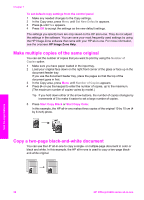
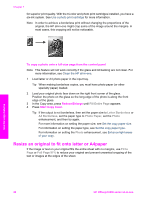
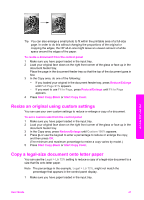
If you use the document feeder tray, place the pages so that the top of the document goes in first. 3 In the Copy area, press Menu until Enhancements appears. 4 Press until the Text setting appears, and then press OK. 5 Press Start Copy Black or Start Copy Color. If any of the following occur, turn off Text enhancement by selecting Photo or None: ● Stray dots of color surround some text on your copies ● Large, black typefaces look splotchy (not smooth) ● Thin, colored objects or lines contain black sections ● Horizontal grainy or white bands appear in light- to medium-gray areas Enhance light areas of your copy You can use Photo enhancements to enhance light colors that might otherwise appear white. You can also use Photo enhancements to eliminate or reduce any of the following that might occur when copying with Text enhancements: ● Stray dots of color surround some text on your copies ● Large, black typefaces look splotchy (not smooth) ● Thin, colored objects or lines contain black sections ● Horizontal grainy or white bands appear in light- to medium-gray areas To copy an overexposed photo 1 Make sure you have paper loaded in the input tray. 2 Load your original photo face down on the right front corner of the glass. Position the photo on the glass so the long edge of the photo is along the front edge of the glass. 3 In the Copy area, press Menu until Enhancements appears. 4 Press until the Photo enhancement setting appears, and then press OK. 5 Press Start Copy Color. It is easy to set Enhancement settings for photos and other documents you copy by using the HP Image Zone software that came with your HP all-in-one. With one click of your mouse button, you can set a photo to copy with Photo enhancements, a text document to copy with Text enhancements, or a document that contains both images and text to copy with both Photo and Text enhancements turned on. For more information, see the onscreen HP Image Zone Help. Prepare a color iron-on transfer You can copy an image or text onto an iron-on transfer, then iron it onto a T-shirt, pillow cover, place mat, or other piece of fabric. Tip Practice applying an iron-on transfer on an old garment first. 1 Load the iron-on transfer paper in the input tray. 2 Load your original face down on the right front corner of the glass. If you are copying a photo, position the photo on the glass so the long edge of the photo is along the front edge of the glass. 3 In the Copy area, press Menu until Copy Paper Type appears. 4 Press until Iron-On or Iron-On Mirrored appears, and then press OK. Use the copy features User Guide 43
-
 1
1 -
2
-
3
-
4
-
5
-
6
-
7
-
8
-
9
-
10
-
11
-
12
-
13
-
14
-
15
-
16
-
17
-
18
-
19
-
20
-
21
-
22
-
23
-
24
-
25
-
26
-
27
-
28
-
29
-
30
-
31
-
32
-
33
-
34
-
35
-
36
-
37
-
38
-
39
-
40
-
 41
41 -
 42
42 -
 43
43 -
 44
44 -
 45
45 -
 46
46 -
 47
47 -
 48
48 -
 49
49 -
 50
50 -
 51
51 -
52
-
53
-
54
-
55
-
56
-
57
-
58
-
59
-
60
-
61
-
62
-
63
-
64
-
65
-
66
-
67
-
68
-
69
-
70
-
71
-
72
-
73
-
74
-
75
-
76
-
77
-
78
-
79
-
80
-
81
-
82
-
83
-
84
-
85
-
86
-
87
-
88
-
89
-
90
-
91
-
92
-
93
-
94
-
95
-
96
-
97
-
98
-
99
-
100
-
101
-
102
-
103
-
104
-
105
-
106
-
107
-
108
-
109
-
110
-
111
-
112
-
113
-
114
-
115
-
116
-
117
-
118
-
119
-
120
-
121
-
122
-
123
-
124
-
125
-
126
-
127
-
128
-
129
-
130
-
131
-
132
-
133
-
134
-
135
-
136
-
137
-
138
-
139
-
140
-
141
-
142
-
143
-
144
-
145
-
146
-
147
-
148
-
149
-
150
-
151
-
152
-
153
-
154
-
155
-
156
-
157
-
158
-
159
-
160
-
161
-
162
-
163
-
164
-
165
-
166
-
167
-
168
-
169
-
170
-
171
-
172
-
173
-
174
-
175
-
176
-
177
 |
 |