HP 712c (English) Windows Users Guide - C5894-60003 - Page 54
Photographs
 |
View all HP 712c manuals
Add to My Manuals
Save this manual to your list of manuals |
Page 54 highlights
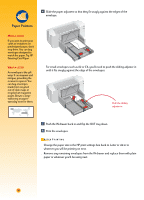
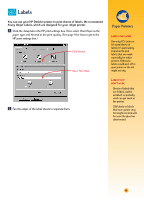
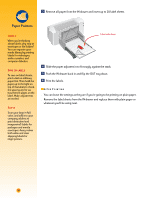
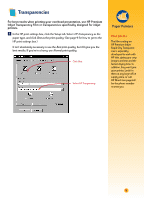
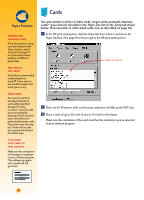
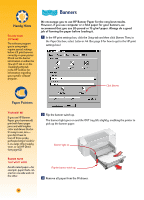
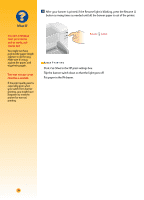
Photographs For the best results, use HP Deluxe Photo Paper, HP Premium Photo Paper, or HP Photo Paper for exceptional quality photo images. Ẅ Click the Setup tab in the HP print settings box. Then select the type of photo paper you are using as the paper type. The print quality automatically changes to Best. (See page 9 for how to get to the HP print settings box.) Select HP Deluxe Photo Paper or HP Premium Photo Paper. ẅ Load the paper as you would for normal printing. Make sure you insert the paper glossy-side down. Ẇ Print the document. For the best results, remove each sheet promptly after printing, and allow it to dry glossy-side up. (The drying time will vary depending on the humidity.) AFTER P RINTING s Change the paper type in the HP print settings box back to Plain Paper or to whatever is appropriate for what you will be printing on next. s Remove the photo paper from the IN drawer and replace it with plain paper or whatever you'll be using next. Paper Pointers MAKE A GOOD IMPRESSION Use HP Deluxe Photo Paper for best results when you're printing photographic images; its glossy surface provides crisp, vibrant images. When you select this paper in the HP print settings box, the printer uses Kodak Image Enhancements technology, which gives you excellent skintones and true-tolife landscape colors. Use HP Premium Photo Paper to produce spectacular photos that look and feel like traditional photos. Use HP Photo Paper for two-sided photo projects. Just print your photos on the glossy side and print your text and graphics on the matte side. 33
-
 1
1 -
2
-
3
-
4
-
5
-
6
-
7
-
8
-
9
-
10
-
11
-
12
-
13
-
14
-
15
-
16
-
17
-
18
-
19
-
20
-
21
-
22
-
23
-
24
-
25
-
26
-
27
-
28
-
29
-
30
-
31
-
32
-
33
-
34
-
35
-
36
-
37
-
38
-
39
-
40
-
41
-
42
-
43
-
44
-
45
-
46
-
47
-
48
-
 49
49 -
 50
50 -
 51
51 -
 52
52 -
 53
53 -
 54
54 -
 55
55 -
 56
56 -
 57
57 -
 58
58 -
 59
59 -
60
-
61
-
62
-
63
-
64
-
65
-
66
-
67
-
68
-
69
-
70
-
71
-
72
-
73
-
74
-
75
-
76
-
77
-
78
-
79
-
80
-
81
-
82
-
83
-
84
-
85
-
86
-
87
-
88
-
89
-
90
 |
 |
