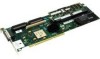
HP A9890A HP A9890A Smart Array 6402 Controller Installation Guide - Page 15
Using ORCA (IA Platforms Only), Configuring Your Logical Boot Drive, Step 10.
 |
UPC - 829160079530
View all HP A9890A manuals
Add to My Manuals
Save this manual to your list of manuals |
Page 15 highlights
Smart Array 6402 Controller HP-UX Installation Setting up a Smart Array 6402 Controller As a Boot Device Step 10. Select the kind of installation (Guided or Advanced) you want to do. The installation starts, and the Ignite-UX graphical interface (GUI) appears. Step 11. Under the "Basic" tab, select the configuration to use according to the HP-UX system you are using. Step 12. Still under the "Basic" tab, for the root disk for the installation, select the Smart Array 6402 logical drive you want to install the HP-UX operating system on. Step 13. Continue with (and finish) the installation as usual. Step 14. Once the installation has completed, you can boot from that Smart Array 6402 logical drive. Using ORCA (IA Platforms Only) This section describes how to use ORCA, a simple ROM-based configuration utility that runs on all Integrity Servers. For IA or Integrity systems follow this procedure: Configuring Your Logical Boot Drive When using an HP Smart Array controller as your boot controller, use the Option Rom Configuration for Arrays (ORCA) utility to configure your logical boot drive. The ORCA utility can only be accessed when the system is booting. Step 1. Press the F8 key when the prompt appears on the screen during boot to start ORCA and configure your logical boot drive. Step 2. Select the Create Logical Drive Step 3. Use the Arrow keys, Spacebar, and Tab key to navigate around the screen and set up the logical drive, including an online spare drive if one is required. NOTE You cannot use ORCA to configure one spare drive to be shared among several arrays. Step 4. Press the Enter key to accept the settings Step 5. Press the F8 key to confirm the settings and save the new configuration. After several seconds, the Configuration Saved screen is displayed. NOTE Pressing F8 at the ORCA prompt may not start ORCA on all terminals. If ORCA does not start when F8 is pressed, reboot and use esc 8 at ORCA prompt to start ORCA. Chapter 1 15
-
 1
1 -
2
-
3
-
4
-
5
-
6
-
7
-
8
-
9
-
 10
10 -
 11
11 -
 12
12 -
 13
13 -
 14
14 -
 15
15 -
 16
16 -
 17
17 -
 18
18 -
 19
19 -
 20
20 -
21
-
22
-
23
-
24
-
25
-
26
-
27
-
28
-
29
-
30
-
31
-
32
-
33
-
34
-
35
-
36
-
37
-
38
-
39
-
40
-
41
-
42
-
43
-
44
 |
 |
