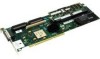
HP A9890A HP A9890A Smart Array 6402 Controller Installation Guide - Page 21
Connecting Controller For Internal Storage, <TABLE>, Step 1., Server, Length, Option Kit Number - internal raid 5
 |
UPC - 829160079530
View all HP A9890A manuals
Add to My Manuals
Save this manual to your list of manuals |
Page 21 highlights
Smart Array 6402 Controller Linux Installation Smart Array 6402 Linux Quick Installation NOTE Do not connect a SCSI cable to an external SCSI port without powering down the system. Adding a SCSI cable by hot-plugging it can cause bus errors, or possibly controller lock up, and in rare cases, electrical damage. Connecting Controller For Internal Storage NOTE Do not use the internal connector and the external connector on the same channel simultaneously. Step 1. Power down the system and open any access panels and covers giving you access to the internal SCSI cabling and the PCI slots. Step 2. Install the Smart Array PCI-X RAID card (A9890A) in a full-length PCI slot. There may be a specific slot required on your server, please see your server documentation for details. Step 3. Remove the SCSI cable(s) connecting the internal disks to the built-in SCSI controller. Step 4. Route the new SCSI cables(s) from the internal disks to the SmartArray cards. Step 5. Replace access panels and covers CAUTION Do not operate the server for long periods without the access panel installed. Operating the server without the access panel results in improper airflow and improper cooling that can lead to thermal damage. CAUTION Do not use hot-pluggable drives and non-hot-pluggable drives on the same SCSI bus. NOTE Table 2-2 Drives grouped in the same array should all have the same storage capacity to avoid wasted disk space. Supported Internal SCSI Cables Server rx2600 Single Port rx2600 Dual Port Length 49 cm / 19 in. 58 cm / 23 in. Option Kit Number A9827A A9827A Cable Assembly Number A7231-63024 A7231-63025 NOTE If additional cables are required, order by the option kit number. Chapter 2 21
-
 1
1 -
2
-
3
-
4
-
5
-
6
-
7
-
8
-
9
-
10
-
11
-
12
-
13
-
14
-
15
-
 16
16 -
 17
17 -
 18
18 -
 19
19 -
 20
20 -
 21
21 -
 22
22 -
 23
23 -
 24
24 -
 25
25 -
 26
26 -
27
-
28
-
29
-
30
-
31
-
32
-
33
-
34
-
35
-
36
-
37
-
38
-
39
-
40
-
41
-
42
-
43
-
44
 |
 |
