HP Business Inkjet 3000 HP Business Inkjet 3000 series printers - (English) Us - Page 135
Replacing printheads
 |
View all HP Business Inkjet 3000 manuals
Add to My Manuals
Save this manual to your list of manuals |
Page 135 highlights
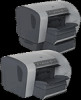
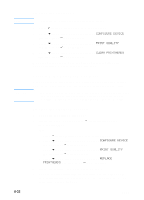
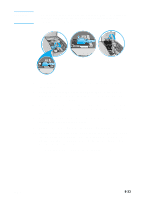
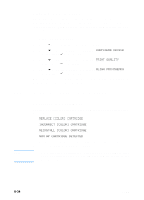
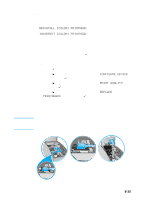
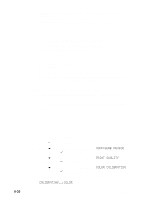
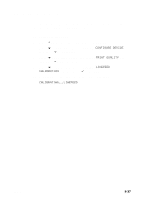
Replacing printheads Replace printheads when the following messages appear on the LCD control panel: REINSTALL [COLOR] PRINTHEAD INCORRECT [COLOR] PRINTHEAD CAUTION To replace printheads 1 Make sure the printer is turned on. 2 Lift the top cover, and then press (select button) on the LCD control panel. -Or- • Press (select button) on the LCD control panel. • Press (down arrow button) to highlight CONFIGURE DEVICE, and then press (select button). • Press (down arrow button) to highlight PRINT QUALITY, and then press (select button). • Press (down arrow button) to highlight REPLACE PRINTHEADS, and then press (select button). 3 Lift the ink cartridge cover and printhead cover. 4 To open the latch, lift it from the rear (item 1 in the graphic) and then pull it forward and down to release the hook from the metal catch (item 2 in the graphic). Do not attempt to force open the printhead latch. The printhead carriage will move to the left when the printer is turned on, enabling you to open the latch. ENWW 8-35
-
 1
1 -
2
-
3
-
4
-
5
-
6
-
7
-
8
-
9
-
10
-
11
-
12
-
13
-
14
-
15
-
16
-
17
-
18
-
19
-
20
-
21
-
22
-
23
-
24
-
25
-
26
-
27
-
28
-
29
-
30
-
31
-
32
-
33
-
34
-
35
-
36
-
37
-
38
-
39
-
40
-
41
-
42
-
43
-
44
-
45
-
46
-
47
-
48
-
49
-
50
-
51
-
52
-
53
-
54
-
55
-
56
-
57
-
58
-
59
-
60
-
61
-
62
-
63
-
64
-
65
-
66
-
67
-
68
-
69
-
70
-
71
-
72
-
73
-
74
-
75
-
76
-
77
-
78
-
79
-
80
-
81
-
82
-
83
-
84
-
85
-
86
-
87
-
88
-
89
-
90
-
91
-
92
-
93
-
94
-
95
-
96
-
97
-
98
-
99
-
100
-
101
-
102
-
103
-
104
-
105
-
106
-
107
-
108
-
109
-
110
-
111
-
112
-
113
-
114
-
115
-
116
-
117
-
118
-
119
-
120
-
121
-
122
-
123
-
124
-
125
-
126
-
127
-
128
-
129
-
 130
130 -
 131
131 -
 132
132 -
 133
133 -
 134
134 -
 135
135 -
 136
136 -
 137
137 -
 138
138 -
 139
139 -
 140
140 -
141
-
142
-
143
-
144
-
145
-
146
-
147
-
148
-
149
-
150
-
151
-
152
-
153
-
154
-
155
-
156
-
157
-
158
-
159
-
160
-
161
-
162
-
163
-
164
-
165
-
166
-
167
-
168
-
169
-
170
-
171
-
172
-
173
-
174
-
175
-
176
-
177
-
178
-
179
-
180
-
181
-
182
-
183
-
184
-
185
-
186
-
187
-
188
-
189
-
190
-
191
-
192
-
193
-
194
-
195
-
196
-
197
-
198
 |
 |