HP Dc5700 HP Backup and Recovery Manager - User Guide (Version 1.0) - Page 9
How to Manage Recovery Points
 |
UPC - 882780819535
View all HP Dc5700 manuals
Add to My Manuals
Save this manual to your list of manuals |
Page 9 highlights
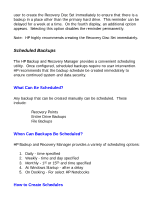
The HP Backup and Recovery Manager provides a simple interface for creating new Recovery Points. 1. On the Windows Start Menu, select HP Backup and Recovery. 2. Select the HP Backup and Recovery Manager. 3. After the Welcome Screen, select Backup to protect system settings and important files. Click Next to continue. 4. Select Create or manage Recovery Points. Click Next to continue. 5. If there are already Recovery Points on the system, select Create New Recovery Point. Click Next to continue, otherwise follow the wizard to create a Recovery Point. 6. Follow the wizard to create a Recovery Point. How to Manage Recovery Points The HP Backup and Recovery Manager allows the Recovery Points created on the hard drive to be deleted or moved to a CD or DVD to free up hard disk space. To access the Recovery Point Manager and manage Recovery Points: 1. On the Windows Start Menu, select HP Backup and Recovery. 2. Select the HP Backup and Recovery Manager. 3. After the Welcome Screen, select Backup to protect system settings and important files. Click Next to continue. 4. Select Create or manage Recovery Points. Click Next to continue. 5. After the Welcome Screen, there may be a warning screen stating that files over certain sizes may not be backed up to CD or DVD. By default, this is 600MB for CDs and 4GB for DVDs. Click Next to continue. 6. Select the location of the Recovery Points to manage. For Recovery Points On another hard disk or On network, select Yes to use the current folder and click Next to continue. 7. Select Manage Existing Recovery Points on the hard drive. Click Next to continue. Note: if there are no Recovery Points, this option does not appear. 8. It is possible to delete all Recovery Points back to a specific time or move all Recovery Points to CD or DVD disc with appropriate hardware. Select an option and follow the wizard to finish.
-
 1
1 -
2
-
3
-
 4
4 -
 5
5 -
 6
6 -
 7
7 -
 8
8 -
 9
9 -
 10
10 -
 11
11 -
 12
12 -
 13
13 -
 14
14 -
15
-
16
-
17
-
18
 |
 |