HP Designjet 815mfp HP Designjet cc800ps, 815mfp, 5500mfp, and 4200 scanner - - Page 42
to the Calibrate Raster Image Processing - 42
 |
View all HP Designjet 815mfp manuals
Add to My Manuals
Save this manual to your list of manuals |
Page 42 highlights
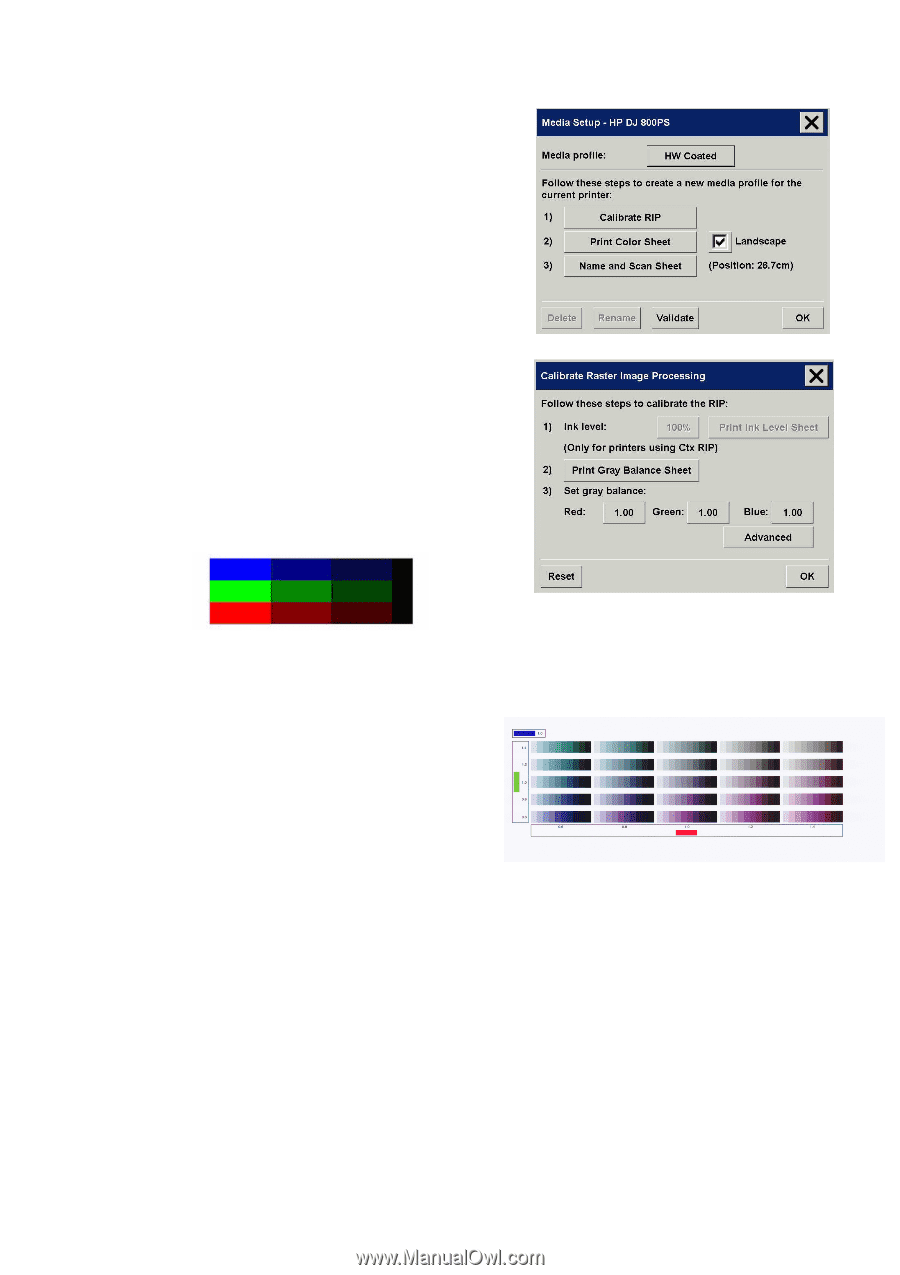
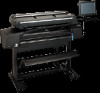
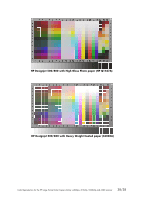
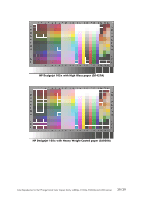
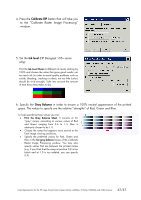
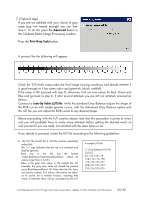
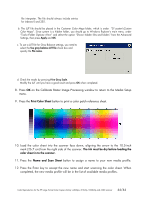
4. Press the Calibrate RIP button that will take you to the "Calibrate Raster Image Processing" window. 5. Set the Ink level (HP Designjet 105x series only): Print the Ink Level Sheet at different ink levels starting by 100% and choose the value that gives good results: not too much ink (in order to avoid quality problems such as cockle, bleeding, cracking or other), not too little (colors should be vivid enough). Take into account the amount of time the printout takes to dry. 6. Specify the Gray Balance in order to ensure a 100% neutral appearance of the printed grays. The values to specify are the relative "strengths" of Red, Green and Blue. To help specifying these values you can: • Print the Gray Balance Sheet. It consists of 25 "gray" ramps, according to various values of Red and Green ranging from 0.6 to 1.4. Blue is arbitrarily chosen to be 1.0. • Choose the ramp that appears more neutral to the final image viewing conditions. • Specify the preferred values for Red, Green and Blue in the Set gray balance boxes of the Calibrate Raster Image Processing window. You may also specify values that are between the printed ramps (e.g. if you think that the ramp at position 0.8 is too bluish and at 1.0 is too reddish, you can specify 0.9) Color Reproduction for the HP Large Format Color Copiers family: cc800ps, 815mfp, 5500mfp and 4200 scanner 42/42
-
 1
1 -
2
-
3
-
4
-
5
-
6
-
7
-
8
-
9
-
10
-
11
-
12
-
13
-
14
-
15
-
16
-
17
-
18
-
19
-
20
-
21
-
22
-
23
-
24
-
25
-
26
-
27
-
28
-
29
-
30
-
31
-
32
-
33
-
34
-
35
-
36
-
 37
37 -
 38
38 -
 39
39 -
 40
40 -
 41
41 -
 42
42 -
 43
43 -
 44
44 -
 45
45 -
 46
46 -
 47
47 -
48
-
49
-
50
-
51
-
52
-
53
-
54
-
55
-
56
-
57
-
58
-
59
-
60
-
61
 |
 |