HP HP-380467-003 Creating Disc Labels with LightScribe - Page 5
Go for contrast.
 |
UPC - 846084030171
View all HP HP-380467-003 manuals
Add to My Manuals
Save this manual to your list of manuals |
Page 5 highlights
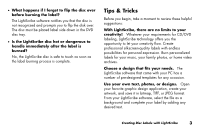
Make each CD or DVD a work in progress. You can add new text and pictures (for example, more song names or file names) to a previously burned label. Simply load the label design you originally used to burn the label, clear the existing text and graphics to avoid duplicate information being burned, then add the new label information and burn again. Preview your label. Use the Print Preview function (or print out on paper) to see your label before burning to make sure it is exactly the way you want it. Cut down on your label burning time. Switch from Best to Normal mode: you'll burn fewer tracks per inch for a lighter, but faster, label. Or use the Title or Content templates instead of Full Disc. Because LightScribe burns (starting in the center of the disc) outward in concentric rings, Title and Content templates save time by confining your label to a narrower band. For the same reason, using circular text instead of straight text can also speed up burn times. Go for contrast. A high-contrast photo or graphic stands out better than a picture in mostly soft middle tones. Use your software's preview feature to see how the graphics you use look on disc. Keep using your PC. While the label is being created, you can continue to use your PC for other activities. The LightScribe software indicates the time remaining to burn the design. Avoid sudden shock or vibration. While the disc is labeling, avoid any sudden shock or vibration to the PC. 4 Creating Disc Labels with LightScribe
-
 1
1 -
 2
2 -
 3
3 -
 4
4 -
 5
5 -
 6
6 -
 7
7 -
 8
8 -
 9
9 -
 10
10
 |
 |