HP L5015tm User Guide
HP L5015tm Manual
 |
View all HP L5015tm manuals
Add to My Manuals
Save this manual to your list of manuals |
HP L5015tm manual content summary:
- HP L5015tm | User Guide - Page 1
User Guide - HP L5015tm | User Guide - Page 2
to change without notice. The only warranties for HP products and services are set forth in the express warranty statements accompanying such products and services. Nothing herein should be construed as constituting an additional warranty. HP shall not be liable for technical or editorial errors - HP L5015tm | User Guide - Page 3
About This Guide This guide provides information on setting up the monitor, installing drivers, using the on-screen display menu, troubleshooting and technical specifications. WARNING! Text set off in this manner indicates that failure to follow directions could result in bodily harm or loss of life - HP L5015tm | User Guide - Page 4
iv About This Guide - HP L5015tm | User Guide - Page 5
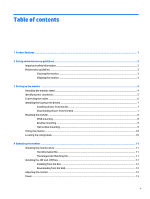
...3 Cleaning the monitor ...3 Shipping the monitor ...3 3 Setting up the monitor ...4 Attaching the monitor stand ...4 Identifying rear connectors ...5 Connecting the cables ...6 Installing the touchscreen drivers ...7 Installing drivers from the disc ...7 Downloading drivers from the Web - HP L5015tm | User Guide - Page 6
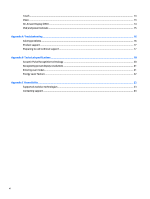
Touch ...13 Video ...13 On-Screen Display (OSD) ...14 OSD and power lockouts ...15 Appendix A Troubleshooting ...16 Solving problems ...16 Product support ...17 Preparing to call technical support ...17 Appendix B Technical specifications ...18 Acoustic Pulse Recognition technology ...20 Recognizing - HP L5015tm | User Guide - Page 7
inputs ● Plug and play capability if supported by the system ● On-Screen Display (OSD) adjustments in several languages for easy setup and screen optimization ● Software and documentation disc that includes the USB touch driver, HP monitor driver software and product documentation ● Detachable stand - HP L5015tm | User Guide - Page 8
reduce the risk of serious injury, read the Safety and Comfort Guide. It describes proper workstation, setup, posture, and health and work and correctly sized furniture designed to properly support your HP LCD monitor. WARNING! LCD monitors that are inappropriately situated on dressers, bookcases - HP L5015tm | User Guide - Page 9
this product yourself. Adjust only those controls that are covered in the operating instructions. If the monitor is not operating properly or has been dropped or damaged, contact an authorized HP dealer, reseller, or service provider. ● Use only a power source and connection appropriate for this - HP L5015tm | User Guide - Page 10
, ensure that the power is turned off to the monitor, computer system, and other attached devices, then follow the instructions below. Attaching the monitor stand The base comes detached; the neck of the monitor is attached. To mount the base: 1. Unpack the display head and place it face down on - HP L5015tm | User Guide - Page 11
to the monitor. (The AC power adapter is purchased separately.) Connects the VGA video cable to the monitor. The APR touch technology is NOT supported by the serial port on this model. Use the USB port for APR touch technology. Connects the touchscreen USB cable to the monitor. Identifying rear - HP L5015tm | User Guide - Page 12
's VGA input connector and your VGA video source, respectively. Tighten the video cable's screws for best performance. 2. Connect the USB touch cable between the monitor's USB connector and your PC's USB port. 3. Select the correct power cable for your region. Connect the power cable between the - HP L5015tm | User Guide - Page 13
Click Next and follow the on screen instructions to complete the touchscreen setup process. Downloading drivers from the Web To download the latest version of touchscreen driver from the HP monitors support Web site: 1. Go to http://www.hp.com/support and select the appropriate country and language - HP L5015tm | User Guide - Page 14
. CAUTION: This monitor supports the VESA industry standard 75mm mounting holes. To attach a third party mounting solution to the monitor, four 4mm, screws that secure the stand to the back of the monitor. 5. Follow the instructions from the manufacturer to install the panel to the manufacturer - HP L5015tm | User Guide - Page 15
base for mounting or securing (1). An additional two-hole pattern is available under small caps on the top of the base (2). Flat surface mounting The monitor's stand has covered mounting holes for securing the stand to a flat surface using M4 flathead screws. To use these mounting holes, unsnap the - HP L5015tm | User Guide - Page 16
to hold the base when adjusting the LCD, and take care not to touch the screen. Locating the rating labels The rating labels on the monitor provide the spare part number, product number, and serial number. You may need these numbers when contacting HP about the monitor model. The rating labels are - HP L5015tm | User Guide - Page 17
monitor driver The disc that comes with the monitor contains monitor driver files you can install on your computer: ● an .INF (Information) file ● an .ICM (Image Color Matching) file NOTE: If the monitor does not include a disc, the .INF and .ICM files can be downloaded from the HP monitors support - HP L5015tm | User Guide - Page 18
the disc in the computer optical drive. The disc menu is displayed. 2. View the HP Monitor Software Information file. 3. Select Install Monitor Driver Software. 4. Follow the on-screen instructions. 5. Ensure that the proper resolution and refresh rates appear in the Windows Display control panel - HP L5015tm | User Guide - Page 19
key). To improve reliability and reduce wasteful power consumption, disconnect the power adapter when long periods of disuse are planned. Touch Your monitor is factory-calibrated and should not need manual calibration (unless the input video is not fully scaled to the native resolution, or the - HP L5015tm | User Guide - Page 20
display parameters: Parameter Brightness Contrast Clock Phase Auto Adjust H-position V-position Available Adjustment Increase/decrease monitor brightness Default: Maximum Increase/decrease monitor contrast Default: Best gray-shade performance Allows fine adjustments of the panel's pixel dot clock - HP L5015tm | User Guide - Page 21
with equal black bars on the left and right). The touchscreen may need recalibration when switching between Aspect Ratio options Adjusts OSD button inactivity the monitor will wait before closing the OSD. The adjustable range is between 5 and 60 seconds. Default: 15 seconds Selects which language - HP L5015tm | User Guide - Page 22
The following table lists possible problems, the possible cause of each problem, and the recommended solutions. Problem Suggested Troubleshooting The monitor does not respond when turning on the system Check that the AC power cord is properly connected Monitor display is dim Use the OSD - HP L5015tm | User Guide - Page 23
numbers ● Locate an HP service center Preparing to call technical support If you cannot solve a problem using the troubleshooting tips in this section, you may need to call technical support. Have the following information available when you call: ● The monitor ● Monitor model number ● Serial - HP L5015tm | User Guide - Page 24
all HP's component manufacturers' typical level specifications for performance. Actual performance may vary either higher or lower. Active Display Area Monitor Dimensions (with stand) Monitor Thickness LCD Technology Diagonal Size Aspect Ratio Native (Optimal) Resolution Other Supported Resolutions - HP L5015tm | User Guide - Page 25
Shipping Dimensions Mounting Options On-Screen Display (OSD) Controls (Accessible through switches along the bottom) Temperature Humidity (non-condensing) Touch Interface MTBF 487 x 231 x 485 mm / 19.2 x 9.1 x 19.1 inches 75 mm VESA mount, capped through-mount holes Controls: Menu, Left, Right, - HP L5015tm | User Guide - Page 26
is based on controllers resolution of 4096 x 4096 Typically 2 to 3 ounces (55 to 85 grams) Board: USB 1.1 90% +/- 5% The touch activation area of the touchscreen is resistant to chemicals such as: ● Acetone ● Toluene ● Methy ethyl ketone ● Isopropyl alcohol ● Methyl alcohol ● Ethyl Acetate ● Ammonia - HP L5015tm | User Guide - Page 27
on the screen. Preset 1 2 3 4 5 6 7 8 9 10 11 12 13 14 15 Pixel Format VGA 640 x 350 70Hz VGA 720 x 400 70Hz VGA 640 x 480 60Hz MAC 640 preset mode. If this occurs, you may need to readjust the parameters of the monitor screen by using the on-screen display. Your changes can be made to any or all - HP L5015tm | User Guide - Page 28
light is green. The monitor also supports a reduced power state. The reduced power state will be entered into if the monitor detects the absence of either warm up period before the monitor will return to its normal operating mode. Refer to the computer manual for instructions on setting energy saver - HP L5015tm | User Guide - Page 29
designs, produces, and markets products and services that can be used by everyone, including people with disabilities, either on a stand-alone basis or with appropriate assistive devices. Supported assistive technologies HP products support a wide variety of operating system assistive technologies
-
 1
1 -
 2
2 -
 3
3 -
 4
4 -
 5
5 -
 6
6 -
 7
7 -
8
-
9
-
10
-
11
-
12
-
13
-
14
-
15
-
16
-
17
-
18
-
19
-
20
-
21
-
22
-
23
-
24
-
25
-
26
-
27
-
28
-
29
 |
 |

User Guide