HP LC2000r Pedestal-to-Rack Conversion Guide - Page 25
Reorient the Control Panel, Detach Control Panel from NetServer Chassis
 |
View all HP LC2000r manuals
Add to My Manuals
Save this manual to your list of manuals |
Page 25 highlights
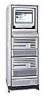
Chapter 3 Conversion: Install Components, Cover, and Front Bezel Reorient the Control Panel The control panel must be repositioned to be easily readable in the rack-mount position. Reposition the control panel and its bezel, as follows: 1. Unscrew the two screws securing the control panel to the chassis. 2. Unhook the control panel from the face of the chassis, as shown in Figure 3-2. A ribbon cable still connects it to the NetServer. Lock Pawl Control Panel Figure 3-2. Detach Control Panel from NetServer Chassis 3. Remove the lock pawl by squeezing the base until the tabs disengage from the mounting slots, as shown in Figure 3-2. The lock pawl is not used on the rack-optimized configuration of the NetServer. 21
-
 1
1 -
2
-
3
-
4
-
5
-
6
-
7
-
8
-
9
-
10
-
11
-
12
-
13
-
14
-
15
-
16
-
17
-
18
-
19
-
 20
20 -
 21
21 -
 22
22 -
 23
23 -
 24
24 -
 25
25 -
 26
26 -
 27
27 -
 28
28 -
 29
29 -
 30
30 -
31
-
32
-
33
-
34
-
35
-
36
-
37
-
38
-
39
-
40
-
41
-
42
-
43
-
44
-
45
-
46
-
47
-
48
 |
 |

Chapter 3
Conversion: Install Components, Cover, and Front Bezel
21
Reorient the Control Panel
The control panel must be repositioned to be easily readable in the rack-mount
position. Reposition the control panel and its bezel, as follows:
1.
Unscrew the two screws securing the control panel to the chassis.
2.
Unhook the control panel from the face of the chassis, as shown in
Figure 3-2. A ribbon cable still connects it to the NetServer.
Control Panel
Lock Pawl
Figure 3-2. Detach Control Panel from NetServer Chassis
3.
Remove the lock pawl by squeezing the base until the tabs disengage from
the mounting slots, as shown in Figure 3-2. The lock pawl is not used on
the rack-optimized configuration of the NetServer.