HP LC2000r Pedestal-to-Rack Conversion Guide - Page 34
Left Rear, Rack Column, Rear of NetServer, Cable Management Arm
 |
View all HP LC2000r manuals
Add to My Manuals
Save this manual to your list of manuals |
Page 34 highlights
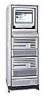
Chapter 3 Conversion: Install Components, Cover, and Front Bezel Rear of NetServer Left Rear Rack Column Cable Management Arm Figure 3-8. Attaching the Cable Management Arm 3. Install the two 6-32 Torx T-15 screws in the two threaded holes on the rear of the NetServer. 4. Orient the cable management arm as shown in Figure 8-17. 5. Install the flange over the 6-32 screws and tighten them. 6. Attach the other flange of the cable arm to the rear column of the rack with the two M-5 Torx T-25 screws, included with the arm. 7. Extend the HP NetServer out of the rack to ensure the Cable Management Arm moves with the chassis without binding. 8. Slide the HP NetServer back into the rack. 9. At the front of the rack, insert the screws through the flanges into the rack nuts and secure the HP NetServer to the front rack columns with a Torx T-25 driver. Each of the HP NetServer's two front flanges has two slots, which should line up with the rack nuts previously mounted on the rack columns. 30
-
 1
1 -
2
-
3
-
4
-
5
-
6
-
7
-
8
-
9
-
10
-
11
-
12
-
13
-
14
-
15
-
16
-
17
-
18
-
19
-
20
-
21
-
22
-
23
-
24
-
25
-
26
-
27
-
28
-
 29
29 -
 30
30 -
 31
31 -
 32
32 -
 33
33 -
 34
34 -
 35
35 -
 36
36 -
 37
37 -
 38
38 -
 39
39 -
40
-
41
-
42
-
43
-
44
-
45
-
46
-
47
-
48
 |
 |
