HP LP2475w HP LP2275w and LP2475w LCD Monitors User Guide - Page 30
HP LP2475w Monitor Front Panel Controls, Operating the Monitor - quick select
 |
UPC - 883585765447
View all HP LP2475w manuals
Add to My Manuals
Save this manual to your list of manuals |
Page 30 highlights
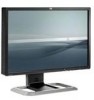
HP LP2475w Model Table 4-2 HP LP2475w Monitor Front Panel Controls Control Function 1 Input / Scan Scans all video inputs for valid signals. 2 Input / Quick Select Displays valid video input signals for quick selection. 3 Menu 4 - (Minus)/Auto 5 + (Plus)/Reset Opens, selects or exits the OSD menu. ● Navigates backward through the OSD menu and decreases adjustment levels. ● When the OSD menu is inactive, activates the auto adjustment feature to optimize the screen image. ● Navigates forward through the OSD menu and increases adjustment levels. ● When the OSD menu is inactive, resets the monitor settings to factory default settings. 6 PIP/POP Turns Picture-In-Picture or Picture-Outside-Picture on or off. NOTE: The PIP/POP feature must be initially set up using the OSD menu. Select Video Input Control from the OSD menu to make your PIP/ POP, input source, window size and screen position selections. 7 Power LED Fully powered = Green. Sleep mode = Amber. Sleep Timer mode = Flashing Amber. 8 Power Turns the monitor on or off. 24 Chapter 4 Operating the Monitor
-
 1
1 -
2
-
3
-
4
-
5
-
6
-
7
-
8
-
9
-
10
-
11
-
12
-
13
-
14
-
15
-
16
-
17
-
18
-
19
-
20
-
21
-
22
-
23
-
24
-
 25
25 -
 26
26 -
 27
27 -
 28
28 -
 29
29 -
 30
30 -
 31
31 -
 32
32 -
 33
33 -
 34
34 -
 35
35 -
36
-
37
-
38
-
39
-
40
-
41
-
42
-
43
-
44
-
45
-
46
-
47
-
48
-
49
-
50
-
51
-
52
-
53
-
54
-
55
 |
 |
