HP LaserJet Enterprise MFP M725 HP LaserJet Enterprise MFP M725 - User Guide
HP LaserJet Enterprise MFP M725 Manual
 |
View all HP LaserJet Enterprise MFP M725 manuals
Add to My Manuals
Save this manual to your list of manuals |
HP LaserJet Enterprise MFP M725 manual content summary:
- HP LaserJet Enterprise MFP M725 | HP LaserJet Enterprise MFP M725 - User Guide - Page 1
LASERJET ENTERPRISE MFP M725 User Guide M725dn M725f M725z M725z+ - HP LaserJet Enterprise MFP M725 | HP LaserJet Enterprise MFP M725 - User Guide - Page 2
- HP LaserJet Enterprise MFP M725 | HP LaserJet Enterprise MFP M725 - User Guide - Page 3
HP LaserJet Enterprise MFP M725 User Guide - HP LaserJet Enterprise MFP M725 | HP LaserJet Enterprise MFP M725 - User Guide - Page 4
services. Nothing herein should be construed as constituting an additional warranty. HP shall not be liable for technical or editorial errors or omissions contained herein. Part only. Don't steal music. Microsoft®, Windows®, Windows® XP, and Windows Vista® are U.S. registered trademarks of Microsoft - HP LaserJet Enterprise MFP M725 | HP LaserJet Enterprise MFP M725 - User Guide - Page 5
the software (Windows) ......... 18 Connect the product to a network by using a network cable and install the software (Windows) ...... 20 and output bins 27 Supported paper sizes ...28 Supported paper types ...32 Configure trays ...33 Configure a tray when loading paper 33 Configure a tray - HP LaserJet Enterprise MFP M725 | HP LaserJet Enterprise MFP M725 - User Guide - Page 6
59 Toner-cartridge view 59 Toner-cartridge information 60 Recycle the toner cartridge 60 Toner-cartridge storage 60 HP policy on non-HP toner cartridges 60 Replace the toner cartridge 61 Staples (stapling models only 64 Load staples ...64 5 Print ...67 Supported print drivers (Windows 68 HP - HP LaserJet Enterprise MFP M725 | HP LaserJet Enterprise MFP M725 - User Guide - Page 7
74 Automatically print on both sides (Windows 77 Manually print on both sides (Windows 79 Print multiple pages per sheet (Windows 81 Select the page orientation (Windows 83 Select the paper type (Windows 85 Print the first or last page on different paper (Windows 88 Scale a document to fit - HP LaserJet Enterprise MFP M725 | HP LaserJet Enterprise MFP M725 - User Guide - Page 8
Change the AirPrint product name 113 Solve AirPrint problems 113 Use HP Smart Print (Windows 114 Use easy-access USB printing 115 Print pictures 133 Adjust the copy lightness/darkness 134 Set the paper size and type for copying on special paper 136 Use Job Build mode ...137 Copy a book ... - HP LaserJet Enterprise MFP M725 | HP LaserJet Enterprise MFP M725 - User Guide - Page 9
to an existing speed dial list 185 Delete a speed dial list ...186 Delete a single number from a speed dial list 187 Send a fax by entering numbers manually 188 Send a fax by using a speed dial 190 Search a speed-dial list by name 192 Send a fax by using fax address book numbers 193 Search - HP LaserJet Enterprise MFP M725 | HP LaserJet Enterprise MFP M725 - User Guide - Page 10
Troubleshooting tab 208 Security tab 209 HP Web Services tab 209 Networking tab 209 Other Links list 209 HP Utility (Mac OS X) ...211 Open HP Utility ...211 HP Utility features 211 Use HP 217 Assign a system password 217 Encryption support: HP High-Performance Secure Hard Disks 218 Lock the - HP LaserJet Enterprise MFP M725 | HP LaserJet Enterprise MFP M725 - User Guide - Page 11
250 Check the paper type setting (Windows 250 Check the paper type setting (Mac OS X 250 Check the toner-cartridge status 251 Print a cleaning page 251 Visually inspect the toner cartridge 252 Check paper and the printing environment 252 Use paper that meets HP specifications 252 Check the - HP LaserJet Enterprise MFP M725 | HP LaserJet Enterprise MFP M725 - User Guide - Page 12
Check the paper size and type configuration 258 Select the tray to use for you want to print is not listed in the Retrieve from USB menu 276 Solve USB connection problems 277 Solve wired network problems 278 The product has a poor physical connection 278 The computer is using the incorrect IP - HP LaserJet Enterprise MFP M725 | HP LaserJet Enterprise MFP M725 - User Guide - Page 13
messages on the product control panel 286 Send-fax messages 288 Receive-fax messages 289 Service settings ...289 Settings in the Troubleshooting menu 290 Solve product software problems (Windows 291 A print driver for the product is not visible in the Printer folder 291 An error message was - HP LaserJet Enterprise MFP M725 | HP LaserJet Enterprise MFP M725 - User Guide - Page 14
xii ENWW - HP LaserJet Enterprise MFP M725 | HP LaserJet Enterprise MFP M725 - User Guide - Page 15
1 Product introduction ● Product comparison ● Product views ● Control panel ● Product reports ENWW 1 - HP LaserJet Enterprise MFP M725 | HP LaserJet Enterprise MFP M725 - User Guide - Page 16
320 GB HP HighPerformance Secure Hard Disk Control-panel display Touchscreen control panel Print Prints 41 pages per minute (ppm) on A4-size paper and 40 ppm on Letter-size paper Easy-access USB printing (no computer required) M725dn CF066A M725f CF067A M725z CF068A M725z+ CF069A 2 Chapter - HP LaserJet Enterprise MFP M725 | HP LaserJet Enterprise MFP M725 - User Guide - Page 17
Fax HP LaserJet Analog Fax HP will continue to provide best-effort support for the discontinued XP operating system. Windows Vista, 32-bit and 64-bit NOTE: Windows Vista Starter is not supported by the software installer or the print driver. M725dn CF066A M725f CF067A M725z CF068A M725z - HP LaserJet Enterprise MFP M725 | HP LaserJet Enterprise MFP M725 - User Guide - Page 18
M725dn M725f M725z M725z+ CF066A CF067A CF068A CF069A Windows 7, 32-bit and 64-bit Windows 8, 32-bit and 64-bit Windows 2003 Server SP1 or later, 32-bit and 64-bit NOTE: The software installer does not support the 64-bit version, but the print driver supports it. Windows Server 2008, 32- - HP LaserJet Enterprise MFP M725 | HP LaserJet Enterprise MFP M725 - User Guide - Page 19
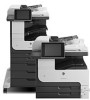
13 12 11 1 Document-feeder cover 2 Document-feeder input tray 3 Document-feeder output bin 4 Stapler/stacker output bin 5 Toner-cartridge door 6 Cartridge-door-release button 7 Formatter (contains the interface ports) 8 Tray 1 9 Right-side access door 10 Handles for lifting the - HP LaserJet Enterprise MFP M725 | HP LaserJet Enterprise MFP M725 - User Guide - Page 20
Product front-left view 9 8 7 6 5 4 3 1 Control-panel display 2 Hardware-integration pocket (for connecting third-party devices) 3 Handles for lifting the product 4 Power connection 5 Duplexer 6 Fuser jam-access cover 7 Upper-left door 8 Stapler door 9 Easy-access USB port 6 - HP LaserJet Enterprise MFP M725 | HP LaserJet Enterprise MFP M725 - User Guide - Page 21
Product input options M725f M725f 1 1x500-sheet feeder M725z M725z 3x500-sheet feeder 2 1x500-sheet feeder with cabinet M725z+ M725z+ 3,500-sheet high-capacity input tray ENWW Product views 7 - HP LaserJet Enterprise MFP M725 | HP LaserJet Enterprise MFP M725 - User Guide - Page 22
Interface ports 1 Fax port 2 Foreign interface harness (for connecting third-party devices) 3 Local area network (LAN) Ethernet (RJ-45) network port 4 Hi-Speed USB 2.0 printing port 5 USB port for connecting external USB devices 8 Chapter 1 Product introduction ENWW - HP LaserJet Enterprise MFP M725 | HP LaserJet Enterprise MFP M725 - User Guide - Page 23
. The serial number contains information about the country/region of origin, the product version, production code, and the production number of the product. Model name M725dn M725f M725z M725z+ Model number CF066A CF067A CF068A CF069A ENWW Product views 9 - HP LaserJet Enterprise MFP M725 | HP LaserJet Enterprise MFP M725 - User Guide - Page 24
that are available in the product firmware. To take advantage of the most current features, upgrade the product firmware. To download the most recent firmware upgrade file, go to www.hp.com/go/ljMFPM725_firmware. NOTE: The features that appear on the Home screen can vary, depending on the product - HP LaserJet Enterprise MFP M725 | HP LaserJet Enterprise MFP M725 - User Guide - Page 25
Retrieve from Device Memory 1 Refresh button 2 Sign In or Sign Out button 3 HP logo or Home button 4 Stop button 5 Start button 6 Product status 7 Language to the default settings. On any screen other than the Home screen, the HP logo changes to a Home the Home button to return to the Home screen - HP LaserJet Enterprise MFP M725 | HP LaserJet Enterprise MFP M725 - User Guide - Page 26
, lint-free cloth. Do not use paper towels or tissues because they are abrasive and to a global menu where you can search for specific topics. You can browse through the menu structure problem. The message also contains instructions to help solve the problem. 12 Chapter 1 Product introduction ENWW - HP LaserJet Enterprise MFP M725 | HP LaserJet Enterprise MFP M725 - User Guide - Page 27
You can print or view a report of the complete Administration menu so you can more easily navigate to the individual settings you need. 1. From the Home screen on the product control panel, scroll to and touch the Administration button. 2. Open the following menus: ● Reports ● Configuration/Status - HP LaserJet Enterprise MFP M725 | HP LaserJet Enterprise MFP M725 - User Guide - Page 28
want to review, and then touch the Print button to print it or touch the View button to review the settings on network. If applicable, it also shows the HP ePrint address and the Airprint address. Shows the approximations provided. Shows a count of all paper sizes that have passed through the product - HP LaserJet Enterprise MFP M725 | HP LaserJet Enterprise MFP M725 - User Guide - Page 29
Speed Dial List Fax Call Report PCL Font List PS Font List Description Shows the detected Web Services for the product. Contains a list of the faxes that have been sent from or received the available PCL fonts. Prints the available HP postscript level 3 emulation fonts. ENWW Product reports 15 - HP LaserJet Enterprise MFP M725 | HP LaserJet Enterprise MFP M725 - User Guide - Page 30
16 Chapter 1 Product introduction ENWW - HP LaserJet Enterprise MFP M725 | HP LaserJet Enterprise MFP M725 - User Guide - Page 31
and install software ● Connect the product to a computer by using a USB cable and install the software (Windows) ● Connect the product to a network by using a network cable and install the software (Windows) ● Connect the product to a computer by using a USB cable and install the software (Mac OS - HP LaserJet Enterprise MFP M725 | HP LaserJet Enterprise MFP M725 - User Guide - Page 32
cable and install the software (Windows) This product supports a USB 2.0 connection. Use an A-to-B type USB cable. HP recommends using a cable that is 3. Install the software from the CD, and follow the on-screen instructions. 4. When prompted, select the Directly connect to this computer using USB - HP LaserJet Enterprise MFP M725 | HP LaserJet Enterprise MFP M725 - User Guide - Page 33
any program to make sure that the software is correctly installed. ENWW Connect the product to a computer by using a USB cable and install the software (Windows) 19 - HP LaserJet Enterprise MFP M725 | HP LaserJet Enterprise MFP M725 - User Guide - Page 34
Connect the product to a network by using a network cable and install the software (Windows) Configure the IP address 1. Make sure the product is turned on and that the Ready message displays on the product controlpanel display. 2. Connect the network - HP LaserJet Enterprise MFP M725 | HP LaserJet Enterprise MFP M725 - User Guide - Page 35
HP Color LaserJet Page 1 5. IPv4: If the IP address is 0.0.0.0, or 192.0.0.192, or 169.254.x.x, you must manually manually configure the IP address. Install the software 1. Close all programs on the computer. 2. Install the software from the CD. 3. Follow the on-screen instructions Windows) 21 - HP LaserJet Enterprise MFP M725 | HP LaserJet Enterprise MFP M725 - User Guide - Page 36
and install the software (Mac OS X) This product supports a USB 2.0 connection. Use an A-to-B type USB cable. HP recommends using a cable that is no longer than 2 the CD. 4. Click the product icon, and follow the on-screen instructions. 5. Click the Close button. 6. Print a page from any program to - HP LaserJet Enterprise MFP M725 | HP LaserJet Enterprise MFP M725 - User Guide - Page 37
Connect the product to a network by using a network cable and install the software (Mac OS X) Configure the IP address 1. Make sure the product is turned on and that the Ready message displays on the product controlpanel display. 2. Connect the network cable to the product and to the network. 3. - HP LaserJet Enterprise MFP M725 | HP LaserJet Enterprise MFP M725 - User Guide - Page 38
should be able to print. If not, you must manually configure the IP address. Install the software 1. Close all programs on the computer. 2. Install the software from the CD. 3. Click the product icon, and follow the on-screen instructions. 4. Click the Close button when the installation is complete - HP LaserJet Enterprise MFP M725 | HP LaserJet Enterprise MFP M725 - User Guide - Page 39
If you are using the IP Printing method, complete the following steps: a. Click the IP Printer tab. b. Choose HP Jet Direct - Socket from the Protocol drop-down menu. This is the recommended setting for HP products. c. Type the IP address into the Address field on the add printer screen. d. The Name - HP LaserJet Enterprise MFP M725 | HP LaserJet Enterprise MFP M725 - User Guide - Page 40
26 Chapter 2 Connect the product and install software ENWW - HP LaserJet Enterprise MFP M725 | HP LaserJet Enterprise MFP M725 - User Guide - Page 41
3 Input trays and output bins ● Supported paper sizes ● Supported paper types ● Configure trays ● Alternative letterhead mode ● Tray 1 ● Tray 2 and Tray 3 ● 500-sheet trays ● 3,500-sheet high-capacity tray ● Standard output bin ● Stapler/stacker (z and z+ models only) ENWW 27 - HP LaserJet Enterprise MFP M725 | HP LaserJet Enterprise MFP M725 - User Guide - Page 42
sizes NOTE: To obtain the best results, select the correct paper size and type in the print driver before printing. Table 3-1 Supported paper sizes Size and dimensions Tray 1 Tray 2 Tray 3 Optional 500-sheet trays 3,500-sheet high-capacity tray Automatic duplex printing Letter 279 x 216 - HP LaserJet Enterprise MFP M725 | HP LaserJet Enterprise MFP M725 - User Guide - Page 43
Table 3-1 Supported paper sizes (continued) Size and dimensions Tray 1 Tray 2 A4 297 x 210 mm (11.7 x 8.3 in) A4 Rotated 210 x 297 mm (8.3 x 11.7 in) mm (10.6 x 15.4 in) Tray 3 Optional 500-sheet trays 3,500-sheet high-capacity tray Automatic duplex printing ENWW Supported paper sizes 29 - HP LaserJet Enterprise MFP M725 | HP LaserJet Enterprise MFP M725 - User Guide - Page 44
Table 3-1 Supported paper sizes (continued) Size and dimensions Tray 1 Tray 2 16K 195 x 270 mm 270 x 195 mm (10.6 x 7.7 in) 8K 260 x 368 mm 260 x 368 mm (10.2 x 14.5 - HP LaserJet Enterprise MFP M725 | HP LaserJet Enterprise MFP M725 - User Guide - Page 45
Table 3-1 Supported paper sizes (continued) Size and dimensions Tray 1 Tray 2 Custom 76 x 127 mm to 312 x 470 mm (3.0 x 5.0 in) to (12.3 x (5.8 x 8.3 in) to (17 x 12.7 in) Tray 3 Optional 500-sheet trays 3,500-sheet high-capacity tray Automatic duplex printing ENWW Supported paper sizes 31 - HP LaserJet Enterprise MFP M725 | HP LaserJet Enterprise MFP M725 - User Guide - Page 46
types For a complete list of specific HP-brand paper that this product supports, go to www.hp.com/support/ ljMFPM725series. NOTE: To obtain the best results, select the correct paper size and type in the print driver before printing. Table 3-2 Supported paper types Paper type Tray 1 Tray 2 and - HP LaserJet Enterprise MFP M725 | HP LaserJet Enterprise MFP M725 - User Guide - Page 47
prompts you to configure a tray for type and size in the following situations: ● When you load paper into the tray ● When you specify a particular tray or paper type for a print job through the print driver or a software program and the tray is not configured to match the print-job's settings NOTE - HP LaserJet Enterprise MFP M725 | HP LaserJet Enterprise MFP M725 - User Guide - Page 48
feature, enable it by using the product control-panel menus. To use the feature with Windows, you also need to enable the feature in the print driver and configure the paper type in the print driver. Enable Alternative Letterhead Mode by using the product control-panel menus 1. From the Home screen - HP LaserJet Enterprise MFP M725 | HP LaserJet Enterprise MFP M725 - User Guide - Page 49
/glossy paper, load paper to less than half of the tray-full indicators. Table 3-3 Tray 1 capacity Paper type Paper Envelopes Labels Transparencies Specifications Range: (0.5 in) Table 3-4 Tray 1 paper orientation Single-sided printing Manual duplex printing and Alternative Letterhead Mode Face - HP LaserJet Enterprise MFP M725 | HP LaserJet Enterprise MFP M725 - User Guide - Page 50
Load Tray 1 1. Open Tray 1. 2. Pull out the paper support. 3. For paper larger than Letter or A4 size, fold out the extension. 36 Chapter 3 Input trays and output bins ENWW - HP LaserJet Enterprise MFP M725 | HP LaserJet Enterprise MFP M725 - User Guide - Page 51
4. Slide the paper-width guides wider than the paper. 5. Load the paper into the tray. Make sure that the paper fits under the tabs and below the maximum-height indicators. 6. Adjust the paper-width guides so that they lightly touch the paper stack but do not bend the paper. ENWW Tray 1 37 - HP LaserJet Enterprise MFP M725 | HP LaserJet Enterprise MFP M725 - User Guide - Page 52
of the stack is below the tray-full indicator. For short/narrow and heavy/glossy paper, load paper to less than half of the tray-full indicators. Table 3-5 Tray 2 and Tray 3 capacity Paper type Specifications Paper Range: 60 g/m2 (16 lb) to 130 g/m2 (35 lb) Quantity Equivalent to 250 sheets - HP LaserJet Enterprise MFP M725 | HP LaserJet Enterprise MFP M725 - User Guide - Page 53
Load Tray 2 and Tray 3 1. Open the tray. 2. Adjust the paper-guides to the correct paper size. ENWW Tray 2 and Tray 3 39 - HP LaserJet Enterprise MFP M725 | HP LaserJet Enterprise MFP M725 - User Guide - Page 54
3. Load the paper into the tray. Make sure that the stack is flat at all four corners and that the top of the stack is below the maximum-height indicators. 4. Close the tray. 40 Chapter 3 Input trays and output bins ENWW - HP LaserJet Enterprise MFP M725 | HP LaserJet Enterprise MFP M725 - User Guide - Page 55
top of the stack is below the tray-full indicator. For short/narrow and heavy/glossy paper, load paper to less than half of the tray-full indicators. Table 3-7 500-sheet tray capacity Paper type Specifications Paper Range: 60 g/m2 (16 lb) to 130 g/m2 (35 lb) Quantity Equivalent to 500 sheets - HP LaserJet Enterprise MFP M725 | HP LaserJet Enterprise MFP M725 - User Guide - Page 56
Load the 500-sheet trays 1. Open the tray. 2 3 2. Adjust the paper-size guides to the correct paper size. 42 Chapter 3 Input trays and output bins ENWW - HP LaserJet Enterprise MFP M725 | HP LaserJet Enterprise MFP M725 - User Guide - Page 57
3. Load the paper into the tray. Make sure that the stack is flat at all four corners and that the top of the stack is below the maximum-height indicators. 4. Close the tray. 2 3 ENWW 500-sheet trays 43 - HP LaserJet Enterprise MFP M725 | HP LaserJet Enterprise MFP M725 - User Guide - Page 58
glossy paper, load paper to less than half of the tray-full indicators. Table 3-9 3,500-sheet high-capacity input tray capacity Paper type Specifications Paper tray The 3,500-sheet high-capacity tray supports only A4 and Letter-size paper. 1. Open the right and left sides of the tray. - HP LaserJet Enterprise MFP M725 | HP LaserJet Enterprise MFP M725 - User Guide - Page 59
into each side of the tray. The right side holds 1,500 sheets of paper. The left side holds 2,000 sheets of paper. 4 NOTE: For best results, load full reams of paper. Avoid dividing reams into smaller sections. 4. Close the right and left sides of the tray. 4 ENWW 3,500-sheet high-capacity - HP LaserJet Enterprise MFP M725 | HP LaserJet Enterprise MFP M725 - User Guide - Page 60
30 sheets, the product delivers the job to the bin, but the product does not staple the job. The stapler supports paper only. Do not try to staple other types of paper, such as envelopes, transparencies, or labels. To configure the default location where the product places the staples on the pages - HP LaserJet Enterprise MFP M725 | HP LaserJet Enterprise MFP M725 - User Guide - Page 61
● Top left ● Top right ENWW Stapler/stacker (z and z+ models only) 47 - HP LaserJet Enterprise MFP M725 | HP LaserJet Enterprise MFP M725 - User Guide - Page 62
48 Chapter 3 Input trays and output bins ENWW - HP LaserJet Enterprise MFP M725 | HP LaserJet Enterprise MFP M725 - User Guide - Page 63
accessories, and supplies ● HP policy on non-HP supplies ● HP anticounterfeit Web site ● Print when a toner cartridge is at estimated end of life ● Enable or disable the Very Low Settings options from the control panel ● Customer self-repair parts ● Accessories ● Toner cartridge ● Staples (stapling - HP LaserJet Enterprise MFP M725 | HP LaserJet Enterprise MFP M725 - User Guide - Page 64
accessories, and supplies Order supplies and paper Order genuine HP parts or accessories Order through service or support providers Order using HP software www.hp.com/go/suresupply www.hp.com/buy/parts Contact an HP-authorized service or support provider. The HP Embedded Web Server contains a link - HP LaserJet Enterprise MFP M725 | HP LaserJet Enterprise MFP M725 - User Guide - Page 65
warranty to the customer or any HP support contract with the customer. However, if product failure or damage is attributable to the use of a non-HP toner cartridge or refilled toner cartridge, HP will charge its standard time and materials charges to service the product for the particular failure - HP LaserJet Enterprise MFP M725 | HP LaserJet Enterprise MFP M725 - User Guide - Page 66
/go/anticounterfeit when you install an HP toner cartridge and the control-panel message says the cartridge is non-HP. HP will help determine if the cartridge is genuine and take steps to resolve the problem. Your toner cartridge might not be a genuine HP toner cartridge if you notice the following - HP LaserJet Enterprise MFP M725 | HP LaserJet Enterprise MFP M725 - User Guide - Page 67
a supply is nearing the estimated end of its useful life. This message displays when a supply is at its estimated end of useful life. Print-quality problems can occur when using a supply that is at its estimated end of life. ENWW Print when a toner cartridge is at estimated end of life 53 - HP LaserJet Enterprise MFP M725 | HP LaserJet Enterprise MFP M725 - User Guide - Page 68
interruption when it passes the Very Low threshold if you select the Continue option for the toner cartridge, but print quality might degrade. Once an HP supply has reached Very Low, HP's premium Protection Warranty on that supply has ended. 54 Chapter 4 Parts, supplies, and accessories ENWW - HP LaserJet Enterprise MFP M725 | HP LaserJet Enterprise MFP M725 - User Guide - Page 69
HP service personnel to perform the repair. For these parts, on-site or return-to-depot support is not provided under the HP product warranty. ● Parts listed as Optional self-replacement can be installed by HP service under the scanner lid Optional Staple-cartridge refill Refill for the stapler - HP LaserJet Enterprise MFP M725 | HP LaserJet Enterprise MFP M725 - User Guide - Page 70
pads Trays 3, 4, 5, and 6 label kit Replacement labels for Trays 3, 4, 5, and 6 Mandatory Toner cartridge Standard capacity Mandatory High capacity Mandatory Power cable 220V - 10A Replacement cable - China Mandatory Part number CF235-67916 CF235-67918 CF235-60103 CF235-60104 5851-5011 - HP LaserJet Enterprise MFP M725 | HP LaserJet Enterprise MFP M725 - User Guide - Page 71
America/Chile/Peru Replacement cable - South America/ Chile/Peru Mandatory Power cable 220V / 110V - Thailand/ Replacement cable - Thailand/ Philippines Philippines Mandatory Part number 8121-0964 8121-0731 8121-1143 8121-0564 8121-0739 8121-0837 8121-1004 8121-0733 8121-0737 8121-0738 8121 - HP LaserJet Enterprise MFP M725 | HP LaserJet Enterprise MFP M725 - User Guide - Page 72
of the paper CF240A DIMM memory HP 200-pin DDR2 512MB x64 DIMM CF306A Fax accessory HP LaserJet MFP Analog Fax Accessory CC487A 500 Document-feeder roller kit Replacement rollers for the document feeder L2718A Staple cartridge refill Refill staple cartridge C8091A HP Jetdirect print - HP LaserJet Enterprise MFP M725 | HP LaserJet Enterprise MFP M725 - User Guide - Page 73
Toner cartridge Toner-cartridge view 1 Imaging drum CAUTION: Do not touch the shutter or the surface of the roller. Doing so can damage the cartridge. 2 Memory chip 3 Pull-tab for the sealing tape ENWW Toner cartridge 59 - HP LaserJet Enterprise MFP M725 | HP LaserJet Enterprise MFP M725 - User Guide - Page 74
few minutes. HP policy on non-HP toner cartridges Hewlett-Packard Company cannot recommend the use of non-HP toner cartridges, either new or remanufactured. NOTE: Any damage caused by a non-HP toner cartridge is not covered under the HP warranty and service agreements. 60 Chapter 4 Parts, supplies - HP LaserJet Enterprise MFP M725 | HP LaserJet Enterprise MFP M725 - User Guide - Page 75
Replace the toner cartridge CAUTION: If toner gets on clothing, wipe it off with a dry cloth and wash the clothes in cold water. Hot water sets toner into fabric. NOTE: Information about recycling used toner cartridges is on the toner-cartridge box. 1. Press the cartridge-door-release button. 2. - HP LaserJet Enterprise MFP M725 | HP LaserJet Enterprise MFP M725 - User Guide - Page 76
Place the used toner cartridge in the bag for recycling. 5. Grasp the front and back of the toner cartridge, and distribute the toner by gently rocking the toner cartridge five or six times. CAUTION: Do not touch the shutter or the surface of the roller. 62 Chapter 4 Parts, supplies, and accessories - HP LaserJet Enterprise MFP M725 | HP LaserJet Enterprise MFP M725 - User Guide - Page 77
6. Remove the shipping tape from the new toner cartridge. Recycle the tape with the used toner cartridge. 7. Align the toner cartridge with the tracks inside the product, and insert the toner cartridge until it is firmly seated. 8. Close the cartridge door. After a short time, the control panel - HP LaserJet Enterprise MFP M725 | HP LaserJet Enterprise MFP M725 - User Guide - Page 78
models only) Item Staple cartridge Description Each cartridge holds 5,000 unformed staples. Part number C8091A For more information, go to www.hp.com/go/learnaboutsupplies. Load staples 1. Open the stapler door. 2. Remove the staple cartridge. 64 Chapter 4 Parts, supplies, and accessories - HP LaserJet Enterprise MFP M725 | HP LaserJet Enterprise MFP M725 - User Guide - Page 79
3. Insert the new staple cartridge. 4. Close the stapler door. ENWW Staples (stapling models only) 65 - HP LaserJet Enterprise MFP M725 | HP LaserJet Enterprise MFP M725 - User Guide - Page 80
66 Chapter 4 Parts, supplies, and accessories ENWW - HP LaserJet Enterprise MFP M725 | HP LaserJet Enterprise MFP M725 - User Guide - Page 81
Supported print drivers (Windows) ● Change print-job settings (Windows) ● Change print-job settings (Mac OS X) ● Print tasks (Windows) ● Print tasks (Mac OS X) ● Additional print tasks (Windows) ● Additional print tasks (Mac OS X) ● Store print jobs on the product ● Add a job-separator page (Windows - HP LaserJet Enterprise MFP M725 | HP LaserJet Enterprise MFP M725 - User Guide - Page 82
programs that are based on PCL 5 HP Universal Print Driver (UPD) The HP Universal Print Driver (UPD) for Windows is a single print driver that gives you instant access to virtually any HP LaserJet product, from any location, without downloading separate drivers. It is built on 68 Chapter 5 Print - HP LaserJet Enterprise MFP M725 | HP LaserJet Enterprise MFP M725 - User Guide - Page 83
this mode, download UPD from the Internet. Go to www.hp.com/go/ upd. ● Dynamic mode allows you to use a single driver installation, so you can discover and print to HP products in any location. ● Use this mode if you are installing UPD for a workgroup. ENWW Supported print drivers (Windows) 69 - HP LaserJet Enterprise MFP M725 | HP LaserJet Enterprise MFP M725 - User Guide - Page 84
of the screen, and then click Devices and Printers. 2. Right-click the print-driver icon, and then select Printing Preferences. Change the product configuration settings 1. Windows XP, Windows Server 2003, and Windows Server 2008 (using the default Start menu view): Click Start, and then click - HP LaserJet Enterprise MFP M725 | HP LaserJet Enterprise MFP M725 - User Guide - Page 85
. 2. In the Printer menu, select the product. 3. By default, the print driver displays the Copies & Pages menu. Open the menus drop-down list, and then product in the left side of the window. 3. Click the Options & Supplies button. 4. Click the Driver tab. 5. Configure the installed options. ENWW - HP LaserJet Enterprise MFP M725 | HP LaserJet Enterprise MFP M725 - User Guide - Page 86
Print tasks (Windows) Use a printing shortcut (Windows) 1. From the software program, select the Print option. 2. Select the product, and then click the Properties or Preferences button. 3. Click the Printing Shortcuts tab. 72 Chapter 5 Print ENWW - HP LaserJet Enterprise MFP M725 | HP LaserJet Enterprise MFP M725 - User Guide - Page 87
OK button to close the Document Properties dialog box. NOTE: When you select a shortcut, the corresponding settings change on the other tabs in the print driver. 5. In the Print dialog box, click the OK button to print the job. ENWW Print tasks (Windows) 73 - HP LaserJet Enterprise MFP M725 | HP LaserJet Enterprise MFP M725 - User Guide - Page 88
Create printing shortcuts (Windows) 1. From the software program, select the Print option. 2. Select the product, and then click the Properties or Preferences button. 3. Click the Printing Shortcuts tab. 4. Select - HP LaserJet Enterprise MFP M725 | HP LaserJet Enterprise MFP M725 - User Guide - Page 89
5. Select the print options for the new shortcut. 6. Click the Save As button. ENWW Print tasks (Windows) 75 - HP LaserJet Enterprise MFP M725 | HP LaserJet Enterprise MFP M725 - User Guide - Page 90
7. Enter a name for the shortcut, and then click the OK button. 8. Click the OK button to close the Document Properties dialog box. In the Print dialog box, click the OK button to print the job. 76 Chapter 5 Print ENWW - HP LaserJet Enterprise MFP M725 | HP LaserJet Enterprise MFP M725 - User Guide - Page 91
Automatically print on both sides (Windows) 1. From the software program, select the Print option. 2. Select the product, and then click the Properties or Preferences button. 3. Click the Finishing tab. ENWW Print tasks (Windows) 77 - HP LaserJet Enterprise MFP M725 | HP LaserJet Enterprise MFP M725 - User Guide - Page 92
4. Select the Print on both sides check box. Click the OK button to close the Document Properties dialog box. 5. In the Print dialog box, click the OK button to print the job. 78 Chapter 5 Print ENWW - HP LaserJet Enterprise MFP M725 | HP LaserJet Enterprise MFP M725 - User Guide - Page 93
Manually print on both sides (Windows) NOTE: Follow these steps to print on both sides of a paper size or type that is not supported by the automatic duplexer. 1. From the software program, select the Print option. 2. Select the product, and then click the Properties or Preferences button. 3. Click - HP LaserJet Enterprise MFP M725 | HP LaserJet Enterprise MFP M725 - User Guide - Page 94
4. Select the Print on both sides (manually) check box. Click the OK button to print the first side of the job. 5. Retrieve the printed stack from the output bin, and place it - HP LaserJet Enterprise MFP M725 | HP LaserJet Enterprise MFP M725 - User Guide - Page 95
Print multiple pages per sheet (Windows) 1. From the software program, select the Print option. 2. Select the product, and then click the Properties or Preferences button. 3. Click the Finishing tab. 4. Select the - HP LaserJet Enterprise MFP M725 | HP LaserJet Enterprise MFP M725 - User Guide - Page 96
5. Select the correct Print page borders, Page order, and Orientation options. Click the OK button to close the Document Properties dialog box. 6. In the Print dialog box, click the OK button to print the job. 82 Chapter 5 Print ENWW - HP LaserJet Enterprise MFP M725 | HP LaserJet Enterprise MFP M725 - User Guide - Page 97
Select the page orientation (Windows) 1. From the software program, select the Print option. 2. Select the product, and then click the Properties or Preferences button. 3. Click the Finishing tab. ENWW Print tasks (Windows) 83 - HP LaserJet Enterprise MFP M725 | HP LaserJet Enterprise MFP M725 - User Guide - Page 98
4. In the Orientation area, select the Portrait or Landscape option. To print the page image upside down, select the Rotate by 180 degrees option. Click the OK button to close the Document Properties dialog box. 5. In the Print dialog box, click the OK button to print the job. 84 Chapter 5 Print - HP LaserJet Enterprise MFP M725 | HP LaserJet Enterprise MFP M725 - User Guide - Page 99
Select the paper type (Windows) 1. From the software program, select the Print option. 2. Select the product, and then click the Properties or Preferences button. 3. Click the Paper/Quality tab. 4. From the Paper type drop-down list, click the More... option. ENWW Print tasks (Windows) 85 - HP LaserJet Enterprise MFP M725 | HP LaserJet Enterprise MFP M725 - User Guide - Page 100
5. Expand the list of Type is: options. 6. Expand the category of paper types that best describes your paper. 86 Chapter 5 Print ENWW - HP LaserJet Enterprise MFP M725 | HP LaserJet Enterprise MFP M725 - User Guide - Page 101
7. Select the option for the type of paper you are using, and click the OK button. 8. Click the OK button to close the Document Properties dialog box. In the Print dialog box, click the OK button to print the job. ENWW Print tasks (Windows) 87 - HP LaserJet Enterprise MFP M725 | HP LaserJet Enterprise MFP M725 - User Guide - Page 102
or last page on different paper (Windows) 1. From the software program, select the Print option. 2. Select the product, and then click the Properties or Preferences button. 3. Click the Paper/Quality tab. 4. In the Special pages area, click the Print pages on different paper option, and then click - HP LaserJet Enterprise MFP M725 | HP LaserJet Enterprise MFP M725 - User Guide - Page 103
, select either the First or Last option. 6. Select the correct options from the Paper source and Paper type drop-down lists. Click the Add button. 7. If you are printing both the first and last pages on different paper, repeat steps 5 and 6, selecting the options for the other page. ENWW Print - HP LaserJet Enterprise MFP M725 | HP LaserJet Enterprise MFP M725 - User Guide - Page 104
8. Click the OK button. 9. Click the OK button to close the Document Properties dialog box. In the Print dialog box, click the OK button to print the job. 90 Chapter 5 Print ENWW - HP LaserJet Enterprise MFP M725 | HP LaserJet Enterprise MFP M725 - User Guide - Page 105
Scale a document to fit page size (Windows) 1. From the software program, select the Print option. 2. Select the product, and then click the Properties or Preferences button. 3. Click the Effects tab. ENWW Print tasks (Windows) 91 - HP LaserJet Enterprise MFP M725 | HP LaserJet Enterprise MFP M725 - User Guide - Page 106
4. Select the Print document on option, and then select a size from the drop-down list. Click the OK button to close the Document Properties dialog box. 5. In the Print dialog box, click the OK button to print the job. 92 Chapter 5 Print ENWW - HP LaserJet Enterprise MFP M725 | HP LaserJet Enterprise MFP M725 - User Guide - Page 107
Create a booklet (Windows) 1. From the software program, select the Print option. 2. Select the product, and then click the Properties or Preferences button. 3. Click the Finishing tab. 4. Select the Print on both sides check box. ENWW Print tasks (Windows) 93 - HP LaserJet Enterprise MFP M725 | HP LaserJet Enterprise MFP M725 - User Guide - Page 108
5. In the Booklet layout drop-down list, click the Left binding or Right binding option. The Pages per sheet option automatically changes to 2 pages per sheet. Click the OK button to close the Document Properties dialog box. 6. In the Print dialog box, click the OK button to print the job. 94 - HP LaserJet Enterprise MFP M725 | HP LaserJet Enterprise MFP M725 - User Guide - Page 109
Select staple options (Windows) 1. From the software program, select the Print option. 2. Select the product, and then click the Properties or Preferences button. 3. Click the Output tab. ENWW Print tasks (Windows) 95 - HP LaserJet Enterprise MFP M725 | HP LaserJet Enterprise MFP M725 - User Guide - Page 110
4. In the Output Options area, select an option from the Staple drop-down list. Click the OK button to close the dialog box. 5. In the Print dialog box, click the OK button to print the job. 96 Chapter 5 Print ENWW - HP LaserJet Enterprise MFP M725 | HP LaserJet Enterprise MFP M725 - User Guide - Page 111
2. In the Printer menu, select the product. 3. By default, the print driver displays the Copies & Pages menu. Open the menus drop-down list, and then binding option from the Two-Sided drop-down list. 5. Click the Print button. Manually print on both sides (Mac OS X) 1. Click the File menu, and then - HP LaserJet Enterprise MFP M725 | HP LaserJet Enterprise MFP M725 - User Guide - Page 112
. 2. In the Printer menu, select the product. 3. By default, the print driver displays the Copies & Pages menu. Open the menus drop-down list, and then , and then click the OK button. 5. Click the Print button. Select the paper type (Mac OS X) 1. Click the File menu, and then click the Print - HP LaserJet Enterprise MFP M725 | HP LaserJet Enterprise MFP M725 - User Guide - Page 113
In the Printer menu, select the product. 3. By default, the print driver displays the Copies & Pages menu. Open the menus drop-down list, and then click the Paper Handling menu. 4. In the Destination Paper Size area, click the Scale to fit paper size box, and then select the size from the drop-down - HP LaserJet Enterprise MFP M725 | HP LaserJet Enterprise MFP M725 - User Guide - Page 114
options (Mac OS X) 1. Click the File menu, and then click the Print option. 2. In the Printer menu, select the product. 3. By default, the print driver displays the Copies & Pages menu. Open the menus drop-down list, and then click the Finishing menu. 4. Select a staple option from the Staple drop - HP LaserJet Enterprise MFP M725 | HP LaserJet Enterprise MFP M725 - User Guide - Page 115
the screen, and then click Devices and Printers. Double-click the product icon to open the window, rightclick the print job that you want to cancel, and then click Cancel. Select the paper size (Windows) 1. From the software program, select the Print option. 2. Select the product, and then click the - HP LaserJet Enterprise MFP M725 | HP LaserJet Enterprise MFP M725 - User Guide - Page 116
The length is the long edge of the paper. 6. Click the Save button, and then click the Close button. 7. Click the OK button to close the Document Properties dialog box. In the Print dialog box, click the OK button to print the job. Print watermarks (Windows) 1. From the software program, select the - HP LaserJet Enterprise MFP M725 | HP LaserJet Enterprise MFP M725 - User Guide - Page 117
in the dock. Highlight the print job, and then click Delete. Select the paper size (Mac OS X) 1. Click the File menu, and then click the Print the Copies & Pages menu, click the Page Setup button. 4. From the Paper Size drop-down list, select the Manage Custom Sizes option. 5. Specify the dimensions - HP LaserJet Enterprise MFP M725 | HP LaserJet Enterprise MFP M725 - User Guide - Page 118
watermarks (Mac OS X) 1. Click the File menu, and then click the Print option. 2. In the Printer menu, select the product. 3. By default, the print driver displays the Copies & Pages menu. Open the menus drop-down list, and then click the Watermarks menu. 4. From the Mode menu, select the Watermark - HP LaserJet Enterprise MFP M725 | HP LaserJet Enterprise MFP M725 - User Guide - Page 119
Store print jobs on the product Create a stored job (Windows) You can store jobs on the product so you can print them at any time. 1. From the software program, select the Print option. 2. Select the - HP LaserJet Enterprise MFP M725 | HP LaserJet Enterprise MFP M725 - User Guide - Page 120
a copy of the job in the product memory so you can print it again later. ● Stored Job: Store a job on the product and allow other users to print the job at any time. For this job-storage mode, you can select one of the Make Job Private/Secure options. If you - HP LaserJet Enterprise MFP M725 | HP LaserJet Enterprise MFP M725 - User Guide - Page 121
name, click the Custom button, and then enter the user name or the job name. Select which option to use click the Print option. 2. In the Printer menu, select the product. 3. By default, the print driver displays the Copies & Pages menu. Open the menus drop-down list, and then click the Job Storage - HP LaserJet Enterprise MFP M725 | HP LaserJet Enterprise MFP M725 - User Guide - Page 122
a copy of the job in the product memory so you can print it again later. ● Stored Job: Store a job on the product and allow other users to print the job at any time. If you assign a personal identification number (PIN) to the job, the person who prints the job must provide - HP LaserJet Enterprise MFP M725 | HP LaserJet Enterprise MFP M725 - User Guide - Page 123
lower-left corner of the screen, click Control Panel, and then click Printers. Windows 7: Click the Windows icon in the lower-left corner of the screen, and then click Devices and Printers. 2. Right-click the driver icon, and then select Properties or Printer properties. 3. Click the Device Settings - HP LaserJet Enterprise MFP M725 | HP LaserJet Enterprise MFP M725 - User Guide - Page 124
is before the @ symbol. NOTE: This code is valid for only 24 hours from the time you enable HP Web Services. If it expires, follow the instructions to enable HP Web Services again, and obtain a new code. d. To prevent your product from printing unexpected documents, click ePrint Settings, and then - HP LaserJet Enterprise MFP M725 | HP LaserJet Enterprise MFP M725 - User Guide - Page 125
network (LAN or WAN) to supported PostScript® products. Go to www.hp.com/go/eprintsoftware for drivers and information. Supported operating systems ● Windows® XP (32-bit, SP 2 or greater) NOTE: Microsoft retired mainstream support for Windows XP in April 2009. HP will continue to provide best-effort - HP LaserJet Enterprise MFP M725 | HP LaserJet Enterprise MFP M725 - User Guide - Page 126
AirPrint and about which HP products are compatible with AirPrint, go to www.hp.com/go/airprint. NOTE: AirPrint does not support USB connections. You photos, the option to select the paper size appears if more than one tray is loaded with paper. 3. Select the product. 4. Tap the Print button. 112 - HP LaserJet Enterprise MFP M725 | HP LaserJet Enterprise MFP M725 - User Guide - Page 127
Networking tab, and then click the Network Identification option. 3. In the Bonjour Service Name field, type a new name. 4. Click the Apply button. Solve AirPrint problems Verify the product supports AirPrint. Go to www.hp.com/go/airprint. Upgrade the product firmware to use AirPrint. Go to www - HP LaserJet Enterprise MFP M725 | HP LaserJet Enterprise MFP M725 - User Guide - Page 128
automatically selects the section of the Web page that you most likely want to print. You can edit the selected area before you print. Download HP Smart Print from this Web site: www.hp.com/go/smartweb. NOTE: HP Smart Print is compatible with Windows browsers only. 114 Chapter 5 Print ENWW - HP LaserJet Enterprise MFP M725 | HP LaserJet Enterprise MFP M725 - User Guide - Page 129
Use easy-access USB printing This product features easy-access USB printing, so you can quickly print files without sending them from a computer. The product accepts standard USB flash drives in the USB port on the front of the product. You can print the following types of files: ● .pdf ● .prn ● . - HP LaserJet Enterprise MFP M725 | HP LaserJet Enterprise MFP M725 - User Guide - Page 130
Print easy-access USB documents 1. Insert the USB flash drive into the USB port on the left side of the product control panel. NOTE: You might need to remove the cover from the USB port. Pull the cover straight out to remove it. 2. The product detects the USB flash drive. Touch the OK button to - HP LaserJet Enterprise MFP M725 | HP LaserJet Enterprise MFP M725 - User Guide - Page 131
job ● Copy on both sides (duplex) ● Reduce or enlarge a copy image ● Optimize copy quality for text or pictures ● Adjust the copy lightness/darkness ● Set the paper size and type for copying on special paper ● Use Job Build mode ● Copy a book ● Copy a photo ENWW 117 - HP LaserJet Enterprise MFP M725 | HP LaserJet Enterprise MFP M725 - User Guide - Page 132
output for a particular type of content: text, printed pictures, or photographs. Use the Pages per Sheet feature to copy multiple pages onto one sheet of paper. Use the Original Size feature to describe the page size of the original document. Use the Booklet Format feature to copy two or more pages - HP LaserJet Enterprise MFP M725 | HP LaserJet Enterprise MFP M725 - User Guide - Page 133
Menu item Edge-To-Edge Job Build Description Use the Edge-To-Edge feature to avoid shadows that can appear along the edges of copies when the original document is printed close to the edges. Combine this feature with the Reduce/Enlarge feature to ensure that the entire page is printed on the copies - HP LaserJet Enterprise MFP M725 | HP LaserJet Enterprise MFP M725 - User Guide - Page 134
Make a single copy 1. Place the document face-down on the scanner glass, or place it face-up in the document feeder and adjust the paper guides to fit the size of the document. 2. From the Home screen on the product control panel, touch the Start button. 120 Chapter 6 Copy ENWW - HP LaserJet Enterprise MFP M725 | HP LaserJet Enterprise MFP M725 - User Guide - Page 135
Make multiple copies 1. Place the document face-down on the scanner glass, or place it face-up in the document feeder and adjust the paper guides to fit the size of the document. 2. From the Home screen on the product control panel, touch the Copy button. 3. Touch the Copies field to - HP LaserJet Enterprise MFP M725 | HP LaserJet Enterprise MFP M725 - User Guide - Page 136
4. Enter the number of copies, and then touch the OK button. 5. Touch the Start button. 122 Chapter 6 Copy ENWW - HP LaserJet Enterprise MFP M725 | HP LaserJet Enterprise MFP M725 - User Guide - Page 137
up to 100 pages (depending on the thickness of the pages). 1. Place the document into the document feeder with the pages facing up. Adjust the paper guides to fit the size of the document. 2. From the Home screen on the product control panel, touch the Copy button. 3. Touch the Copies field to - HP LaserJet Enterprise MFP M725 | HP LaserJet Enterprise MFP M725 - User Guide - Page 138
4. Enter the number of copies, and then touch the OK button. 5. Touch the Start button. 124 Chapter 6 Copy ENWW - HP LaserJet Enterprise MFP M725 | HP LaserJet Enterprise MFP M725 - User Guide - Page 139
Collate a copy job 1. From the Home screen on the product control panel, touch the Copy button. 2. Touch the Collate button. ENWW Collate a copy job 125 - HP LaserJet Enterprise MFP M725 | HP LaserJet Enterprise MFP M725 - User Guide - Page 140
3. Touch the Collate on (Sets in page order) option. Touch the OK button. 4. Touch the Start button. 126 Chapter 6 Copy ENWW - HP LaserJet Enterprise MFP M725 | HP LaserJet Enterprise MFP M725 - User Guide - Page 141
Staple a copy job 1. From the Home screen on the product control panel, touch the Copy button. 2. Touch the Staple/Collate button. 3. Select a Staple option. Touch the OK button. 4. Touch the Start button. ENWW Staple a copy job 127 - HP LaserJet Enterprise MFP M725 | HP LaserJet Enterprise MFP M725 - User Guide - Page 142
1. Load the original documents into the document feeder with the first page facing up, and with the top of the page leading. 2. Adjust the paper guides to fit the size of the document. 3. From the Home screen on the product control panel, touch the Copy button. 4. Touch the Sides button - HP LaserJet Enterprise MFP M725 | HP LaserJet Enterprise MFP M725 - User Guide - Page 143
-sided copy from a two-sided original, touch the 2-sided original, 1-sided output button. Touch the OK button. 6. Touch the Start button. Copy on both sides manually 1. Lift the scanner lid. 2. Place the document face-down on the scanner glass with the upper-left corner of the page in the upper-left - HP LaserJet Enterprise MFP M725 | HP LaserJet Enterprise MFP M725 - User Guide - Page 144
3. Gently close the scanner lid. 4. From the Home screen on the product control panel, touch the Copy button. 5. Touch the Sides button. 6. To make a two-sided copy from a one-sided original, touch the 1-sided original, 2-sided output button. To make a two-sided copy from a two-sided original, touch - HP LaserJet Enterprise MFP M725 | HP LaserJet Enterprise MFP M725 - User Guide - Page 145
Reduce or enlarge a copy image 1. From the Home screen on the product control panel, touch the Copy button. 2. Touch the Reduce/Enlarge button. ENWW Reduce or enlarge a copy image 131 - HP LaserJet Enterprise MFP M725 | HP LaserJet Enterprise MFP M725 - User Guide - Page 146
from the scanner glass. Touch the OK button. You can also select these options: ● Auto: The product automatically scales the image to fit the paper size in the tray. ● Auto Include Margins: The product reduces the image slightly to fit the entire scanned image within the printable area on the - HP LaserJet Enterprise MFP M725 | HP LaserJet Enterprise MFP M725 - User Guide - Page 147
Copy button. 2. Touch the More Options button, and then touch the Optimize Text/Picture button. 3. Select one of the predefined options, or touch the Manually adjust button and then adjust the slider in the Optimize For area. Touch the OK button. 4. Touch the Start button. NOTE: These settings are - HP LaserJet Enterprise MFP M725 | HP LaserJet Enterprise MFP M725 - User Guide - Page 148
Adjust the copy lightness/darkness 1. From the Home screen on the product control panel, touch the Copy button. 2. Touch the Image Adjustment button. 134 Chapter 6 Copy ENWW - HP LaserJet Enterprise MFP M725 | HP LaserJet Enterprise MFP M725 - User Guide - Page 149
3. Adjust the sliders to set the Darkness level, the Contrast level, the Sharpness level, and the Background Cleanup level. Touch the OK button. 4. Touch the Start button. ENWW Adjust the copy lightness/darkness 135 - HP LaserJet Enterprise MFP M725 | HP LaserJet Enterprise MFP M725 - User Guide - Page 150
Set the paper size and type for copying on special paper 1. From the Home screen on the product control panel, touch the Copy button. 2. Touch the Paper Selection button. 3. Select the tray that holds the paper that you want to use, and then touch the OK button. 136 Chapter 6 Copy ENWW - HP LaserJet Enterprise MFP M725 | HP LaserJet Enterprise MFP M725 - User Guide - Page 151
accommodate at one time. 1. Place the document face-down on the scanner glass, or place it face-up in the document feeder and adjust the paper guides to fit the size of the document. 2. From the Home screen on the product control panel, touch the Copy button. 3. Touch the More Options button - HP LaserJet Enterprise MFP M725 | HP LaserJet Enterprise MFP M725 - User Guide - Page 152
Copy a book 1. Lift the scanner lid. 2. Place the book on the scanner glass with the spine aligned with the mark on the rear, center of the scanner glass. 3. Gently close the scanner lid. 138 Chapter 6 Copy ENWW - HP LaserJet Enterprise MFP M725 | HP LaserJet Enterprise MFP M725 - User Guide - Page 153
4. From the Home screen on the product control panel, touch the Start button. 5. Repeat these steps for each page that you want to copy. NOTE: This product does not have the capability to distinguish left and right pages. Assemble the copied pages carefully. ENWW Copy a book 139 - HP LaserJet Enterprise MFP M725 | HP LaserJet Enterprise MFP M725 - User Guide - Page 154
Copy a photo Copy photos from the scanner glass. 1. Lift the scanner lid. 2. Place the photo on the scanner glass with the picture-side down and the upper-left corner of the photo in the upper-left corner of the glass. 3. Gently close the scanner lid. 140 Chapter 6 Copy ENWW - HP LaserJet Enterprise MFP M725 | HP LaserJet Enterprise MFP M725 - User Guide - Page 155
4. From the Home screen on the product control panel, touch the Copy button. 5. Touch the More Options button at the bottom of the screen. 6. Touch the Optimize Text/Picture button. 7. Select the Photograph option, and then touch the OK button. 8. Touch the Start button. ENWW Copy a photo 141 - HP LaserJet Enterprise MFP M725 | HP LaserJet Enterprise MFP M725 - User Guide - Page 156
142 Chapter 6 Copy ENWW - HP LaserJet Enterprise MFP M725 | HP LaserJet Enterprise MFP M725 - User Guide - Page 157
7 Scan/send ● Set up scan/send features ● Change default scan/send settings from the product control panel ● Send a scanned document to a network folder ● Send a scanned document to a folder in the product memory ● Send a scanned document to a USB flash drive ● Send a scanned document to one or more - HP LaserJet Enterprise MFP M725 | HP LaserJet Enterprise MFP M725 - User Guide - Page 158
, click the Scan/Digital Send tab. 3. If you did not set up the E-mail feature during software installation, you can enable it by using the HP Embedded Web Server. a. Click the E-mail Setup link. b. Select the Enable Send to E-mail check box to enable the feature. c. Select the outgoing mail server - HP LaserJet Enterprise MFP M725 | HP LaserJet Enterprise MFP M725 - User Guide - Page 159
c. Configure the options that you want to customize. d. Click the Apply button at the bottom of the page. 5. Enable the Save to USB feature. a. Click the Save to USB Setup link. b. Select the Enable Save to USB check box. c. Click the Apply button at the bottom of the page. ENWW Set up scan/send - HP LaserJet Enterprise MFP M725 | HP LaserJet Enterprise MFP M725 - User Guide - Page 160
Change default scan/send settings from the product control panel 1. From the Home screen on the product control panel, scroll to and touch the Administration button. 2. Open the Scan/Digital Send Settings menu. 146 Chapter 7 Scan/send ENWW - HP LaserJet Enterprise MFP M725 | HP LaserJet Enterprise MFP M725 - User Guide - Page 161
3. Select the category of scan and send settings that you want to configure. 4. Open the Default Job Options menu, and configure the options. Touch the Save button to save the settings. ENWW Change default scan/send settings from the product control panel 147 - HP LaserJet Enterprise MFP M725 | HP LaserJet Enterprise MFP M725 - User Guide - Page 162
support this feature: ● Windows Server 2003, 64-bit ● Windows Server 2008, 64-bit ● Windows XP, 64-bit ● Windows Vista, 64-bit ● Windows . The system administrator can use the HP Embedded Web Server to configure pre-defined paper guides to fit the size of the document. 148 Chapter 7 Scan/send ENWW - HP LaserJet Enterprise MFP M725 | HP LaserJet Enterprise MFP M725 - User Guide - Page 163
2. From the Home screen on the product control panel, touch the Save to Network Folder button. NOTE: If prompted, type your user name and password. 3. To use one of the preset job settings, select one of the items in the Quick Sets list. 4. To set up a new - HP LaserJet Enterprise MFP M725 | HP LaserJet Enterprise MFP M725 - User Guide - Page 164
5. If necessary, touch the File Type drop-down menu to select a different output file format. 6. Touch the Add button that is below the Folder Path field to open a keyboard, and then type the path to the network folder. Use this format for the path: \\path\path Touch the OK button. 150 Chapter 7 - HP LaserJet Enterprise MFP M725 | HP LaserJet Enterprise MFP M725 - User Guide - Page 165
7. To configure settings for the document, touch the More Options button. 8. Touch the Start button to save the file. NOTE: You can preview the image at any time by touching the Preview button in the upper-right corner of the screen. For more information about this feature, touch the Help button on - HP LaserJet Enterprise MFP M725 | HP LaserJet Enterprise MFP M725 - User Guide - Page 166
place it face-up in the document feeder and adjust the paper guides to fit the size of the document. 2. From the Home screen on the product control panel, scroll to and touch the Save to Device Memory button. NOTE: If prompted, enter your user - HP LaserJet Enterprise MFP M725 | HP LaserJet Enterprise MFP M725 - User Guide - Page 167
and save the document 1. Place the document face-down on the scanner glass, or place it face-up in the document feeder and adjust the paper guides to fit the size of the document. 2. From the Home screen on the product control panel, scroll to and touch the Save to USB button - HP LaserJet Enterprise MFP M725 | HP LaserJet Enterprise MFP M725 - User Guide - Page 168
3. Insert the USB flash drive into the USB port on the left side of the product control panel. NOTE: You might need to remove the cover from the USB port. 4. You can save the file on the root of the USB flash drive, or save it in a folder. To save it in a folder, select one of the folders in the - HP LaserJet Enterprise MFP M725 | HP LaserJet Enterprise MFP M725 - User Guide - Page 169
6. To configure settings for the document, touch the More Options button. 7. Touch the Start button to save the file. NOTE: You can preview the image at any time by touching the Preview button in the upper-right corner of the screen. For more information about this feature, touch the Help button on - HP LaserJet Enterprise MFP M725 | HP LaserJet Enterprise MFP M725 - User Guide - Page 170
adjust the paper guides to fit the size of the document. 2. From the Home screen on the product control panel, touch the E-mail button. NOTE: If prompted, type your user name and password. 3. Touch the To field to open a keyboard. NOTE: If you are signed in to the product, your user - HP LaserJet Enterprise MFP M725 | HP LaserJet Enterprise MFP M725 - User Guide - Page 171
4. Enter the email address. To send to multiple addresses, separate the addresses with a semicolon, or touch the Enter button on the touchscreen keyboard after you type each address. 5. Complete the CC:, Subject:, and File Name: fields by touching the field and using the touchscreen keyboard to - HP LaserJet Enterprise MFP M725 | HP LaserJet Enterprise MFP M725 - User Guide - Page 172
8. Touch the Start button to begin sending. NOTE: The product might prompt you to add the email address to the address book. NOTE: You can preview the image at any time by touching the Preview button in the upper-right corner of the screen. For more information about this feature, touch the Help - HP LaserJet Enterprise MFP M725 | HP LaserJet Enterprise MFP M725 - User Guide - Page 173
you. ● Personal Contacts: Lists all the contacts that are associated with your user name. These contacts are not visible to other people who use the product. to all people who use the product. NOTE: You can also use the HP Embedded Web Server (EWS) to create and manage the address book. 1. From - HP LaserJet Enterprise MFP M725 | HP LaserJet Enterprise MFP M725 - User Guide - Page 174
2. Touch the Address Book button that is next to the To: field to open the Address Book screen. 3. Touch the Add button that is in the lower left corner of the screen. 160 Chapter 7 Scan/send ENWW - HP LaserJet Enterprise MFP M725 | HP LaserJet Enterprise MFP M725 - User Guide - Page 175
using the address book 1. Place the document face-down on the scanner glass, or place it face-up in the document feeder and adjust the paper guides to fit the size of the document. ENWW Use the address book to send email 161 - HP LaserJet Enterprise MFP M725 | HP LaserJet Enterprise MFP M725 - User Guide - Page 176
2. From the Home screen on the product control panel, touch the E-mail button. NOTE: If prompted, enter your user name and password. 3. Touch the Address Book button that is next to the To: field to open the Address Book screen. 4. From the drop-down - HP LaserJet Enterprise MFP M725 | HP LaserJet Enterprise MFP M725 - User Guide - Page 177
5. Select a name from the list of contacts, and then touch the right arrow button to add the name to the recipients list. Repeat this step for each recipient, and then touch the OK button. 6. Touch the Start button to begin sending. NOTE: You can preview the image at any time by touching the Preview - HP LaserJet Enterprise MFP M725 | HP LaserJet Enterprise MFP M725 - User Guide - Page 178
Scan a photo 1. Lift the scanner lid. 2. Place the photo on the scanner glass with the picture-side down and the upper-left corner of the photo in the upper-left corner of the glass. 3. Gently close the scanner lid. 164 Chapter 7 Scan/send ENWW - HP LaserJet Enterprise MFP M725 | HP LaserJet Enterprise MFP M725 - User Guide - Page 179
4. From the Home screen on the product control panel, touch one of the buttons for the scan/ send features: ● Save to Network Folder ● Save to Device Memory ● Save to USB 5. Select an existing folder, or touch the New Folder button to create a new folder. 6. Enter the name for the file in the File - HP LaserJet Enterprise MFP M725 | HP LaserJet Enterprise MFP M725 - User Guide - Page 180
166 Chapter 7 Scan/send ENWW - HP LaserJet Enterprise MFP M725 | HP LaserJet Enterprise MFP M725 - User Guide - Page 181
a number to an existing speed dial list ● Delete a speed dial list ● Delete a single number from a speed dial list ● Send a fax by entering numbers manually ● Send a fax by using a speed dial ● Search a speed-dial list by name ● Send a fax by using fax address book numbers ● Search the fax address - HP LaserJet Enterprise MFP M725 | HP LaserJet Enterprise MFP M725 - User Guide - Page 182
/regions, setting the date, time, country/region, phone number, and company name is a legal requirement for fax. Fax Setup Wizard The Fax Setup Wizard guides you through a step-by-step procedure to configure fax settings that are required to use the fax feature. If the settings are not configured - HP LaserJet Enterprise MFP M725 | HP LaserJet Enterprise MFP M725 - User Guide - Page 183
Wizard on the control panel override any settings made in the HP Embedded Web Server. NOTE: If the Fax Settings menu does not to use analog fax when LAN fax is enabled, use the HP MFP Digital Sending Software Configuration Utility or the HP Embedded Web Server to disable LAN fax. Set or verify the - HP LaserJet Enterprise MFP M725 | HP LaserJet Enterprise MFP M725 - User Guide - Page 184
4. Touch a Time Format option. 5. Touch the Save button to save the settings. 170 Chapter 8 Fax ENWW - HP LaserJet Enterprise MFP M725 | HP LaserJet Enterprise MFP M725 - User Guide - Page 185
Configure fax dialing settings 1. From the Home screen on the product control panel, scroll to and touch the Administration button. 2. Open the following menus: ● Fax Settings ● Fax Send Settings ● Fax Send Setup ● Fax Dialing Settings Configure any of the following settings: Menu item Fax Dial - HP LaserJet Enterprise MFP M725 | HP LaserJet Enterprise MFP M725 - User Guide - Page 186
Menu item Detect Dial Tone Dialing Prefix Description The Detect Dial Tone setting determines whether the fax checks for a dial tone before sending a fax. The Dialing Prefix setting allows you to enter a prefix number (such as a "9" to access an outside line) when dialing. This prefix number is - HP LaserJet Enterprise MFP M725 | HP LaserJet Enterprise MFP M725 - User Guide - Page 187
setting. However, using the JBIG Compression feature might cause compatibility problems when communicating with some older fax machines, in which case is enabled by default. You should turn it off only if you are having trouble sending or receiving a fax and if you are willing to accept the errors - HP LaserJet Enterprise MFP M725 | HP LaserJet Enterprise MFP M725 - User Guide - Page 188
billing codes The billing-code setting, when enabled, prompts the user to enter a number when sending a fax. This number the Save button, and then skip the remaining steps. To allow users to edit billing codes, select the Allow users to edit billing codes box. 4. Touch the Default Billing Code field - HP LaserJet Enterprise MFP M725 | HP LaserJet Enterprise MFP M725 - User Guide - Page 189
before you send it. You can configure the preview to be optional for all users, required for all users, or disabled for all users. The outgoing fax resolution setting determines the maximum resolution supported by the receiving fax. The fax accessory uses the highest possible resolution common to - HP LaserJet Enterprise MFP M725 | HP LaserJet Enterprise MFP M725 - User Guide - Page 190
Menu item Job Build Blank Page Suppression Description Use the Job Build feature to combine multiple originals into a single fax job. Use the Blank Page Suppression feature to prevent blank pages in a fax from being printed. 176 Chapter 8 Fax ENWW - HP LaserJet Enterprise MFP M725 | HP LaserJet Enterprise MFP M725 - User Guide - Page 191
The default range for the available options for the Rings To Answer setting is country/region-specific. The range of possible Rings To Answer options is limited by country/region. If you experience problems with the fax accessory answering, and the Rings To Answer setting is 1, try increasing it to - HP LaserJet Enterprise MFP M725 | HP LaserJet Enterprise MFP M725 - User Guide - Page 192
Use a fax printing schedule NOTE: Before enabling a fax-printing schedule, a schedule must be created. 1. From the Home screen on the product control panel, scroll to and touch the Administration button. 2. Open the following menus: ● Fax Settings ● Fax Receive Settings ● Fax Printing Schedule 3. - HP LaserJet Enterprise MFP M725 | HP LaserJet Enterprise MFP M725 - User Guide - Page 193
Block incoming faxes Use the fax block list setting to create a list of blocked phone numbers. When a fax is received from a blocked phone number, the fax is not printed and is immediately deleted from memory. Create a blocked-fax list 1. From the Home screen on the product control panel, scroll to - HP LaserJet Enterprise MFP M725 | HP LaserJet Enterprise MFP M725 - User Guide - Page 194
: Menu item Notification Stamp Received Faxes Fit to Page Paper Selection Sides Description The Notification setting controls when the fax disabled, an incoming image larger than the page splits across pages. Use the Paper Selection feature to specify which tray to use for printing faxes. Use the - HP LaserJet Enterprise MFP M725 | HP LaserJet Enterprise MFP M725 - User Guide - Page 195
at the bottom of the page. Enable fax forwarding 1. Open a Web browser, and then enter the product IP address in the address line. 2. When the HP Embedded Web Server opens, click the Fax tab. 3. Click the Fax Archive and Forwarding link. 4. In the Fax Forwarding area, click the Enable Fax Forwarding - HP LaserJet Enterprise MFP M725 | HP LaserJet Enterprise MFP M725 - User Guide - Page 196
Create a speed dial list 1. From the Home screen on the product control panel, touch the Fax button. 2. Touch the Speed Dials button to display the Speed Dials screen. 3. Touch one of the unassigned One Touch Speed Dials numbers. 182 Chapter 8 Fax ENWW - HP LaserJet Enterprise MFP M725 | HP LaserJet Enterprise MFP M725 - User Guide - Page 197
4. Touch the Speed Dial Name field to display the keyboard. 5. Type a name for the speed dial. ENWW Create a speed dial list 183 - HP LaserJet Enterprise MFP M725 | HP LaserJet Enterprise MFP M725 - User Guide - Page 198
6. Type a fax number for the speed dial. NOTE: To enter additional fax numbers for a speed dial, touch the screen to the right of the last digit of the previously entered fax number. When the cursor appears, touch the enter key to move the cursor to the next line. Repeat this step to enter all the - HP LaserJet Enterprise MFP M725 | HP LaserJet Enterprise MFP M725 - User Guide - Page 199
Add a number to an existing speed dial list 1. From the Home screen on the product control panel, scroll to and touch the Fax button. 2. Touch the Speed Dials button to display the Speed Dials screen. 3. Touch the One Touch Speed Dials number of the list to be edited. 4. Touch the down arrow on the - HP LaserJet Enterprise MFP M725 | HP LaserJet Enterprise MFP M725 - User Guide - Page 200
Delete a speed dial list 1. From the Home screen on the product control panel, scroll to and touch the Fax button. 2. Touch the Speed Dials button to display the Speed Dials screen. 3. Touch the One Touch Speed Dials number of the list to be deleted. 4. Touch the Delete button. 5. Touch the Yes - HP LaserJet Enterprise MFP M725 | HP LaserJet Enterprise MFP M725 - User Guide - Page 201
Delete a single number from a speed dial list 1. From the Home screen on the product control panel, scroll to and touch the Fax button. 2. Touch the Speed Dials button to display the Speed Dials screen. 3. Touch the One Touch Speed Dials number of the list to open the keyboard. 4. Touch the down - HP LaserJet Enterprise MFP M725 | HP LaserJet Enterprise MFP M725 - User Guide - Page 202
numbers manually 1. Place the document face-down on the scanner glass, or place it face-up in the document feeder and adjust the paper guides to fit the size of the document. 2. From the Home screen on the product control panel, touch the Fax button. You might be prompted to type a user name - HP LaserJet Enterprise MFP M725 | HP LaserJet Enterprise MFP M725 - User Guide - Page 203
-right corner of the screen. For more information about this feature, touch the Help button on the preview screen. ENWW Send a fax by entering numbers manually 189 - HP LaserJet Enterprise MFP M725 | HP LaserJet Enterprise MFP M725 - User Guide - Page 204
Send a fax by using a speed dial 1. Place the document face-down on the scanner glass, or place it face-up in the document feeder and adjust the paper guides to fit the size of the document. 2. From the Home screen on the product control panel, touch the Fax button. 190 Chapter 8 Fax ENWW - HP LaserJet Enterprise MFP M725 | HP LaserJet Enterprise MFP M725 - User Guide - Page 205
3. Touch the number button for the speed dial name you want to use. The speed dial name appears in the Fax Recipients section of the Fax screen. 4. Touch the Start button to send the fax. NOTE: You can preview the image at any time by touching the Preview button in the upper-right corner of the - HP LaserJet Enterprise MFP M725 | HP LaserJet Enterprise MFP M725 - User Guide - Page 206
Search a speed-dial list by name NOTE: If you do not know the unique name of the speed dial, type a letter to select any portion of the list. For example, to view speed-dial names that begin with the letter N, type the letter N. If no matching entries exist, a message appears before the search shows - HP LaserJet Enterprise MFP M725 | HP LaserJet Enterprise MFP M725 - User Guide - Page 207
Send a fax by using fax address book numbers The fax address book feature allows you to store fax numbers on the product. Your Microsoft® Exchange contact list might also be enabled on the product to appear in the fax address book. 1. From the Home screen on the product control panel, touch the Fax - HP LaserJet Enterprise MFP M725 | HP LaserJet Enterprise MFP M725 - User Guide - Page 208
4. Touch the names to highlight and then touch the right arrow icon to move the highlighted names to the Fax Recipients section. 5. Touch the OK button to return to the Fax screen. 6. Touch the Start button to send the fax. 194 Chapter 8 Fax ENWW - HP LaserJet Enterprise MFP M725 | HP LaserJet Enterprise MFP M725 - User Guide - Page 209
Search the fax address book Use the fax address book search feature to complete a name search of the address book. 1. From the Home screen on the product control panel, touch the Fax button. 2. Touch the Address Book button. 3. Select the All Contacts or Local Contacts option in the drop-down menu - HP LaserJet Enterprise MFP M725 | HP LaserJet Enterprise MFP M725 - User Guide - Page 210
Cancel a fax To cancel a current fax job, touch the Cancel Job button on the fax status screen. 196 Chapter 8 Fax ENWW - HP LaserJet Enterprise MFP M725 | HP LaserJet Enterprise MFP M725 - User Guide - Page 211
, so a fax transmission is more sensitive to a VoIP environment. The following are suggested changes in settings for the HP LaserJet Analog Fax Accessory 500 when it is connected to a VoIP service: ● Begin with the fax speed set in Fast (V.34) mode and with Error Correction Mode (ECM) turned on - HP LaserJet Enterprise MFP M725 | HP LaserJet Enterprise MFP M725 - User Guide - Page 212
Fax reports The following sections list the fax reports available on this product. These reports can be printed or viewed on the product control panel. The following fax reports are available on this product: ● Fax Activity Log ● Billing Codes Report ● Blocked Fax List ● Speed Dial List ● Fax Call - HP LaserJet Enterprise MFP M725 | HP LaserJet Enterprise MFP M725 - User Guide - Page 213
To clear the fax activity log, complete the following steps. 1. On the control panel, touch the Administration icon. 2. Open the following menus: ● Fax Settings ● Clear fax activity log 3. Touch the Clear button to clear the fax activity log. Billing code report The billing code report is a list of - HP LaserJet Enterprise MFP M725 | HP LaserJet Enterprise MFP M725 - User Guide - Page 214
200 Chapter 8 Fax ENWW - HP LaserJet Enterprise MFP M725 | HP LaserJet Enterprise MFP M725 - User Guide - Page 215
9 Manage the product ● Configure IP network settings ● HP Embedded Web Server ● HP Utility (Mac OS X) ● Use HP Web Jetadmin software ● Economy settings ● Product security features ● Upgrade the product firmware ENWW 201 - HP LaserJet Enterprise MFP M725 | HP LaserJet Enterprise MFP M725 - User Guide - Page 216
HP does not support peer-to-peer networking, as the feature is a function of Microsoft operating systems and not of the HP print drivers. Go to Microsoft at www.microsoft.com. View or change network settings Use the HP xxxx:xxxx:xxxx:xxxx 2. To open the HP Embedded Web Server, type the IP address - HP LaserJet Enterprise MFP M725 | HP LaserJet Enterprise MFP M725 - User Guide - Page 217
touch the OK button. Repeat the process for each field, and then touch the Save button. Manually configure IPv6 TCP/IP parameters from the control panel Use the control-panel Administration menus to manually set an IPv6 address. 1. From the Home screen on the product control panel, scroll to and - HP LaserJet Enterprise MFP M725 | HP LaserJet Enterprise MFP M725 - User Guide - Page 218
To use the HP Embedded Web Server, your browser must meet the following requirements: ● Windows: Microsoft Internet Explorer HP-UX 10 and HP-UX 11: Netscape Navigator 4.7 The HP Embedded Web Server works when the product is connected to an IP-based network. The HP Embedded Web Server does not support - HP LaserJet Enterprise MFP M725 | HP LaserJet Enterprise MFP M725 - User Guide - Page 219
estimated life remaining of HP supplies. The page also shows the type and size of paper set for each HP Instant Support link (in the Other Links area on all HP Embedded Web Server pages) to connect to a set of dynamic Web pages that help you solve problems. These pages also show additional services - HP LaserJet Enterprise MFP M725 | HP LaserJet Enterprise MFP M725 - User Guide - Page 220
and supplies to specific email addresses. Edit Other Links Add or customize a link to another Web site. This link displays in the Other Links area on all HP Embedded Web Server pages. Ordering Information Enter information about ordering replacement toner cartridges. This information displays - HP LaserJet Enterprise MFP M725 | HP LaserJet Enterprise MFP M725 - User Guide - Page 221
Scan/Digital Send tab Table 9-4 HP Embedded Web Server Scan/Digital Send tab Menu Description Address Book Add email addresses into the workflow tools. Digital Sending Software Setup Configure settings related to using optional Digital Sending software. ENWW HP Embedded Web Server 207 - HP LaserJet Enterprise MFP M725 | HP LaserJet Enterprise MFP M725 - User Guide - Page 222
that have been sent from or received by this product. Troubleshooting tab Table 9-6 HP Embedded Web Server Troubleshooting tab Menu Description General Troubleshooting Select from a variety of reports and tests to help solve problems with the product. Retrieve Diagnostic Data Export product - HP LaserJet Enterprise MFP M725 | HP LaserJet Enterprise MFP M725 - User Guide - Page 223
Configure access to product functions for specific individuals or groups. Also set up user accounts and select the method by HP Embedded Web Server Other Links list Menu Description HP Instant Support Connects you to the HP Web site to help you find solutions to product problems. ENWW HP - HP LaserJet Enterprise MFP M725 | HP LaserJet Enterprise MFP M725 - User Guide - Page 224
Web site, where you can receive information on options for purchasing original HP supplies, such as toner cartridges and paper. Product Support Connects to the support site for the product, from which you can search for help regarding various topics. 210 Chapter 9 Manage the product ENWW - HP LaserJet Enterprise MFP M725 | HP LaserJet Enterprise MFP M725 - User Guide - Page 225
left side of the window. 3. Click the Options & Supplies button. 4. Click the Utility tab. 5. Click the Open Printer Utility button. HP Utility features HP Utility consists of pages HP Utility. Menu Information And Support Item Supplies Status Device Information File Upload Upload Fonts HP - HP LaserJet Enterprise MFP M725 | HP LaserJet Enterprise MFP M725 - User Guide - Page 226
, such as the IPv4 and IPv6 settings. Provides access to the HP Embedded Web Server. Opens the HP Embedded Web Server page for configuring settings for scanning to email. NOTE: USB connections are not supported. Opens the HP Embedded Web Server page for configuring settings for scanning to a network - HP LaserJet Enterprise MFP M725 | HP LaserJet Enterprise MFP M725 - User Guide - Page 227
, troubleshoot, and secure your printing and imaging environment - ultimately increasing business productivity by helping you save time, control costs, and protect your investment. HP Web Jetadmin upgrades are periodically made available to provide support for specific product features. Go to www.hp - HP LaserJet Enterprise MFP M725 | HP LaserJet Enterprise MFP M725 - User Guide - Page 228
parts in the toner cartridge. If print quality begins to degrade and is no longer acceptable, consider replacing the toner cartridge. NOTE: This feature is available with the PCL 6 print driver for Windows. If you are not using that driver, you can enable the feature by using the HP Embedded - HP LaserJet Enterprise MFP M725 | HP LaserJet Enterprise MFP M725 - User Guide - Page 229
● Sleep Timer Settings ● Sleep Mode/Auto off After 3. Select the appropriate time period, and then touch the Save button. NOTE: The sleep-mode default time is 30 minutes. NOTE: When the product is in sleep mode, the power-button light flashes. Set the sleep schedule NOTE: You must configure the date - HP LaserJet Enterprise MFP M725 | HP LaserJet Enterprise MFP M725 - User Guide - Page 230
10. Configure the following settings: ● Time ● Event Days 11. Touch the OK button, and then touch the Save button. 216 Chapter 9 Manage the product ENWW - HP LaserJet Enterprise MFP M725 | HP LaserJet Enterprise MFP M725 - User Guide - Page 231
information about HP's secure imaging and printing solutions, visit www.hp.com/go/ secureprinting. The site provides links to white papers and FAQ documents the product and the HP Embedded Web Server so that unauthorized users cannot change the product settings. 1. Open the HP Embedded Web Server by - HP LaserJet Enterprise MFP M725 | HP LaserJet Enterprise MFP M725 - User Guide - Page 232
features and robust functionality. Use the Security menu in the HP Embedded Web Server to configure the disk. For more information about the encrypted hard disk, see the HP High-Performance Secure Hard Disk Setup Guide. 1. Go to www.hp.com/support. 2. Enter Secure Hard Disk into the search field and - HP LaserJet Enterprise MFP M725 | HP LaserJet Enterprise MFP M725 - User Guide - Page 233
Upgrade the product firmware Software and firmware upgrades and installation instructions for this product are available at www.hp.com/support/ljMFPM725series. Click Support & Drivers, click the operating system, and then select the download for the product. ENWW Upgrade the product firmware 219 - HP LaserJet Enterprise MFP M725 | HP LaserJet Enterprise MFP M725 - User Guide - Page 234
220 Chapter 9 Manage the product ENWW - HP LaserJet Enterprise MFP M725 | HP LaserJet Enterprise MFP M725 - User Guide - Page 235
slowly ● Solve easy-access USB printing problems ● Solve USB connection problems ● Solve wired network problems ● Solve fax problems ● Solve product software problems (Windows) ● Solve product software problems (Mac OS X) ● Remove software (Windows) ● Remove the print driver (Mac OS X) ENWW 221 - HP LaserJet Enterprise MFP M725 | HP LaserJet Enterprise MFP M725 - User Guide - Page 236
within specifications, paper. If the page jams in the product, follow the instructions on the control panel to clear the jam. If the page does not print correctly, contact HP Customer Care. If the page prints correctly, the problem is probably with the computer you are using, with the print driver - HP LaserJet Enterprise MFP M725 | HP LaserJet Enterprise MFP M725 - User Guide - Page 237
might need to be upgraded. Software and firmware upgrades and installation instructions for this product are available at www.hp.com/support/ljMFPM725series. Click Support & Drivers, click the operating system, and then select the download for the product. ENWW Solve problems checklist 223 - HP LaserJet Enterprise MFP M725 | HP LaserJet Enterprise MFP M725 - User Guide - Page 238
, and custom-size paper) ● Product processing and download time ● The complexity and size of graphics ● The speed of the computer you are using ● The USB connection ● The product I/O configuration ● The network operating system and configuration (if applicable) ● The print driver that you are using - HP LaserJet Enterprise MFP M725 | HP LaserJet Enterprise MFP M725 - User Guide - Page 239
Restore factory-set defaults 1. From the Home screen on the product control panel, scroll to and touch the Administration button. 2. Open the following menus: ● General Settings ● Restore Factory Settings 3. A verification message advises that completing the reset function might result in loss of - HP LaserJet Enterprise MFP M725 | HP LaserJet Enterprise MFP M725 - User Guide - Page 240
screens, the Help opens to a global menu where you can search for specific topics. You can browse through the menu structure by touching the buttons in button to open a message that describes the problem. The message also contains instructions to help solve the problem. You can print a report of the - HP LaserJet Enterprise MFP M725 | HP LaserJet Enterprise MFP M725 - User Guide - Page 241
rotate it 180 degrees, and flip it over. Do not fan the paper. Return the stack of paper to the tray. 2. Use only paper that meets HP specifications for this product. 3. Use paper that is not wrinkled, folded, or damaged. If necessary, use paper from a different package. 4. Make sure the tray is not - HP LaserJet Enterprise MFP M725 | HP LaserJet Enterprise MFP M725 - User Guide - Page 242
paper jams To reduce the number of paper jams, try these solutions. 1. Use only paper that meets HP specifications for this product. 2. Use paper paper to the tray. 5. Make sure the paper guides in the tray are adjusted correctly for the size of paper. Adjust the guides so they are touching the paper - HP LaserJet Enterprise MFP M725 | HP LaserJet Enterprise MFP M725 - User Guide - Page 243
Clear jams Jam locations Use this illustration to troubleshoot jams in the product. 1 Document feeder 2 Stapler/stacker 3 Output path 4 Duplex path (for two-sided printing) 5 Stapler/stacker output bin 6 Output bin 7 Toner cartridge 8 Input trays 9 Optional input trays ENWW Clear - HP LaserJet Enterprise MFP M725 | HP LaserJet Enterprise MFP M725 - User Guide - Page 244
panel. When you complete a step, the product displays instructions for the next step until you have completed all steps in the procedure. Clear jams in the document feeder 1. Lift the latch to release the document-feeder cover. 2. Open the document-feeder cover. 230 Chapter 10 Solve problems ENWW - HP LaserJet Enterprise MFP M725 | HP LaserJet Enterprise MFP M725 - User Guide - Page 245
3. Lift the jam-access door, and remove any jammed paper. If necessary, rotate the green wheel at the front of the document feeder to remove jammed paper. 4. Close the document-feeder cover. Clear jams in the output-bin area 1. If paper is visible from the output bin, grasp the leading edge and - HP LaserJet Enterprise MFP M725 | HP LaserJet Enterprise MFP M725 - User Guide - Page 246
Clear jams in the stapler/stacker 1. If paper is visible in the stapler/stacker output bin, grasp the leading edge of the paper and slowly pull the paper out of the product. 2. Open the upper-left door. 3. Press the green tab down to open the bar. 232 Chapter 10 Solve problems ENWW - HP LaserJet Enterprise MFP M725 | HP LaserJet Enterprise MFP M725 - User Guide - Page 247
the door snap into place. Clear staple jams To reduce the risk of staple jams, make sure that you staple 30 or fewer pages of paper (80 g/m2 (20 lb) at a time. ENWW Clear jams 233 - HP LaserJet Enterprise MFP M725 | HP LaserJet Enterprise MFP M725 - User Guide - Page 248
1. Open the stapler door. 2. Remove the staple cartridge. 3. Remove any loose staples from the product. 234 Chapter 10 Solve problems ENWW - HP LaserJet Enterprise MFP M725 | HP LaserJet Enterprise MFP M725 - User Guide - Page 249
4. Lift up the lever on the front of the staple cartridge. 5. Remove the sheet of staples from the stapler. 6. Push down the lever on the front of the staple cartridge. ENWW Clear jams 235 - HP LaserJet Enterprise MFP M725 | HP LaserJet Enterprise MFP M725 - User Guide - Page 250
7. Insert the staple cartridge. 8. Close the stapler door. Clear jams in Tray 1 1. Slowly pull the jammed paper out of the product. 236 Chapter 10 Solve problems ENWW - HP LaserJet Enterprise MFP M725 | HP LaserJet Enterprise MFP M725 - User Guide - Page 251
you were not able to clear the jam by using the right-side access door, slide the tray out of the product. 3. Remove any damaged paper from the tray. ENWW Clear jams 237 - HP LaserJet Enterprise MFP M725 | HP LaserJet Enterprise MFP M725 - User Guide - Page 252
the tray above (if applicable) or through the toner-cartridge area. 3 5. Close the tray. NOTE: Before replacing the tray, make sure the paper is flat in the tray at all four corners and below the tabs on the guides. 6. Close the right-side access door. 238 Chapter 10 Solve problems 2 3 ENWW - HP LaserJet Enterprise MFP M725 | HP LaserJet Enterprise MFP M725 - User Guide - Page 253
-sheet trays 1. Open the right-side access door and the 500sheet tray jam-access door. 2. Remove the 500-sheet tray. 2 3 4 2 3 3. If the edge of the paper is visible in the feed area, slowly pull the paper toward the right side and out of the product. NOTE: Do not force the - HP LaserJet Enterprise MFP M725 | HP LaserJet Enterprise MFP M725 - User Guide - Page 254
4. Close the 500-sheet tray. 2 3 5. Close the right-side access door and the 500sheet tray jam-access door. 2 3 4 Clear jams in the 3,500-sheet high-capacity tray 1. Open the right and left sides of the tray. 4 240 Chapter 10 Solve problems ENWW - HP LaserJet Enterprise MFP M725 | HP LaserJet Enterprise MFP M725 - User Guide - Page 255
2. Remove any damaged sheets of paper. 4 3. Above the right-side tray, press the green button to release the jam-access plate. 4 4. If jammed paper is in the feed area, pull it down to remove it. 4 ENWW Clear jams 241 - HP LaserJet Enterprise MFP M725 | HP LaserJet Enterprise MFP M725 - User Guide - Page 256
5. Push up on the jam-access plate to close it. 4 6. Close the right and left sides of the tray. 4 7. Open the jam-access door on the right side of the high-capacity tray cabinet. 242 Chapter 10 Solve problems ENWW - HP LaserJet Enterprise MFP M725 | HP LaserJet Enterprise MFP M725 - User Guide - Page 257
8. Lift up the jam-release plate and remove any jammed paper. 9. Close the jam-access door on the right side of the high-capacity tray cabinet. Clear jams from the toner-cartridge area 1. Press the cartridge-door-release button. ENWW Clear jams 243 - HP LaserJet Enterprise MFP M725 | HP LaserJet Enterprise MFP M725 - User Guide - Page 258
2. Open the cartridge door. 3. Remove the toner cartridge. CAUTION: To prevent damage to the toner cartridge, do not expose it to light for more than a few minutes. 4. Pull the green tab down to open the metal plate inside the product. 244 Chapter 10 Solve problems ENWW - HP LaserJet Enterprise MFP M725 | HP LaserJet Enterprise MFP M725 - User Guide - Page 259
cause temporary problems with print quality. Loose toner should clear from the paper path after a few pages are printed. If toner gets on your clothing, wipe it off with a dry cloth and wash clothing in cold water. (Hot water sets toner into fabric.) 6. Replace the toner cartridge. 7. Close the - HP LaserJet Enterprise MFP M725 | HP LaserJet Enterprise MFP M725 - User Guide - Page 260
Clear jams in the fuser 1. Open the fuser door on the left side of the product. CAUTION: The fuser can be hot while the product is in use. 2. Push down on the green tab to open the fuser jam-access cover. 3. Remove any paper from the fuser. 246 Chapter 10 Solve problems ENWW - HP LaserJet Enterprise MFP M725 | HP LaserJet Enterprise MFP M725 - User Guide - Page 261
4. Close the fuser jam-access cover. 5. Close the fuser door. ENWW Clear jams 247 - HP LaserJet Enterprise MFP M725 | HP LaserJet Enterprise MFP M725 - User Guide - Page 262
Clear jams from the duplexer 1. Remove the duplexer. 2. Remove any paper from the duplexer. 3. Reinstall the duplexer. 248 Chapter 10 Solve problems ENWW - HP LaserJet Enterprise MFP M725 | HP LaserJet Enterprise MFP M725 - User Guide - Page 263
no memory is used to store the most recent pages, performance is optimal. NOTE: Some pages can be lost if the product runs out of paper while printing a duplex job with Jam Recovery set to Off. ● On - The product always reprints jammed pages. Additional memory is allocated to store the last - HP LaserJet Enterprise MFP M725 | HP LaserJet Enterprise MFP M725 - User Guide - Page 264
problems: ● smeared print ● fuzzy print ● dark print ● curled paper ● scattered dots of toner ● loose toner ● small areas of missing toner Check the paper type setting (Windows paper types that best describes your paper. 7. Select the option for the type of paper job. Check the paper type setting (Mac - HP LaserJet Enterprise MFP M725 | HP LaserJet Enterprise MFP M725 - User Guide - Page 265
and if applicable, the status of other replaceable maintenance parts. Print quality problems can occur when using a toner cartridge that is at its estimated end of life. The supplies status page indicates when a supply level is very low. After an HP supply has reached the very low threshold - HP LaserJet Enterprise MFP M725 | HP LaserJet Enterprise MFP M725 - User Guide - Page 266
imaging drum does not appear to be damaged, rock the toner cartridge gently several times and reinstall it. Print a few pages to see if the problem has resolved. Check paper and the printing environment Use paper that meets HP specifications Use different paper if you are having any of the following - HP LaserJet Enterprise MFP M725 | HP LaserJet Enterprise MFP M725 - User Guide - Page 267
parts in the toner cartridge. If print quality begins to degrade and is no longer acceptable, consider replacing the toner cartridge. NOTE: This feature is available with the PCL 6 print driver for Windows. If you are not using that driver, you can enable the feature by using the HP Embedded - HP LaserJet Enterprise MFP M725 | HP LaserJet Enterprise MFP M725 - User Guide - Page 268
PS driver HP UPD PCL 5 HP UPD PCL 6 ● Provided as the default driver on the product CD. This driver is automatically installed unless you select a different one. ● Recommended for all Windows environments ● Provides the overall best speed, print quality, and product-feature support for most users - HP LaserJet Enterprise MFP M725 | HP LaserJet Enterprise MFP M725 - User Guide - Page 269
Settings ● Print Quality ● Image Registration 3. Select the tray that you want to adjust. 4. Touch the Print Test Page button, and then follow the instructions on the printed pages. 5. Touch the Print Test Page button to verify the results, and then make further adjustments if necessary. 6. When you - HP LaserJet Enterprise MFP M725 | HP LaserJet Enterprise MFP M725 - User Guide - Page 270
backing. 1. Press the power button to turn off the product, and then disconnect the power cable from the electrical outlet. 2. Open the scanner lid. Align paper that has copy defects with the scanner glass to identify the locations of dirt or smudges. 256 Chapter 10 Solve - HP LaserJet Enterprise MFP M725 | HP LaserJet Enterprise MFP M725 - User Guide - Page 271
abrasives, acetone, benzene, ammonia, ethyl alcohol, or carbon tetrachloride on any part of the product; these can damage the product. Do not place liquids They might seep and damage the product. NOTE: If you are having trouble with streaks on copies when you are using the document feeder, be - HP LaserJet Enterprise MFP M725 | HP LaserJet Enterprise MFP M725 - User Guide - Page 272
using the document feeder, make sure to adjust the guides in the input tray so they are against the paper settings Check the paper settings if copied pages have smears, fuzzy or dark print, curled paper, scattered dots of toner, loose toner, or areas where toner has dropped out. Check the paper - HP LaserJet Enterprise MFP M725 | HP LaserJet Enterprise MFP M725 - User Guide - Page 273
the Optimize Text/Picture button. 3. Select one of the predefined options, or touch the Manually adjust button and then adjust the slider in the Optimize For area. Touch the OK button the original document is printed close to the paper edges. 4. Touch the OK button. ENWW Improve copy quality 259 - HP LaserJet Enterprise MFP M725 | HP LaserJet Enterprise MFP M725 - User Guide - Page 274
Clean the pickup rollers and separation pad in the document feeder 1. Lift the document-feeder latch. 2. Open the document-feeder cover. 260 Chapter 10 Solve problems ENWW - HP LaserJet Enterprise MFP M725 | HP LaserJet Enterprise MFP M725 - User Guide - Page 275
3. Remove any visible lint or dust from each of the feed rollers and the separation pad using compressed air or a clean lint-free cloth moistened with warm water. NOTE: Lift up the roller assembly so you can clean the second roller. 4. Close the document-feeder cover. ENWW Improve copy quality 261 - HP LaserJet Enterprise MFP M725 | HP LaserJet Enterprise MFP M725 - User Guide - Page 276
backing. 1. Press the power button to turn off the product, and then disconnect the power cable from the electrical outlet. 2. Open the scanner lid. Align paper that has copy defects with the scanner glass to identify the locations of dirt or smudges. 262 Chapter 10 Solve - HP LaserJet Enterprise MFP M725 | HP LaserJet Enterprise MFP M725 - User Guide - Page 277
abrasives, acetone, benzene, ammonia, ethyl alcohol, or carbon tetrachloride on any part of the product; these can damage the product. Do not place liquids They might seep and damage the product. NOTE: If you are having trouble with streaks on copies when you are using the document feeder, be - HP LaserJet Enterprise MFP M725 | HP LaserJet Enterprise MFP M725 - User Guide - Page 278
button, and then touch the Optimize Text/Picture button. 3. Select one of the predefined options, or touch the Manually adjust button and then adjust the slider in the Optimize For area. Touch the OK button. 4. Touch the Open the Scan/Digital Send Settings menu. 264 Chapter 10 Solve problems ENWW - HP LaserJet Enterprise MFP M725 | HP LaserJet Enterprise MFP M725 - User Guide - Page 279
3. Select the category of scan and send settings that you want to configure. 4. Open the Default Job Options menu. 5. Touch the Output Quality button. 6. Select one of the predefined options. Touch the Save button. 7. Touch the Start button. Clean the pickup rollers and separation pad in the - HP LaserJet Enterprise MFP M725 | HP LaserJet Enterprise MFP M725 - User Guide - Page 280
with warm water. NOTE: Lift up the roller assembly so you can clean the second roller. 4. Close the document-feeder cover. 266 Chapter 10 Solve problems ENWW - HP LaserJet Enterprise MFP M725 | HP LaserJet Enterprise MFP M725 - User Guide - Page 281
backing. 1. Press the power button to turn off the product, and then disconnect the power cable from the electrical outlet. 2. Open the scanner lid. Align paper that has copy defects with the scanner glass to identify the locations of dirt or smudges. ENWW Improve fax quality 267 - HP LaserJet Enterprise MFP M725 | HP LaserJet Enterprise MFP M725 - User Guide - Page 282
acetone, benzene, ammonia, ethyl alcohol, or carbon tetrachloride on any part of the product; these can damage the product. Do not place liquids might seep and damage the product. NOTE: If you are having trouble with streaks on copies when you are using the document feeder, be 10 Solve problems ENWW - HP LaserJet Enterprise MFP M725 | HP LaserJet Enterprise MFP M725 - User Guide - Page 283
Copy button. 2. Touch the More Options button, and then touch the Optimize Text/Picture button. 3. Select one of the predefined options, or touch the Manually adjust button and then adjust the slider in the Optimize For area. Touch the OK button. 4. Touch the Start button. NOTE: These settings are - HP LaserJet Enterprise MFP M725 | HP LaserJet Enterprise MFP M725 - User Guide - Page 284
. Touch the Save button. Send to a different fax machine Try sending the fax to a different fax machine. If the fax quality is better, the problem is related to the initial recipient's fax machine settings or supplies status. Clean the pickup rollers and separation pad in the document feeder 1. Lift - HP LaserJet Enterprise MFP M725 | HP LaserJet Enterprise MFP M725 - User Guide - Page 285
3. Remove any visible lint or dust from each of the feed rollers and the separation pad using compressed air or a clean lint-free cloth moistened with warm water. NOTE: Lift up the roller assembly so you can clean the second roller. 4. Close the document-feeder cover. Check the fit-to-page setting - HP LaserJet Enterprise MFP M725 | HP LaserJet Enterprise MFP M725 - User Guide - Page 286
from a different fax machine. If the fax quality is better, the problem is with the sender's fax machine. If a different fax machine is unavailable changes: ● Make sure the original document is on white (not colored) paper. ● Increase the fax resolution, quality level, or contrast settings. ● - HP LaserJet Enterprise MFP M725 | HP LaserJet Enterprise MFP M725 - User Guide - Page 287
correctly. 4. Install the HP software from the CD that came with the product or use the UPD print driver. Using generic print drivers can cause delays clearing jobs disabling the firewall to see if it is the source of the problem. 7. If your computer or the product is connected to a wireless - HP LaserJet Enterprise MFP M725 | HP LaserJet Enterprise MFP M725 - User Guide - Page 288
this product. For a list of specifications, go to this Web site: www.hp.com/support/ljMFPM725series. 2. When you configure the product to print on some paper types, such as heavy paper, the product prints more slowly so it can correctly fuse the toner to the paper. If the paper type setting is not - HP LaserJet Enterprise MFP M725 | HP LaserJet Enterprise MFP M725 - User Guide - Page 289
USB printing problems ● The that uses File Allocation Table (FAT) file systems. The product supports FAT32 USB flash drives. 3. If another menu is already USB flash drive 1. Make sure that paper is in the tray. 2. Check the control panel for messages. If paper is jammed in the product, clear the - HP LaserJet Enterprise MFP M725 | HP LaserJet Enterprise MFP M725 - User Guide - Page 290
be trying to print a file type that the USB printing feature does not support. The product supports .pdf, .prn, .pcl, .ps, and .cht file types. 2. You using a character set for the file name that the product does not support. In this case, the product replaces the file names with characters from - HP LaserJet Enterprise MFP M725 | HP LaserJet Enterprise MFP M725 - User Guide - Page 291
Solve USB connection problems If you have connected the product directly to a computer, configure the following setting so the product wakes from Sleep that the cable is working correctly by connecting it to another product. Replace the cable if necessary. ENWW Solve USB connection problems 277 - HP LaserJet Enterprise MFP M725 | HP LaserJet Enterprise MFP M725 - User Guide - Page 292
activity light and the green link-status light are lit. 4. If the problem continues, try a different cable or port on the hub. The computer is on the product configuration page. 2. If you installed the product using the HP standard TCP/IP port, select the box labeled Always print to this printer, - HP LaserJet Enterprise MFP M725 | HP LaserJet Enterprise MFP M725 - User Guide - Page 293
by pinging the product. a. Open a command-line prompt on your computer. For Windows, click Start, click Run, and then type cmd. b. Type ping followed by causing compatibility problems Verify that any new software programs are correctly installed and that they use the correct print driver. The - HP LaserJet Enterprise MFP M725 | HP LaserJet Enterprise MFP M725 - User Guide - Page 294
problems you encounter: ● Are you using the fax cable supplied with the fax accessory? This fax accessory has been tested with the supplied fax cable to meet RJ11 and functional specifications answer setting. NOTE: Roll-over lines can cause problems with receiving faxes. Using roll-over lines with - HP LaserJet Enterprise MFP M725 | HP LaserJet Enterprise MFP M725 - User Guide - Page 295
fax accessory is lower than that of the messaging service, the fax accessory answers all calls. Does your does not print, there might be a problem with the analog fax accessory. If you accessory is installed and operational; however, the HP Digital Sending utility has either disabled the product fax - HP LaserJet Enterprise MFP M725 | HP LaserJet Enterprise MFP M725 - User Guide - Page 296
(analog fax is turned off). General fax problems Problem Cause Solution The fax failed to send. JBIG not been enabled. Use the HP MFP Digital Sending Software Configuration utility to enable the jam, and send the fax again. The volume for sounds coming from the fax accessory is too high or - HP LaserJet Enterprise MFP M725 | HP LaserJet Enterprise MFP M725 - User Guide - Page 297
following are suggested changes in settings for the HP LaserJet Analog Fax Accessory 500 when it is connected to a VoIP service: ● Begin with the fax speed set reliability, contact your VoIP provider for help. Problems with receiving faxes Problem Incoming fax calls are not being answered by the - HP LaserJet Enterprise MFP M725 | HP LaserJet Enterprise MFP M725 - User Guide - Page 298
will print after the tray has paper. The Fax Printing Schedule feature is in use. Faxes print according to the schedule. To print faxes immediately, disable the Fax Printing Schedule feature. The product is either low on toner or has run out of toner. If configured, the product stops printing - HP LaserJet Enterprise MFP M725 | HP LaserJet Enterprise MFP M725 - User Guide - Page 299
with sending faxes Problem Cause Solution Faxes are transmitting very slowly. You might be sending a complex fax, such as one with many graphics. Complex faxes take the phone jack, and connect a phone. Try to make a phone call to ensure the phone line is working. ENWW Solve fax problems 285 - HP LaserJet Enterprise MFP M725 | HP LaserJet Enterprise MFP M725 - User Guide - Page 300
such as being out of paper. Ask the recipient to make fax problem occurs which prevents or interrupts hp.com. Search for HP LaserJet Analog Fax Accessory 500. Fax error messages on the product control panel If the fax process is interrupted or an error occurs during a fax transmission or reception, a two-part - HP LaserJet Enterprise MFP M725 | HP LaserJet Enterprise MFP M725 - User Guide - Page 301
Trace report before contacting customer support to help identify the problem. This report contains details of the last fax call. 1. From the Home screen on the product control panel, scroll to and touch the Administration button. 2. Open the following menus: ● Troubleshooting ● Fax ● Fax T.30 Trace - HP LaserJet Enterprise MFP M725 | HP LaserJet Enterprise MFP M725 - User Guide - Page 302
resending fax; if the error persists, contact service. Lost telephone connection between sender and receiver. resending fax; if the error persists, contact support. Unable to read or write the fax resending fax; if the error persists, contact support. Out of memory on product. If the error - HP LaserJet Enterprise MFP M725 | HP LaserJet Enterprise MFP M725 - User Guide - Page 303
Ask the sender to resend the fax; if the error persists, contact support. Unable to read or write image Ask the sender to resend the fax Service settings These items in the control-panel menus are intended to be used when an HP service representative is assisting you. ENWW Solve fax problems - HP LaserJet Enterprise MFP M725 | HP LaserJet Enterprise MFP M725 - User Guide - Page 304
report contains detailed error codes and other information that might be useful in troubleshooting a particular problem related to sending or receiving a fax. Print this report before contacting HP customer support. This setting controls the modem's method of transmission. The Normal setting allows - HP LaserJet Enterprise MFP M725 | HP LaserJet Enterprise MFP M725 - User Guide - Page 305
functionality. 2. Verify that all of the cables are correctly seated and within specifications. This includes the USB and power cables. Try a new cable. 3. are not the same, delete the driver, and reinstall the driver using the correct IP address. ENWW Solve product software problems (Windows) 291 - HP LaserJet Enterprise MFP M725 | HP LaserJet Enterprise MFP M725 - User Guide - Page 306
7 a. Click the Windows icon in the lower-left corner of the screen. b. Click Devices and Printers. c. Right-click the product driver icon, and then select Printer properties. not the same, delete the driver, and reinstall the driver using the correct IP address. 292 Chapter 10 Solve problems ENWW - HP LaserJet Enterprise MFP M725 | HP LaserJet Enterprise MFP M725 - User Guide - Page 307
the product does not appear in the Print & Fax or the Print & Scan list after the driver is selected Software troubleshooting ▲ Make sure that your Mac operating system is Mac OS X 10.6 or later. Hardware troubleshooting 1. Make sure that the product is turned on. 2. Make sure that the USB cable is - HP LaserJet Enterprise MFP M725 | HP LaserJet Enterprise MFP M725 - User Guide - Page 308
then connect the cable directly to the USB port on the computer. NOTE: The iMac keyboard is a non-powered USB hub. 294 Chapter 10 Solve problems ENWW - HP LaserJet Enterprise MFP M725 | HP LaserJet Enterprise MFP M725 - User Guide - Page 309
, and then Add or Remove Programs. 2. Find and select the product from the list. 3. Click the Change/Remove button to remove the software. Windows Vista 1. Click the Windows icon in the lower-left corner of the screen. Click Control Panel, and then click Programs and Features. 2. Find and select the - HP LaserJet Enterprise MFP M725 | HP LaserJet Enterprise MFP M725 - User Guide - Page 310
Remove the print driver (Mac OS X) You must have administrator rights to remove the software. 1. Open System Preferences. 2. Select Print & Fax. 3. Highlight the product. 4. Click the minus (-) symbol. 5. Delete the print queue, if necessary. 296 Chapter 10 Solve problems ENWW - HP LaserJet Enterprise MFP M725 | HP LaserJet Enterprise MFP M725 - User Guide - Page 311
(Mac OS X) 103 canceling a print request (Windows) 101 cartridges imaging drum 59 jams, clearing 243 memory chip 59 non-HP 51, 60 order numbers 60 pull tab 59 recycling 60 replacing 61 sealing tape 59 storage 60 checklist problems 222 cleaning control panel 12 paper path 251 rollers 260, 265, 270 - HP LaserJet Enterprise MFP M725 | HP LaserJet Enterprise MFP M725 - User Guide - Page 312
paper-feeding problems 228 double-sided copying 128, 129 double-sided printing Mac 97 drivers changing paper sizes 101 changing settings (Mac) 71 changing settings (Windows) 70 paper 291 Explorer, versions supported HP Embedded Web Server 204 F fax canceling 196 feeding problems 282 optimize for text - HP LaserJet Enterprise MFP M725 | HP LaserJet Enterprise MFP M725 - User Guide - Page 313
71, 97 problems, troubleshooting 293 removing software 296 Mac driver settings Job Storage 107 Macintosh HP Utility 211 managing network 202 manual duplex Mac 97 Windows 79 manual duplexing orientation 35 margins, small copying 259 media stapling 64 memory included 2 memory chip toner cartridge 59 - HP LaserJet Enterprise MFP M725 | HP LaserJet Enterprise MFP M725 - User Guide - Page 314
sizes (Windows) 102 paper type selecting (Windows) 85 paper types selecting (Mac) 98 paper, covers printing (Mac) 99 paper, ordering 50 part number accessories 58 part numbers replacement parts 55 supplies 55 toner cartridges 55 trays 58 PBX systems troubleshooting 285 PCL drivers universal 68 - HP LaserJet Enterprise MFP M725 | HP LaserJet Enterprise MFP M725 - User Guide - Page 315
(Windows) 77 problem-solving no response 273 slow response 274 product memory sending to 152 product memory, scan to 152 PS font list description 15 pull tab on toner cartridges 59 R recipient lists 161 recycling supplies 60 reduce copy jobs 131 removing Mac software 296 replacement parts part - HP LaserJet Enterprise MFP M725 | HP LaserJet Enterprise MFP M725 - User Guide - Page 316
108 storing toner cartridges 60 storing jobs with Windows 105 subnet mask 202 supplies counterfeit 52 non-HP 51, 60 ordering 50 part numbers 55 recycling 60 replacing toner cartridges 61 status, viewing with HP Utility 211 supplies status 251 supplies status page description 14 supported paper 28 - HP LaserJet Enterprise MFP M725 | HP LaserJet Enterprise MFP M725 - User Guide - Page 317
- HP LaserJet Enterprise MFP M725 | HP LaserJet Enterprise MFP M725 - User Guide - Page 318
© 2012 Hewlett-Packard Development Company, L.P. www.hp.com *CF066-90901* *CF066-90901* CF066-90901
-
 1
1 -
 2
2 -
 3
3 -
 4
4 -
 5
5 -
 6
6 -
 7
7 -
8
-
9
-
10
-
11
-
12
-
13
-
14
-
15
-
16
-
17
-
18
-
19
-
20
-
21
-
22
-
23
-
24
-
25
-
26
-
27
-
28
-
29
-
30
-
31
-
32
-
33
-
34
-
35
-
36
-
37
-
38
-
39
-
40
-
41
-
42
-
43
-
44
-
45
-
46
-
47
-
48
-
49
-
50
-
51
-
52
-
53
-
54
-
55
-
56
-
57
-
58
-
59
-
60
-
61
-
62
-
63
-
64
-
65
-
66
-
67
-
68
-
69
-
70
-
71
-
72
-
73
-
74
-
75
-
76
-
77
-
78
-
79
-
80
-
81
-
82
-
83
-
84
-
85
-
86
-
87
-
88
-
89
-
90
-
91
-
92
-
93
-
94
-
95
-
96
-
97
-
98
-
99
-
100
-
101
-
102
-
103
-
104
-
105
-
106
-
107
-
108
-
109
-
110
-
111
-
112
-
113
-
114
-
115
-
116
-
117
-
118
-
119
-
120
-
121
-
122
-
123
-
124
-
125
-
126
-
127
-
128
-
129
-
130
-
131
-
132
-
133
-
134
-
135
-
136
-
137
-
138
-
139
-
140
-
141
-
142
-
143
-
144
-
145
-
146
-
147
-
148
-
149
-
150
-
151
-
152
-
153
-
154
-
155
-
156
-
157
-
158
-
159
-
160
-
161
-
162
-
163
-
164
-
165
-
166
-
167
-
168
-
169
-
170
-
171
-
172
-
173
-
174
-
175
-
176
-
177
-
178
-
179
-
180
-
181
-
182
-
183
-
184
-
185
-
186
-
187
-
188
-
189
-
190
-
191
-
192
-
193
-
194
-
195
-
196
-
197
-
198
-
199
-
200
-
201
-
202
-
203
-
204
-
205
-
206
-
207
-
208
-
209
-
210
-
211
-
212
-
213
-
214
-
215
-
216
-
217
-
218
-
219
-
220
-
221
-
222
-
223
-
224
-
225
-
226
-
227
-
228
-
229
-
230
-
231
-
232
-
233
-
234
-
235
-
236
-
237
-
238
-
239
-
240
-
241
-
242
-
243
-
244
-
245
-
246
-
247
-
248
-
249
-
250
-
251
-
252
-
253
-
254
-
255
-
256
-
257
-
258
-
259
-
260
-
261
-
262
-
263
-
264
-
265
-
266
-
267
-
268
-
269
-
270
-
271
-
272
-
273
-
274
-
275
-
276
-
277
-
278
-
279
-
280
-
281
-
282
-
283
-
284
-
285
-
286
-
287
-
288
-
289
-
290
-
291
-
292
-
293
-
294
-
295
-
296
-
297
-
298
-
299
-
300
-
301
-
302
-
303
-
304
-
305
-
306
-
307
-
308
-
309
-
310
-
311
-
312
-
313
-
314
-
315
-
316
-
317
-
318
 |
 |

LASERJET ENTERPRISE MFP M725
User Guide
M725z
M725dn
M725f
M725z+